Some of the links in this post may be affiliate links.
Growing fresh ginger indoors is super easy! Many people are so shocked when I tell them that I grow and harvest my own ginger at home. Keep reading and I will show you step by step how to grow a ton of ginger indoors.

You will be shocked and amazed at how much ginger you can harvest at home, and all in less than a year’s time from planting to harvest!
Not only that, I will also show you how you can preserve your fresh ginger so you can use it for months on end and not have to run out to the grocery store every time you need it!
You will have fresh ginger at your disposal, and it will be even better than what you buy at the grocery store!
Table of Contents
GROWING GINGER AT HOME
Obtain Your Ginger to Plant
I started with grocery store ginger, but I purchased organic ginger. Make sure it’s firm, plump, and looks fresh.
Try and avoid any rhizomes that look shriveled and old as you may not have success with these.
Conventional ginger could be sprayed with nasty chemicals and growth inhibitors in order to keep it from sprouting and thus increase its shelf life.
You can certainly use conventional ginger, but I like to use organic ginger in order to make it more viable to plant since it shouldn’t have any nasty growth inhibitor chemicals.
Place your ginger in a small bowl, submerge it in water, and set it on the kitchen counter for a day.
If you’re not starting with organic ginger, this process will also help to remove any growth inhibitor and increase the chance of growing, but I would obtain a piece of organic ginger rhizome if at all possible to increase your chances!

I’ve seen some people keep their ginger in water until it actually grows shoots, but I really don’t think this is necessary and it can increase the chance of your ginger rotting.
This next step is the most efficient way to get your ginger to “wake up” and start growing so that you can plant it and will greatly speed up the process of your ginger sprouting.
The secret is to use a heating mat. This will greatly accelerate things and often times you will see growth within a week or two (instead of several weeks without in many cases.)
I took a plastic carryout container with a clear top and filled it with some potting mix with some perlite, and moistened it.
Next I rested the ginger rhizomes right on top, put the clear lid on, and then placed it on top of the heating mat.
Here is what it looked like:
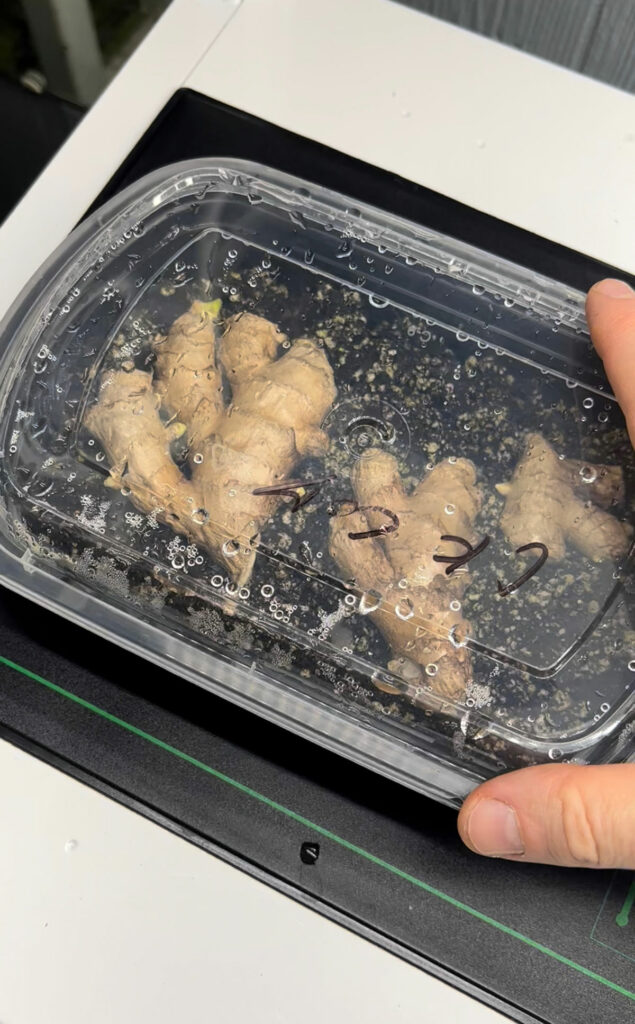

Less than a week later, the buds had already started to grow! After two weeks, this is what the rhizomes looked like.
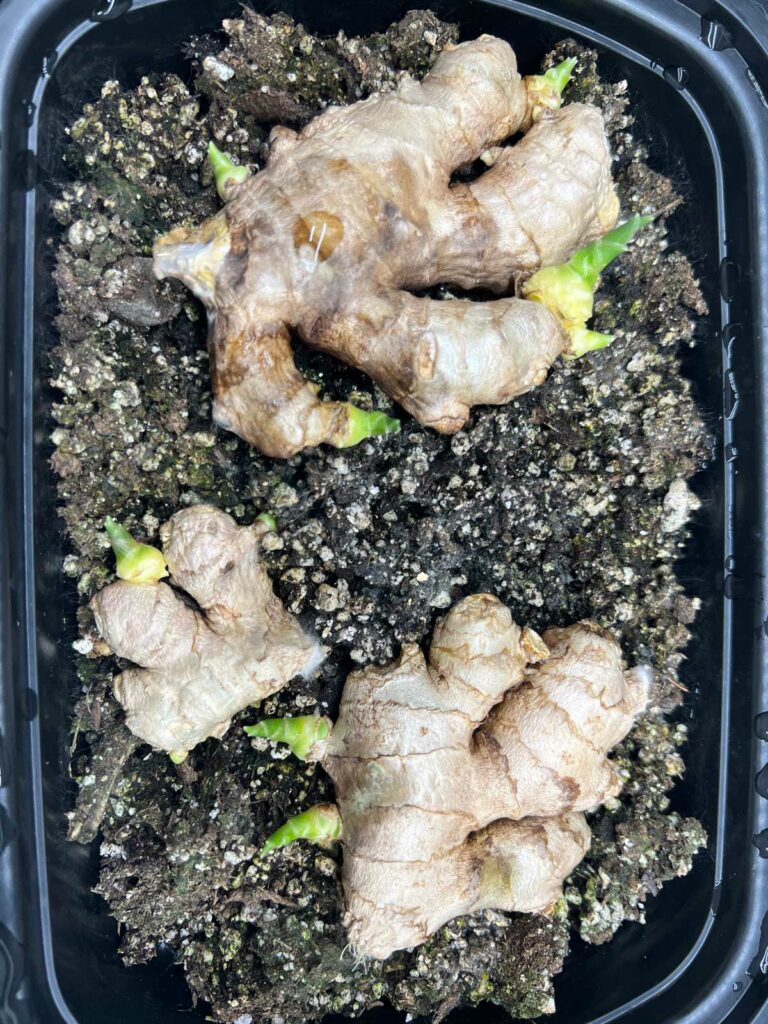
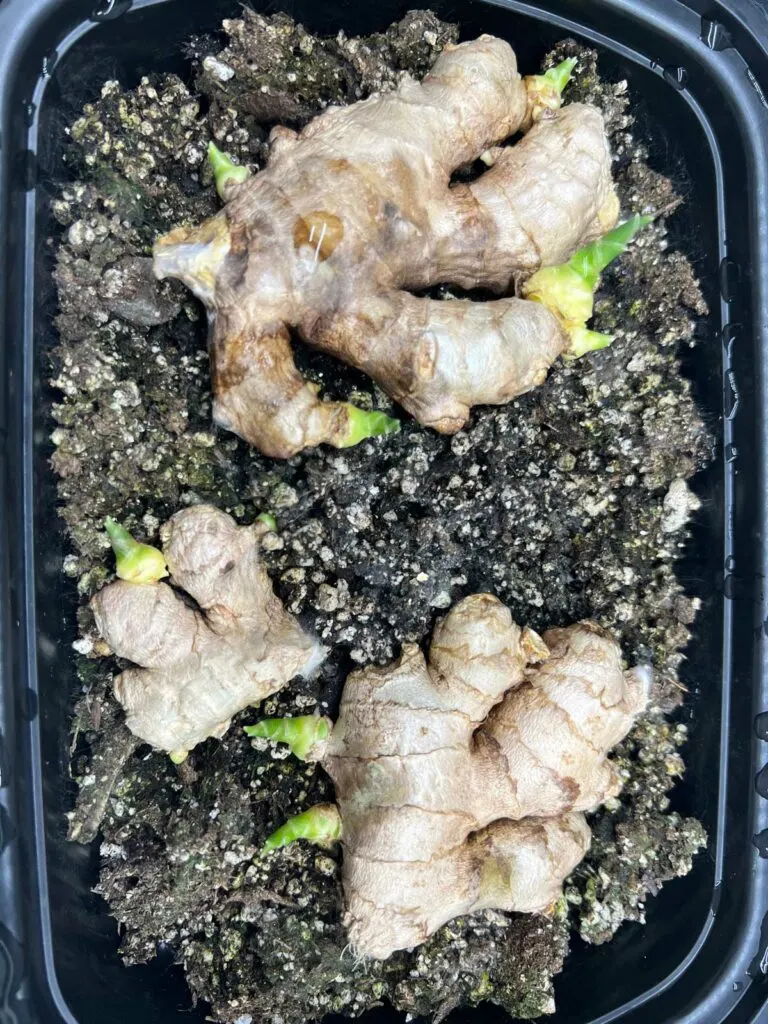
Every few days, open the clear lid and let things air out for a few hours, and then replace the lid.
Once the sprouts are visible and about as big as the photo above, you can move onto the next step.
Planting Your Ginger
If you don’t use a heating mat indoors, ginger is very slow to emerge, and often you won’t notice any new growth for several weeks. The heating mat will be MORE than worth the small cost (they’re very inexpensive).
I like to plant mine in a shallow pot that is wider than it is tall.
The rhizomes will grow horizontally so it needs room to grow. I used a shallow 8 inch pot to start out. You can use a smaller pot if you’d like to start out.
You will be transplanting it anyway. But more on that a little bit later.
Depending on how big your ginger root is, just allow some room for it to grow horizontally. Fill a shallow pot about half full with a good potting soil, and place the ginger on top with the little sprouting buds facing up.
Cover the top of the rhizomes with about 1 inch of soil or so (no more than that), water it, and place it in a warm area with good light. Ginger likes plenty of sunshine, so place it in as sunny of a window as possible.
Keep the soil moist but not wet, and before you know it, the shoots will start to grow!
Remember that ginger plants are tropical and like warm conditions, and plenty of sun and moisture.
Let’s take a look at the progress of my first ginger plant. As you can see below, it started by growing one healthy stalk.
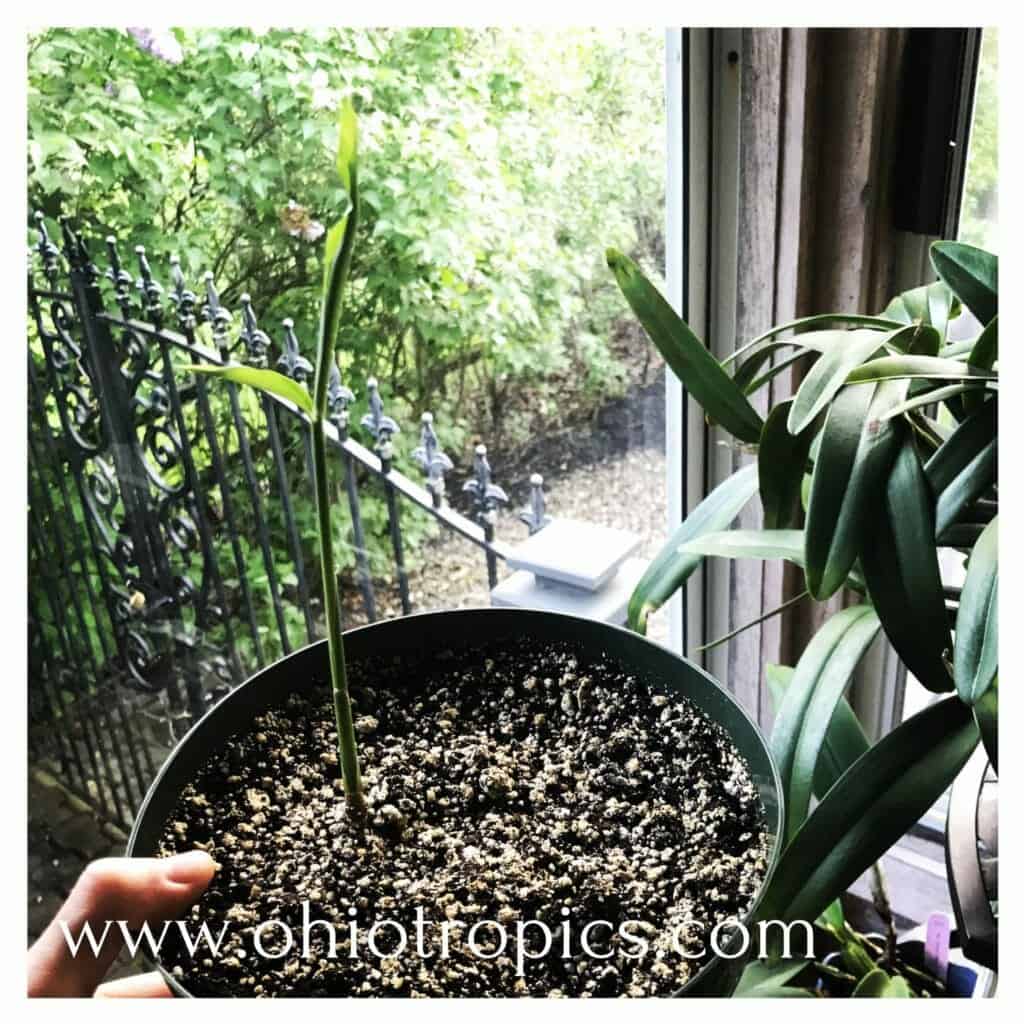
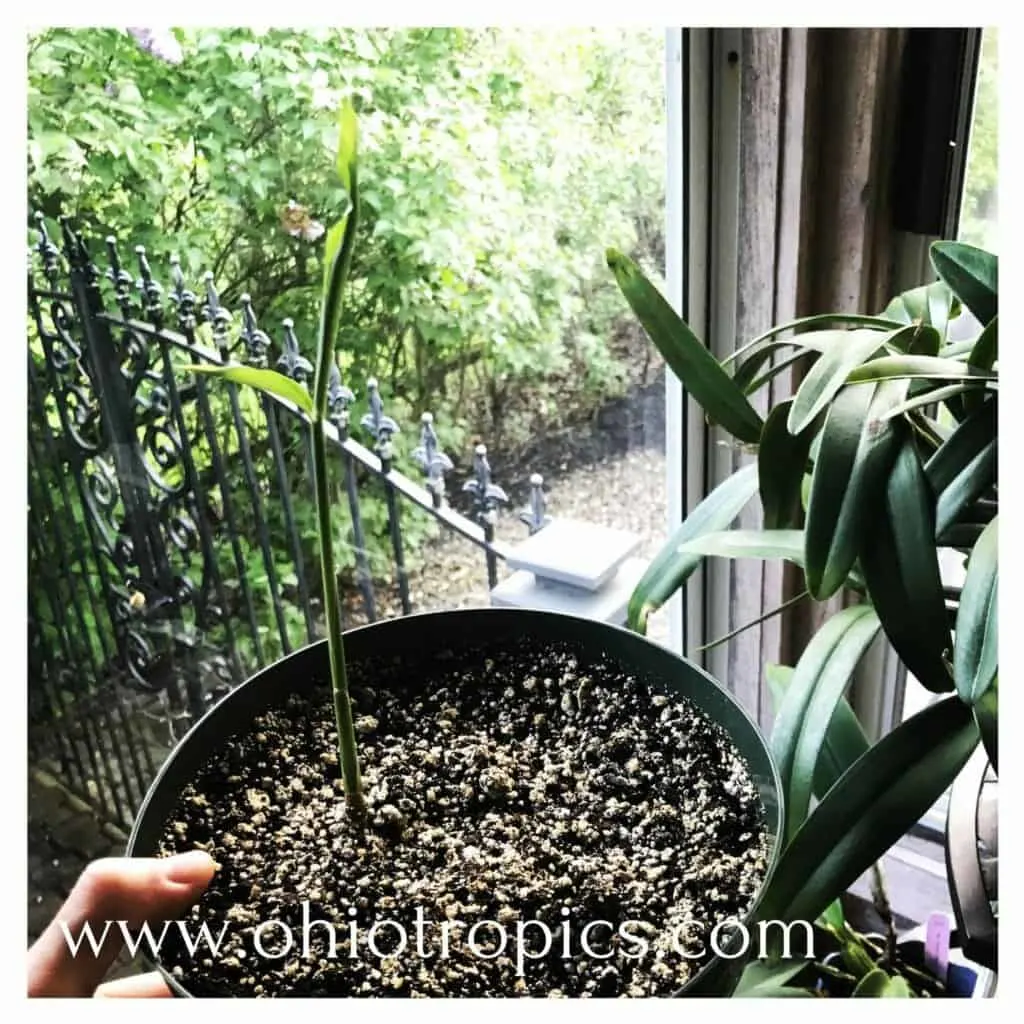
A few weeks later, this is what the stem looked like.

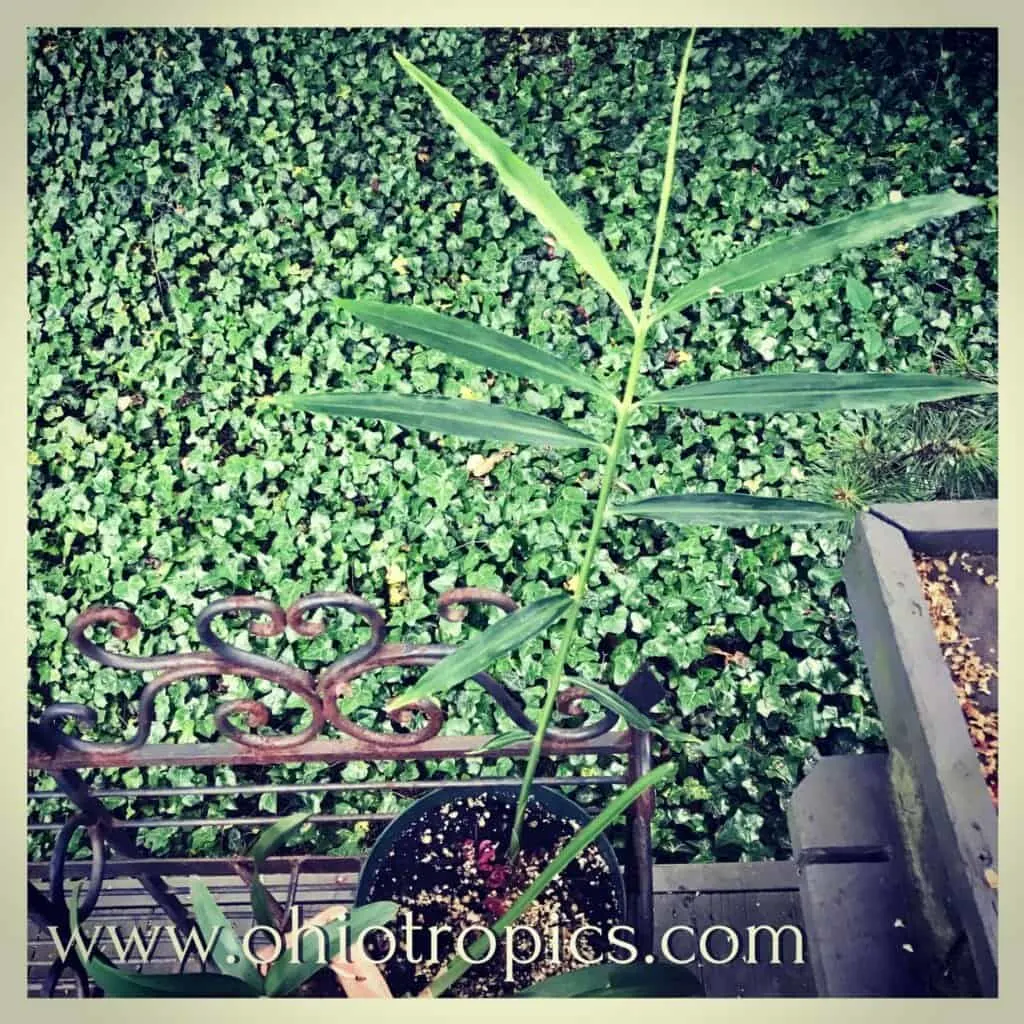
After the plant has been growing a good 2-3 months or so, you can transplant it in to a larger pot.
The very first time I grew ginger, I did not do this and the plant was not able to grow to reach its full potential! I still had a ginger harvest, which I was excited about though.
However the next year, when the weather was warm enough outside, I transplanted it into a nice 12 inch pot and the growth was impressive.
Take a look at how big and full this plant got.

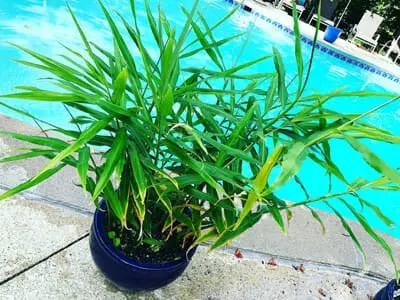
I harvested so much more ginger this way. Don’t worry if the plant looks like it is still too small for that size pot. Just do it and you will be amazed. It will quickly shoot out tons of new growth and grow to be a gorgeous plant.
Remember though to have a pot that is wider than it is deep since ginger rhizomes grow horizontally.
I would recommend at least a 12 inch pot, if not bigger, in order to get a good harvest. You can also plant it into a sunny raised bed.
Through out the summer, I made sure that my ginger was well fertilized. As with anything edible, I always use organic fertilizers.
I use two fertilizers for all my edibles. One is fish emulsion. I like this particular brand because most of the odor is gone. Some fish emulsion fertilizers can be very stinky! Not this one.
And the other is a seaweed fertilizer. I like to spray seaweed extract sometimes on many of my plants as a supplement.
Or to make things simple, Neptune makes a fish and seaweed fertilizer all in one which I’ve used with fantastic results. It makes it easy because you only have to mix one concoction!
The growth really went gangbusters once I placed the ginger plant outside, used a nice sized pot, and fertilized it all summer long.
If you choose to keep growing it only indoors, give your plant the sunniest window possible, and keep your soil fairly moist. Water as soon as the surface of the potting mix feels dry.
Please remember though that these plants like full sun, however if you are transitioning from indoors to outdoors, you need to harden them off by letting them be in the shade outside for several days. For more on this topic, read my blog post on how to harden off plants.
By the end of the season, around October for me, I harvested the whole plant. At this point, you can either harvest the whole plant, or just take little sections at a time and let the rest continue growing!
Then you can have a continual supply of fresh ginger! And there is nothing like fresh ginger!
I’ve never done this, but you can bring your plant back indoors when it starts to get chilly outside in the Fall and let it continue maturing and growing. At some point though, the leaves and canes will all start to yellow.
When this happens, you can then do your final harvest. If you’d like to save some rhizomes for planting the next year, store in a cool, dark area (at least 55-60F would work well) until it’s time to plant again!
I just prefer to do this at the end of the season outside to avoid a mess indoors, and I still get a good harvest. If you start early enough in the year, you will get a nice harvest!
How to Harvest Ginger
The wonderful part of growing ginger is that you can plant and harvest the same year! To maximize your harvest, plan on planting your ginger in January so that you can harvest before the end of the year.
I live in Ohio, so this will give my plants the longest season possible by starting them indoors, and then moving the plants outside when it’s warm enough.
Ginger needs about 10 or 11 months for a full growing season. You can harvest before that though! It will be more tender and without the dark skin that we are used to seeing.
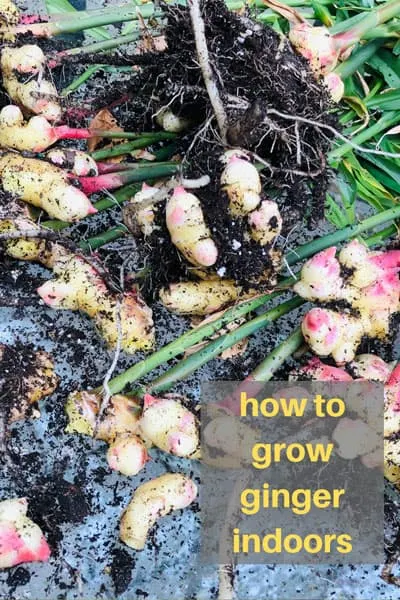
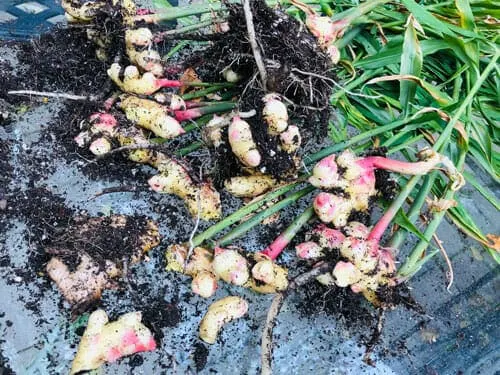
The ginger that you see below was started in late winter and I harvested it in October after it spent the warm months in a pot outdoors. Take a look at all the beautiful ginger rhizomes! And this was all from one piece of ginger rhizome!

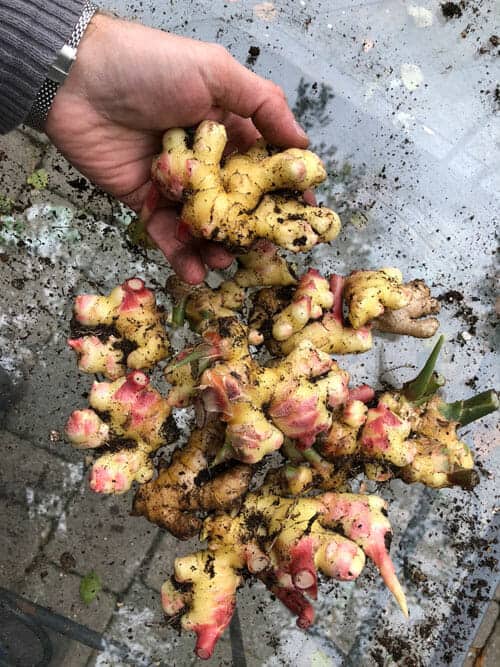
If you harvest before the ginger is mature, the rhizomes will not be brown like the ones you see at the grocery store. The skin is much more tender and a light cream color.
Next, I simply cut off all the stems so I was left with just the rhizomes.

Then I took them inside and gave them a good rinse with water in my kitchen sink.
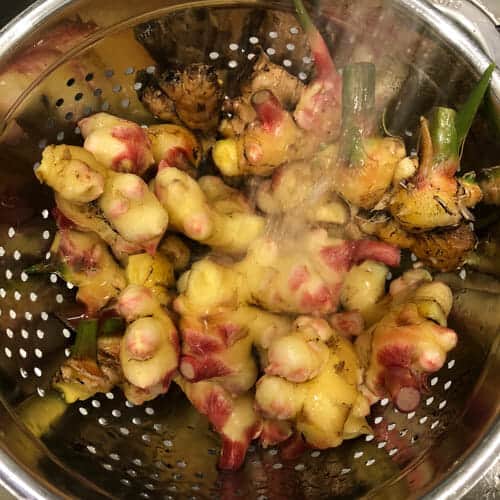

At this point, you can use a vegetable brush to exfoliate the surface of the rhizomes. If you still see soil stuck in some crevices, just break the ginger rhizomes at that junction and continue to rinse until all the soil is washed away.
At any point during the growing season, you can always harvest just a small rhizome and leave the rest of the plant alone as well. I prefer to harvest everything in the pot and then preserve the ginger.
How to Preserve Ginger
Now here is the million dollar trick to preserve your ginger! Since it produced way more ginger that I could possibly use before it shrivels up on me, I received a tip from a friend.
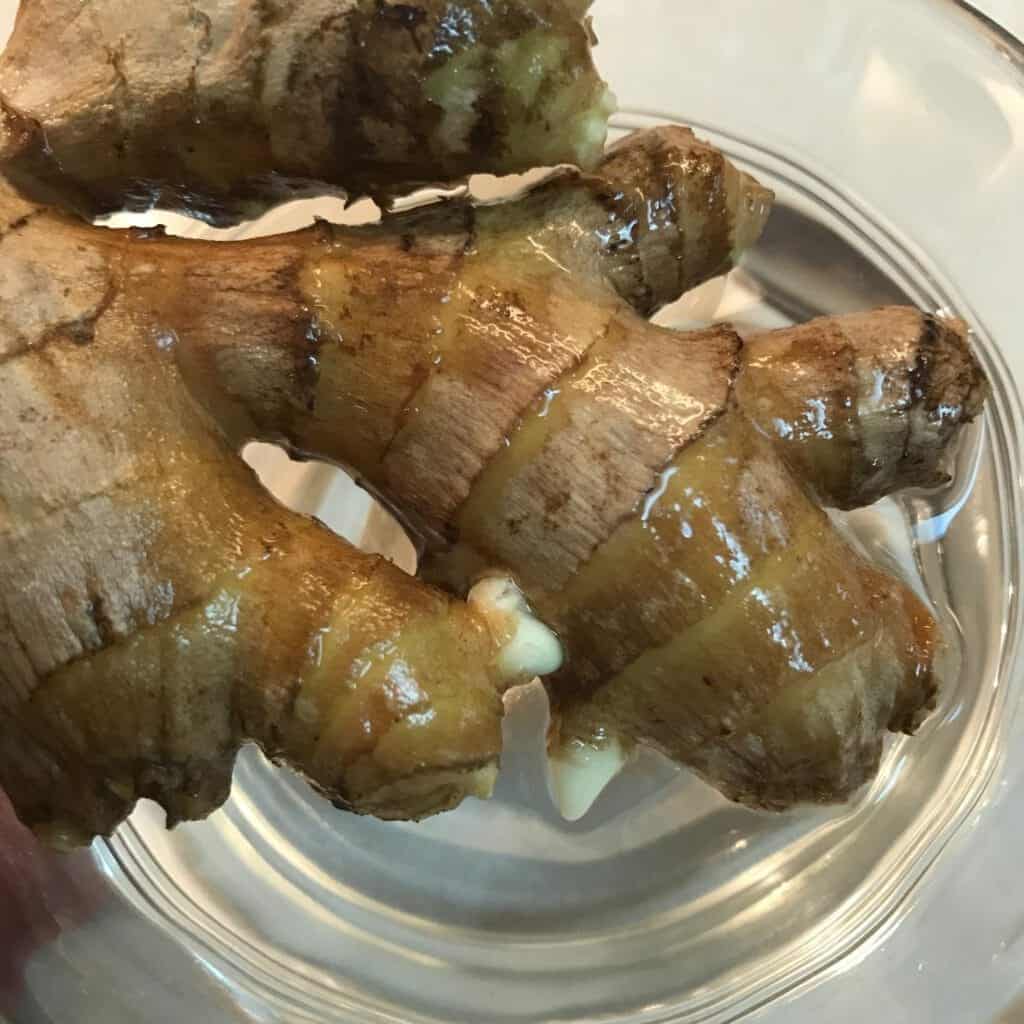
After I thoroughly washed the rhizomes, I placed them in a jar and completely submerged them in vodka.
I then sealed the jar and placed it in the refrigerator. It should keep this way for a very long time and I just use it as needed without worrying about it spoiling on me!
I’ve kept it this way in the refrigerator for a year and a half and it was still good!
All the ginger in the photo below started out with just one organic ginger rhizome from the grocery store! And all in less than a year’s time from planting to harvest.

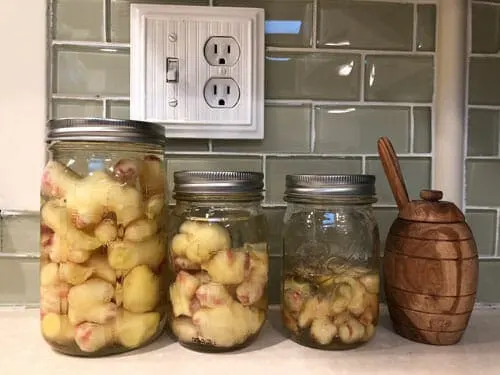
And after you are done using the ginger, you are left with a ginger infused vodka that you can mix up for a cocktail! It’s a really a win-win situation!
Making Ginger Tea
Besides cooking with it, one of my favorite things to do with ginger is make a tea out of it. Especially in the winter!
I take a piece of ginger and slice several very thin pieces and boil them for about 30 minutes. It will be pretty spicy at this point, so it you want it more mild, boil it for about 15 minutes or so.
Then I’ll strain the ginger pieces out, add the juice of 1/4 to 1/2 of a lemon, and then enough honey to taste. It’s absolutely delicious!
So now you know everything you need in order to grow and harvest ginger at home. So give it a try! What are you waiting for?
Maritza
Thursday 21st of December 2023
Hello, I live in San Diego, we have pretty warm weather but at the moment its late December and it has been pretty cold at night and was raining a bit just checked the weather and during the day its been highest 60-65F and the nights its been raining and in the 50s so should I do this indoors until it warms up&what temp is ideal to transplant outdoors? I soaked my ginger root and in the process of putting in a tray like the one in your pic, should I completely close the lid or just place in on top? Also I happen to luckily have the same heating pad & what temp should I put the heating pad on? There is a little thermometer with it should I place that thermometer in the tray? and After it sprouts do I completely stop the heating pad ? Sorry for all the questions it's my first time trying this. Thank you so much!!!
Raffaele
Friday 22nd of December 2023
Hi Maritza! Your plants would be OK outside, but they will start off better with warmer temperatures. I would completely place the clear lid on and place it on a propagation mat. You can set it to maybe 75F or so. Open the lid every day or two to let it air out a bit. After it sprouts, you can even leave it on the heating pad for a bit if you'd like before you pot it up. Make sure it doesn't completely dry up though. Keep it pretty moist. I hope this helps! It's so fun to grow your own :-)
Casey
Saturday 8th of October 2022
This is so helpful! Thank you! I just planted my ginger in the summer and it’s doing well. Will it be okay to leave it outside when the temps dip into the 30’s (it’s supposed to be 38 degrees tonight)? Also, once you’ve preserved it in vodka, do you use those same rhizomes on the heating mat to get started the next growing season?
Raffaele
Sunday 9th of October 2022
Hi Casey! Glad your ginger has been doing well! It won't die in those temperatures, but if you want to keep it growing a little while longer, you can bring the plant to a warmer spot overnight, and then put it back outside. But make sure to harvest before it is consistently cold outside. After you've preserved it in vodka, you can't use that to plant. You'll have to start from scratch. Or maybe save a rhizome or two for that purpose!
Cheryl Howell Trump
Saturday 19th of March 2022
I’m from S Ohio but now live in SC. Seems I should be able to follow this process here since we have many sunny warm days. I think I have to try this! Thank you!
Raffaele
Sunday 20th of March 2022
Give it a shot Cheryl! It's really fun and rewarding. Do follow the part with the heating mat and propagation container. They sprout very quickly that way. Good luck!
Marre
Sunday 6th of September 2020
My ginger looks nothing like that. The leaves on mine are much wider too. What type of ginger is this and can you grow all ginger the same way? Is there a specific alcohol content for the vodka we should use (don't drink much so not sure)?
Raffaele
Monday 7th of September 2020
You may have an ornamental ginger that people just grow for the foliage and the beautiful flowers. It doesn't sound like you have the edible kind. Mine is the kind that you eat. Like I mentioned in the article, I purchased the rhizome from a grocery store. Vodka is all the same alcohol content so it doesn't really matter which type you use.
Jillie
Monday 13th of July 2020
Love the post, you can also freeze ginger, makes it easier to grate for cooking too!
Raffaele
Wednesday 15th of July 2020
Glad you liked the post! Never thought of freezing it! I'll have to try that!