Plant propagation is a fun and rewarding way to learn about your plants, and it also helps to increase your collection while minimizing cost! You can use it to create more plants for yourself, or to share as gifts with friends and family. Not to mention, it is really fun to do! There are so many ways to propagate houseplants, all depending on the type of plant that you have. Snake plant propagation by leaf cuttings is fun and easy to do.
You can propagate various types of plants by division, air layering, leaf cuttings, stem cuttings, etc. Not to mention water propagation versus soil propagation.
In this article, I will focus on propagating Sansevieria with leaf cuttings in soil.
I will also update this post regularly to show the progress of the cuttings. So if you are not subscribed to my blog, make sure to subscribe by email to stay up to date!
When I first posted this topic as an Instagram story (you can find me @ohiotropics on Instagram where I post photos and houseplant tips daily), there were a lot of questions. So I decided to document the process in this post.
Taking a Leaf Cutting
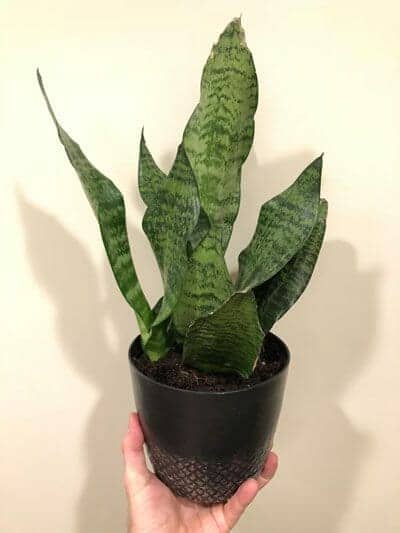
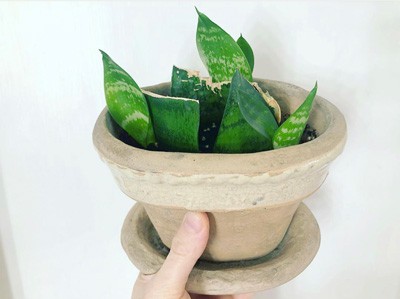
The first thing you'll need to do is a choose a leaf from your Sansevieria to cut off and propagate. I have several Sansevieria plants, but I wanted to propagate one in particular.
I found a beautiful specimen on a clearance rack for $5. It looked like it had suffered some abuse and had some leaves that were damaged. Right off the bat, I decided that I should cut the ugly leaves off and propagate them.
Normally for succulents, I recommend letting the cuttings dry out for a few days to allow the cut to callous over and dry. This prevents rotting.
In the case of Sansevieria, since the leaves really aren't particularly juicy, you are OK to skip this step. You can still allow the callouses to form if you'd like.
Critical Steps for Sansevieria Leaf Cuttings
Be sure you read this section carefully. I've included a diagram as well to visually show it since it can be confusing to explain with just words.
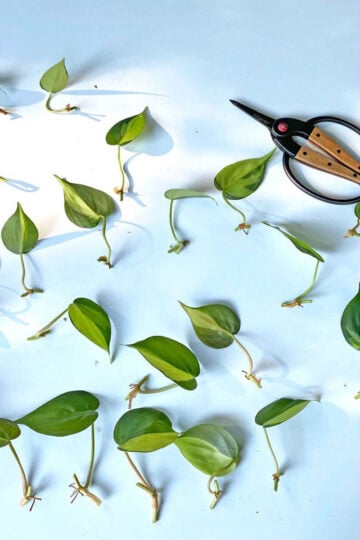
First choose the leaf you want to propagate and cut it off with a pair of sharp scissors. Next, you will cut that leaf into a few segments. You'll want each segment to be at least 2-3 inches long or so.
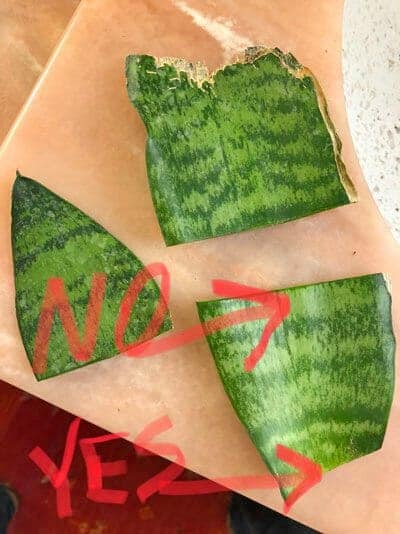
The critical part to follow is that as you cut the leaf segments, you need to keep track of the part of the leaf segment that was closest to the soil. You can NOT turn the leaf segment upside down and then insert that into the soil. It will NOT root.
If you are worried that you will mix them up, cut a little notch on the corner of the leaf segment so that you know which end to insert into the soil.
Look closely at the photo above. The area labeled "yes" is where I made the first cut on the leaf. You can not turn this segment upside down and insert it into the soil for propagation!
The same goes for all the other segments that you cut on the same leaf. The leaf segment needs to remain in the same orientation as it was originally growing on the plant.
So the part of the leaf segment that was originally closest to the pot will be the end that you will insert into the soil for propagation.
Notice that I also cut another leaf segment from the same leaf. Similarly, the bottom of that leaf segment will be the end that I will insert into the soil.
I chose this leaf because it was ugly and damaged when I purchased the plant, so I figured I'd cut it off to improve the appearance of the original plant, and also to propagate!
Propagating Variegated Sansevieria
Please note that if you have a variegated Sansevieria, the leaf cutting propagation method will NOT result in variegated plants. It will revert to the non-variegated version of the plant.
Would you like to save this post?
Enter your email, and I will send this link straight to you!
Some varieties of Sansevieria have yellow or whitish stripes on the leaf margins. In these cases, if you want more variegated plants, you'll need to divide the original plant.
When you use this leaf segment method to propagate, the resulting plants will be plain green. In my case, this is not a variegated plant so my resulting Sansevieria children should be the same as the parent plant.
After You Have Cut Your Leaf Segments
After you have followed the steps above, it is almost time to place them into soil. A have a few product recommendations (see below) that I love using and can be found on Amazon. Follow these steps:
Dip the end of each leaf segment into water, and then into rooting hormone. You don't HAVE to use a rooting hormone, but it will GREATLY speed up the process!
Fill a pot with soil and water thoroughly first in order to pre-moisten the soil before inserting the leaf segments into it. A succulent/cactus soil mix will work best.
I really like Hoffman Organic Cactus & Succulent Soil Mix (links to Amazon). I use it for propagation purposes and anytime I repot any cacti or succulents. In addition to this soil mix, I like to mix in a little perlite or ¼" pumice for additional porosity and drainage.
A good rule of thumb would be to use about 2 to 3 parts of soil mix and 1 part perlite or pumice. Pumice has the added benefit of not floating to the top of the soil when you water.
I like to add perlite or pumice to all my houseplant soil blends, not just for Sansevieria! You will love what it does! I use perlite more for leafy tropicals and pumice for succulents and plants that like to dry out well in between watering.
If you're looking for an amazing potting mix that you can use straight out of the bag for your snake plant, check out the Tropical Succulent Soil Blend from Oh Happy Plants. This is an amazing mix and you will get 10% off at checkout automatically if you use my link.
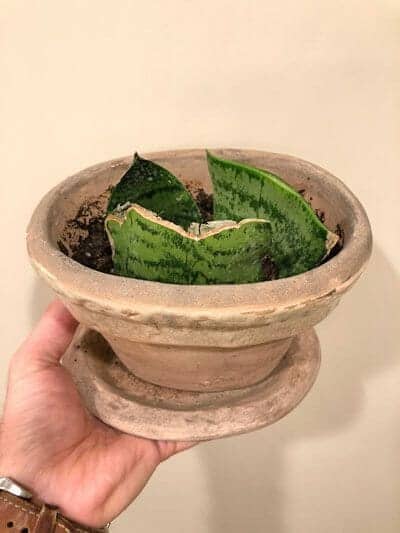
Insert the appropriate end of each leaf segment into the soil, maybe ½ inch to ¾ inches into the soil.
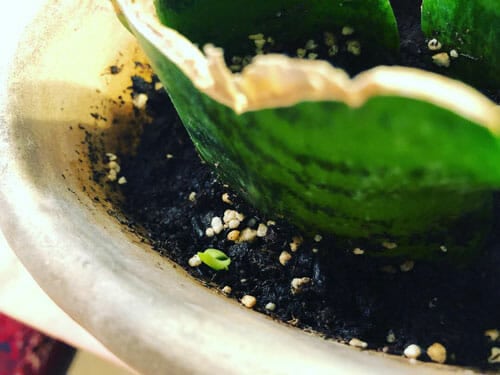
Now it's time to wait for Sansevieria babies to emerge! Place the pot in an area with bright indirect light, and even a little direct sun is fine!
Wait until the soil is nearly dry before watering again thoroughly.
Keep an eye out for new growth in the ensuing weeks and months.
The time that it takes can vary drastically...but for me, it took 7 ½ months for a pup to finally emerge! It is a true test of patience!
And a few months later, all of the leaves have grown new pups.
You can also root Sansevieria in water. This is actually a quicker method and I wrote a blog post on water propagation of snake plants. Although soil propagation takes longer, it is a bit less maintenance.
Once your plants are growing, just follow standard snake plant care. A potting mix of Hoffman Organic Cactus & Succulent Soil Mix with a little perlite or pumice added for additional porosity and drainage will go a long way in growing beautiful Sansenvieria!
Have you every propagated Sansevieria? Comment below!
Do you use root hormone for propagating in water also? And, if so, do you apply it every time you change the water? If only once, does it matter when? Mine are already in water but I have not used growth hormone yet so was wondering if I would still be able to.
Also, you mentioned using items to prop the clipping so it doesn’t rest of the bottom of the glass (giving more space for roots to grow). Can you provide an image of this or explain more how this can be done? I’m using mason jars so the cuttings are resting on the bottom of the jars currently.
Hi Kayt! I don't add any hormone in water. Just in soil. It's typically done mostly with propagating in soil, but don't let that stop you from experimenting if you're curious. As far as your cuttings touch the bottom, you can just leave the cuttings on the bottom of the jar. It will still work, so I wouldn't worry much at all about that. I have actually never propped anything up. You can just use a chip clip or something like that to hold the cutting off the bottom of the propagation vessel if that makes sense. It is definitely not required though. I hope this helps you a bit.
I propagated mine with water. No rooting hormone (I did not have any). I did not divid my leaves as you have shown.
I stuck 4 full mature leaves in a jar of water with the bottom well submerged. Two of them kicked the bucket after 2 months, slowly rotting from the bottom up. I tried to cut away the rot but the poor things finally gave up.
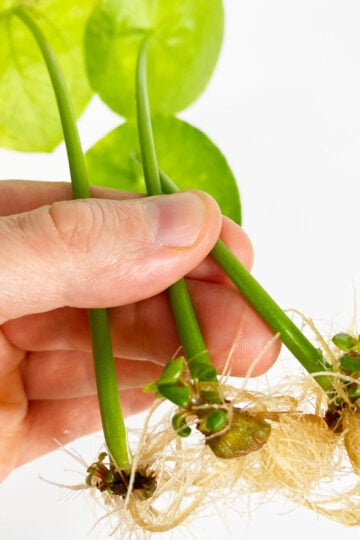
The other two developed tiny roots after 3 months. Now finally 5 months later, both are in soil.
One of them has given out a small bundle of leaves, it's currently peeking out from the soil, maybe only an inch in height. The other one only has roots and it's surviving well. Maybe a couple more months.
It's very time consuming at the same time rewarding!
Hi Caren, I would need more details as this could be caused from a number of things. Are you doing anything differently from what I described in the post?
"Please note that if you have a variegated Sansevieria, the leaf cutting propagation method will NOT result in variegated plants. It will revert to the non-variegated version of the plant."
I've heard 2 things: (1) young snake plant from leaf cutting propagation only has green leaves lost yellow part But after 9-12 months under very bright indirect sunlight, leaves turn Back to fully Variegated Laurentii, this video can prove it: https://www.youtube.com/watch?v=xYfnRg5pbek especially after 2 years he can see all leave turn back to Variegated Laurentii.
(2) If we put the snake plant Deep enough into soil, then it's likely to generate new child stems for new plants, on the other hand if we don't put the plant deep into soil then new leaves only come up on Top of the plant & it's likely Not new stem underneath of the mother plant. Snake plant is very similar to Aloe Vera on this.
Hello,
My Sansevieria ‘Fernwood Mikado’ dropped a nice leaf and I wanted to try starting some cuts foleaves that had busted as the director of this website state. After six months of waiting for a little pup to some time pop out, this will be well work the wait. Thank you.
I have a question. I’m currently in process of water and soil propagating leaf cuttings. One. Pups finally emerge can I cut back the ugly leaf cutting to the top of the solid so we won’t see it? I don’t really like the look of having it after pups emerge.
I have a snake plant that had little baby roots when I first brought it home (about 3 months ago). I took it out of the pot today to transfer because there wasn’t a drainage hole (terrible I know!) and I noticed that the roots are still minuscule! There’s no way they’d be able to support this plant. They’re about as thick as 2 strands of hair, and the longest one is maybe two inches..
Should I go ahead with the repotting/resoiling? Or should I try putting them in water for a couple weeks?
You’re posts continuously help me out, however, I am stumped on this one!
Thanks!
-Elsa
I worked at a garden center and would ask to take 'deadplants' ig yhry were going to throw them away. My manager gave me a single leaf of this plant in hopes to make fun of me, only to find out that now 9 years later, from that single leaf i have had 10 plants and still, after a move and 2 children, i have 4 still! Haha
I do have a big ungly leaf that i was going to cut and toss but I'm going to do this instead! Thank you!!!!


Do you use root hormone for propagating in water also? And, if so, do you apply it every time you change the water? If only once, does it matter when? Mine are already in water but I have not used growth hormone yet so was wondering if I would still be able to.
Also, you mentioned using items to prop the clipping so it doesn’t rest of the bottom of the glass (giving more space for roots to grow). Can you provide an image of this or explain more how this can be done? I’m using mason jars so the cuttings are resting on the bottom of the jars currently.
Hi Kayt! I don't add any hormone in water. Just in soil. It's typically done mostly with propagating in soil, but don't let that stop you from experimenting if you're curious. As far as your cuttings touch the bottom, you can just leave the cuttings on the bottom of the jar. It will still work, so I wouldn't worry much at all about that. I have actually never propped anything up. You can just use a chip clip or something like that to hold the cutting off the bottom of the propagation vessel if that makes sense. It is definitely not required though. I hope this helps you a bit.
When I try snake plants in water they turn mushy and rot . What am I going wrong ? Thank you
Hi Carole! I have some tips to help prevent rotting in this blog post: https://www.ohiotropics.com/2019/09/18/propagate-sansevieria-water/
I propagated mine with water. No rooting hormone (I did not have any). I did not divid my leaves as you have shown.
I stuck 4 full mature leaves in a jar of water with the bottom well submerged. Two of them kicked the bucket after 2 months, slowly rotting from the bottom up. I tried to cut away the rot but the poor things finally gave up.
The other two developed tiny roots after 3 months. Now finally 5 months later, both are in soil.
One of them has given out a small bundle of leaves, it's currently peeking out from the soil, maybe only an inch in height. The other one only has roots and it's surviving well. Maybe a couple more months.
It's very time consuming at the same time rewarding!
It's definitely very rewarding for those with patience 🙂
I'm glad some of them worked! Enjoy watching the progression 🙂
Why is my whale tail turning yellow in the middle section? Thank You so much!
Hi Caren, I would need more details as this could be caused from a number of things. Are you doing anything differently from what I described in the post?
"Please note that if you have a variegated Sansevieria, the leaf cutting propagation method will NOT result in variegated plants. It will revert to the non-variegated version of the plant."
I've heard 2 things: (1) young snake plant from leaf cutting propagation only has green leaves lost yellow part But after 9-12 months under very bright indirect sunlight, leaves turn Back to fully Variegated Laurentii, this video can prove it: https://www.youtube.com/watch?v=xYfnRg5pbek especially after 2 years he can see all leave turn back to Variegated Laurentii.
(2) If we put the snake plant Deep enough into soil, then it's likely to generate new child stems for new plants, on the other hand if we don't put the plant deep into soil then new leaves only come up on Top of the plant & it's likely Not new stem underneath of the mother plant. Snake plant is very similar to Aloe Vera on this.
Thanks for your feedback Nam! I can't understand what he's saying in the video, but I'll take your word for it!
How often should you water the soil while waiting for roots to grow?
I would let the top inch or so dry out, and then water. If you can keep it barely damp, it will help encourage rooting.
Hello,
My Sansevieria ‘Fernwood Mikado’ dropped a nice leaf and I wanted to try starting some cuts foleaves that had busted as the director of this website state. After six months of waiting for a little pup to some time pop out, this will be well work the wait. Thank you.
You're very welcome!
How tall should the new pup get before cutting it off of the leaf that was used to propagate it?
I have a question. I’m currently in process of water and soil propagating leaf cuttings. One. Pups finally emerge can I cut back the ugly leaf cutting to the top of the solid so we won’t see it? I don’t really like the look of having it after pups emerge.
Hi Jennifer! Yes, you can absolutely do that. Some people carefully cut the pup off where it is attached to the leaf. Either one will work though :-).
Hey Raffaele,
I have a snake plant that had little baby roots when I first brought it home (about 3 months ago). I took it out of the pot today to transfer because there wasn’t a drainage hole (terrible I know!) and I noticed that the roots are still minuscule! There’s no way they’d be able to support this plant. They’re about as thick as 2 strands of hair, and the longest one is maybe two inches..
Should I go ahead with the repotting/resoiling? Or should I try putting them in water for a couple weeks?
You’re posts continuously help me out, however, I am stumped on this one!
Thanks!
-Elsa
Your*
I worked at a garden center and would ask to take 'deadplants' ig yhry were going to throw them away. My manager gave me a single leaf of this plant in hopes to make fun of me, only to find out that now 9 years later, from that single leaf i have had 10 plants and still, after a move and 2 children, i have 4 still! Haha
I do have a big ungly leaf that i was going to cut and toss but I'm going to do this instead! Thank you!!!!
You're very welcome! I love that story! Thanks for sharing!!!