Are your Alocasia plants suffering from root rot? In this post, I'll show you all the trouble signs to look for and give you a simple plan to help you turn things around so you can finally have a thriving Alocasia. After implementing the items in this post, your plant will never suffer from root rot again.
Whether you have an Alocasia Polly or others, these tips will apply to all Alocasia varieties.
Root rot isn't as simple as "overwatering" your plants. It's a bit more complicated than that, but fortunately the fix is simple, and I will get into that in the next section when I talk about an ideal potting mix for your Alocasia plants.
Alocasia plants can be prone to root rot, much more so than other indoor plants in my experience.
What does it look like? Here are some signs of root rot that you can look for (and trust me, you will know that something is wrong!)
The whole plant may start to wilt, with curling leaves
There may be a lot of sudden die-back in your plant
Your plant may be wobbly and not secure in its pot
Yellow leaves will eventually occur
Distorted growth
Mushy stems
There may even be a foul odor resulting from the rotting
If you see more than one of these things, it's probably time to check your Alocasia plant's roots. Why exactly does root rot occur? It's mainly due to the lack of air to the roots, and all the problems stemming from this.
I've experienced it quite a bit as a result of a poor potting mix blend that growers have used. Certain potting mixes will work fine in commercial growers' greenhouses, but they are not a suitable mix for plants in the average home.
When there is a lack of air (oxygen) to an Alocasia plant's root system, it will encourage root rot. The lack of oxygen encourages fungal diseases in the soil, which can spread quickly and harm the roots.
The damaged roots can then no longer uptake water and nutrients and your plant will start to suffer.
In many cases, this occurs if your potting mix is not well drained and doesn't contain enough chunky material to allow oxygen to the plant's roots.
If this is the case, these other conditions will aggravate root rot because it creates conditions that further prevent your plant's soil to dry out in a reasonable amount of time:
Low light conditions will cause photosynthesis to slow down, and therefore your plant will be using less water.
Using an oversized pot that is too big for your plant's root system causes the excess volume of soil to not dry out quickly enough.
No drainage holes make it too risky for excess water to accumulate in the pot.
Cooler temperatures will also reduce the rate of photosynthesis and reduce the rate at which your plant uses water.
If all of the conditions above are present (along with an inadequate potting mix) you will have a seemingly perpetually wet soil and this will spell disaster and result in root rot.
HOW TO SAVE A ROTTING ALOCASIA
1. REMOVE YOUR ALOCASIA FROM ITS POT
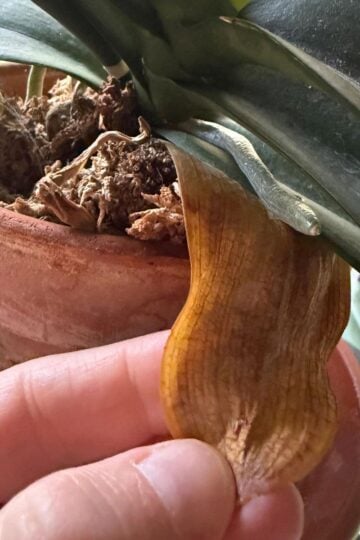
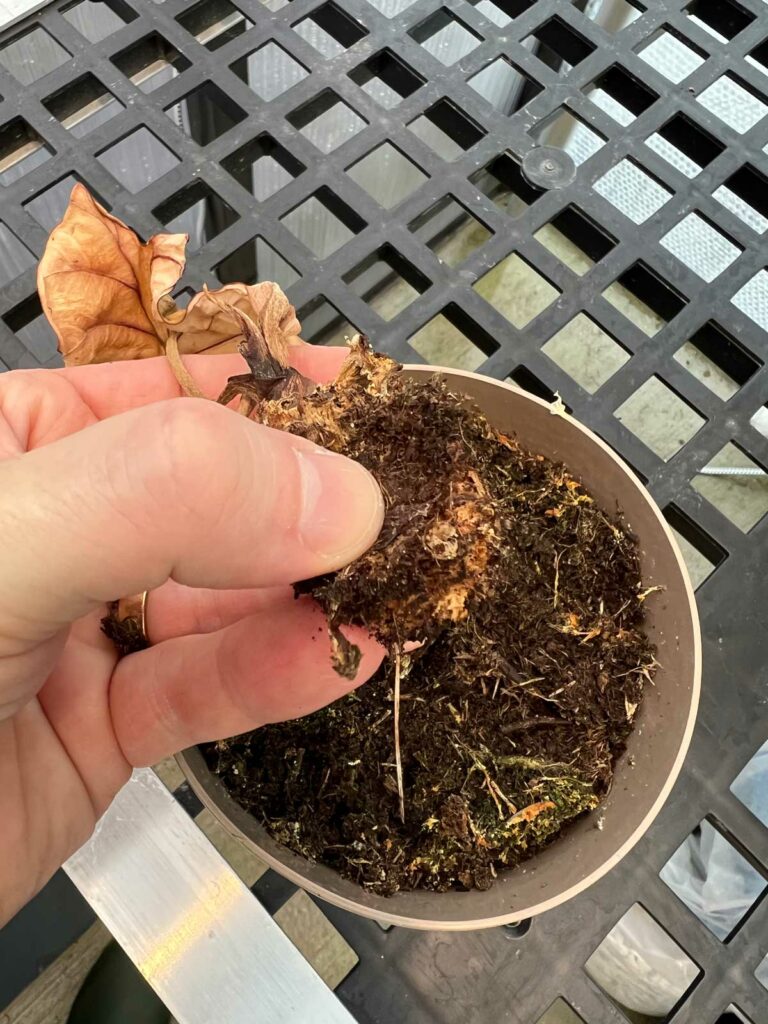
The first step is to remove the plant from its pot and inspect the root system. Alocasia plants grow from corms (similar to bulbs). While some corms may have rotted, there may be others that are still ok.
Would you like to save this post?
Enter your email, and I will send this link straight to you!
Check out the photo below. Here is a completely mushy, rotted corm. Why did it rot? I failed to change the potting mix from the original grower.
It was basically planted in almost pure coco coir which, by itself, is a horrible substrate for Alocasia plants.
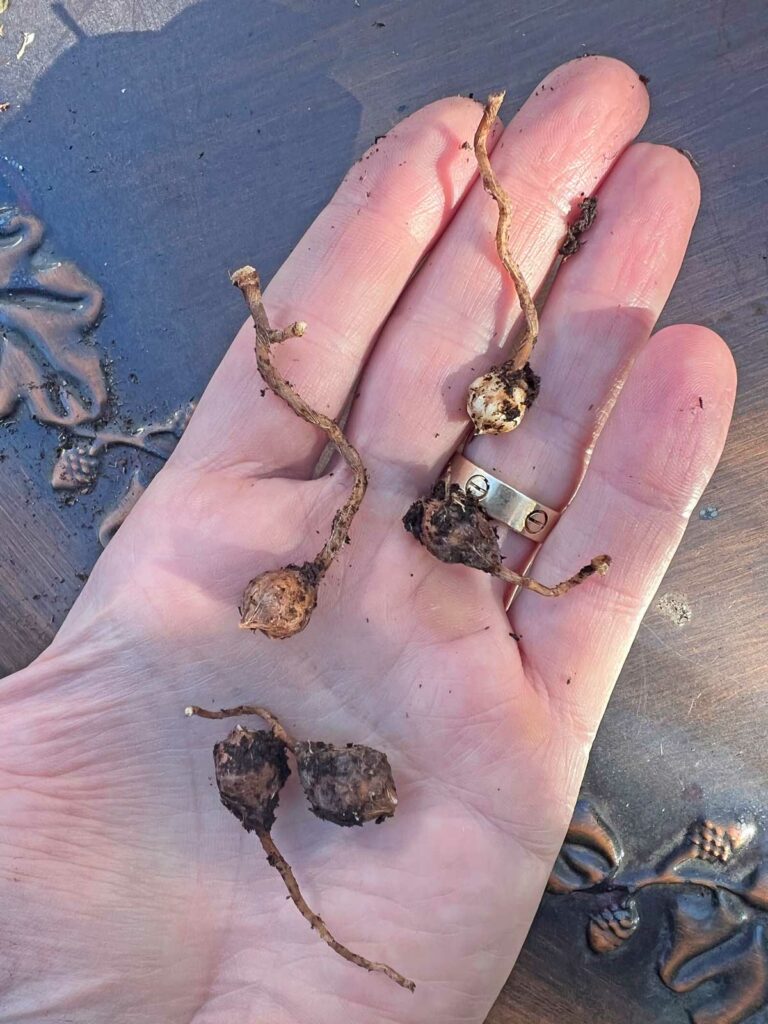
Throw away any mushy corms, and keep inspecting everything to see if you can save any other corms. In my case, I found a number of small corms that were firm and healthy.
All of these corms in the photo above were firm and viable.
Discard all of the old soil and do not reuse it for any other plants as it may contain a fungal infection that can spread to other plants.
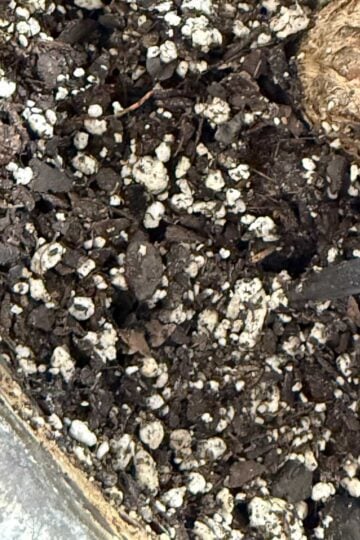
2. CHANGE OUT THE POTTING MIX TO AN ALOCASIA-FRIENDLY SOIL MIX
As I mentioned, my plant had been growing in a coco coir mix with no chunky material mixes in to add oxygen to the root system.
Instead of mixing my own blend (which of course you can do), I planted the healthy corms that I was able to rescue into an amazing mix from Oh Happy Plants.
The blend from Oh Happy Plants is called Pray For Us and you will get 10% off automatically at checkout by using my link.
This is an amazing mix because you can use it straight out of the bag and is chunky enough so that you can keep your potting mix moist while still allowing air to the root system. This is an ideal situation for Alocasia plants, and root rot will be a thing of the past.
I simply took the small corms that I retrieved and planted them about twice as deep as the size of the corms. Always use pots with drainage holes to allow for proper drainage and give your plant a good watering at this time.
It may seem like new growth will take a long time, but be patient. Give your pot a good, thorough watering, and wait until the top inch or so of the soil dries out, and then repeat watering.
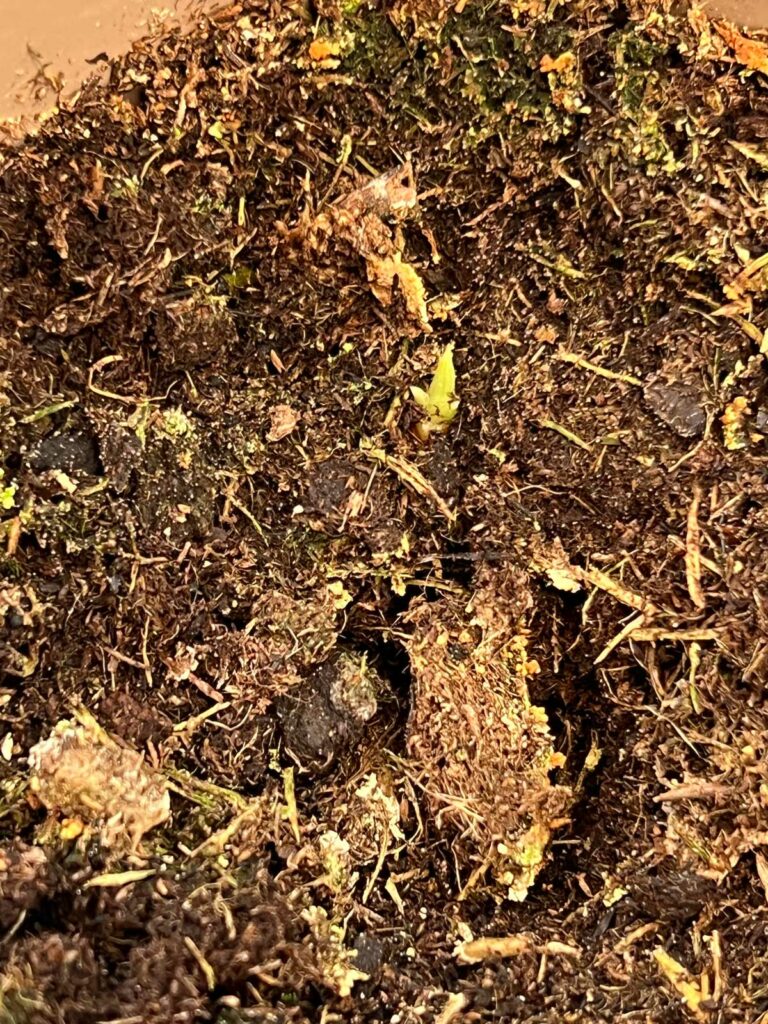
About 2 months after planting, the small corms started to sprout.
3. PROVIDE GOOD GROWING CONDITIONS
Having a wonderful mix like Pray For Us is crucial since it will allow you to have an evenly moist soil, but the growing conditions for your plant are also important. You'll want to remember these growing tips to keep your Alocasia plants in good shape:
Place your Alocasia plant immediately in front of a window, preferably one that gets a couple of hours of direct sunlight if you can. Windows with no sun are also fine, but your plant should be immediately in front. Light intensity decays very quickly the further you get from the window. If you don't have any locations with sufficient natural light, a grow light would be a good idea.
Alocasia plants like to be evenly moist, but not soggy. Using the Pray For Us blend will allow you to water thoroughly, without having to worry about root rot, especially if you're situating your plant in a good growing location. If you allow your Alocasia to go completely dry, it will start to go dormant, so try and not allow this to happen. If you resume watering, it will perk back up.
When your Alocasia is root bound, only go up one pot size. A good rule of thumb is to go up 2 inches in diameter bigger than the previous pot. For example, if your plant was in a 4-inch diameter pot, go up to a 6-inch diameter pot. This minimizes excess volume of soil and thus it will not stay too wet. But again, the Pray For Us blend, it will be very forgiving and set you up for success.
Alocasia is a tropical plant and appreciates high humidity so try your best to provide that. A good humidifier will do wonders, especially during the winter months when many of our homes have bone dry air.
Humidity levels are also important because low humidity can also encourage spider mites, so maintaining a humid environment will discourage them. Be sure to provide good air circulation though as you increase humidity. This will help minimize fungal issues on your Alocasia leaves.
Alocasias do not like the cold so try and avoid temperature stress from cold air. Keep minimum temperatures at or above 60°F (16°C). A good growing range is 70-85°F (21-29°C).
Temperatures that are too cool can cause your plant to start to go dormant.
Avoid any sudden changes in temperature from heating/cooling vents, doors opening and closing in cold weather, etc.
Avoid any standing water for a prolonged period in your plant's saucer.
If you follow all of the topics in this post, your Alocasia will have healthy roots, and healthy roots make for a healthy plant. For more detailed information, check out my post on the best soil for Alocasia plants as well as how to stop root rot.
")
")