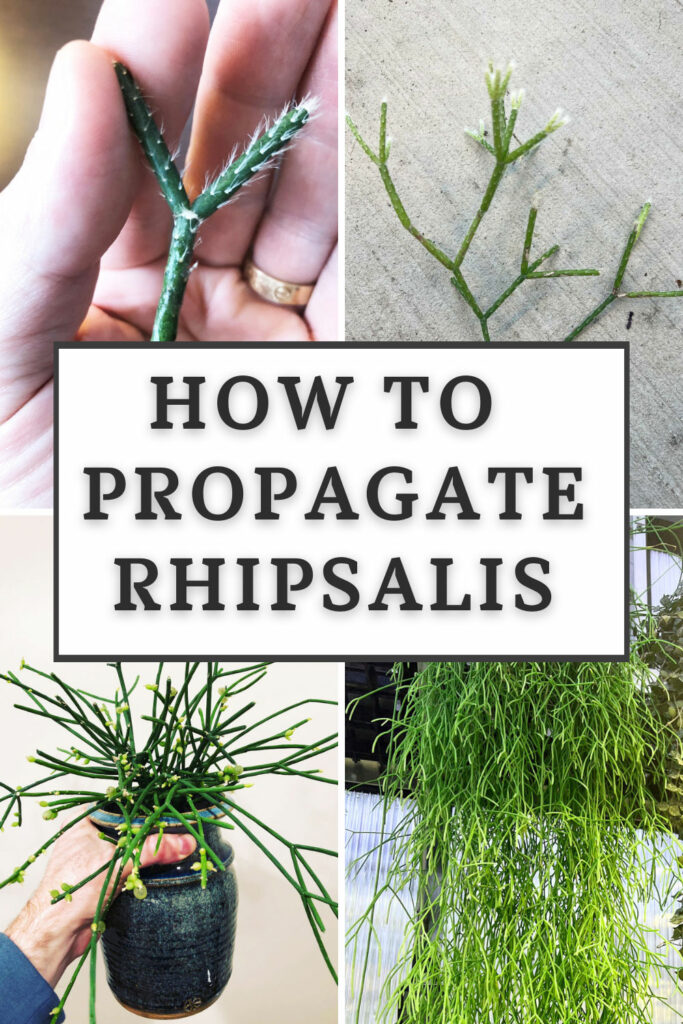
Learn how to propagate Rhipsalis, step by step, in this simple guide. Rhipsalis is one of the largest genera of the epiphytic cactus family and they are super easy to propagate and care for!
Would you like to save this post?
Enter your email, and I will send this link straight to you!
Rhipsalis plants are indeed jungle cacti. Just like their desert cacti cousins, they are true cacti, but their growing environments are drastically different.
Rhipsalis species are native to tropical rainforests of Central America, South America, as well as parts of the Caribbean and a handful of regions of Africa and Asia.
They are epiphytic cacti, so they grow on tree branches (just like many orchids) and they cascade down from the tree tops.
First, I'll get into how to propagate rhipsalis, and then provide some care tips near the end of this post. The best time to propagate is during the growing season, from early Spring and through the summer for many of us, however, I've done it successfully year-round.
It may just be a little slower if you do it in the dead of winter, but it will still work, especially if you give them more light.
Here is my propagation process that I've done several times. It truly is very easy.
1. SNIP SOME CUTTINGS
First, you'll want to take some stem cuttings. You'll want to snip any long stems into smaller segments. This will make it easier on your plant as it's trying to root, and it will also give you a fuller plant much quicker since you'll have more cuttings.
When taking cuttings, it's always a good idea to sterilize your pruners with isopropyl alcohol so that you're not spreading any disease.
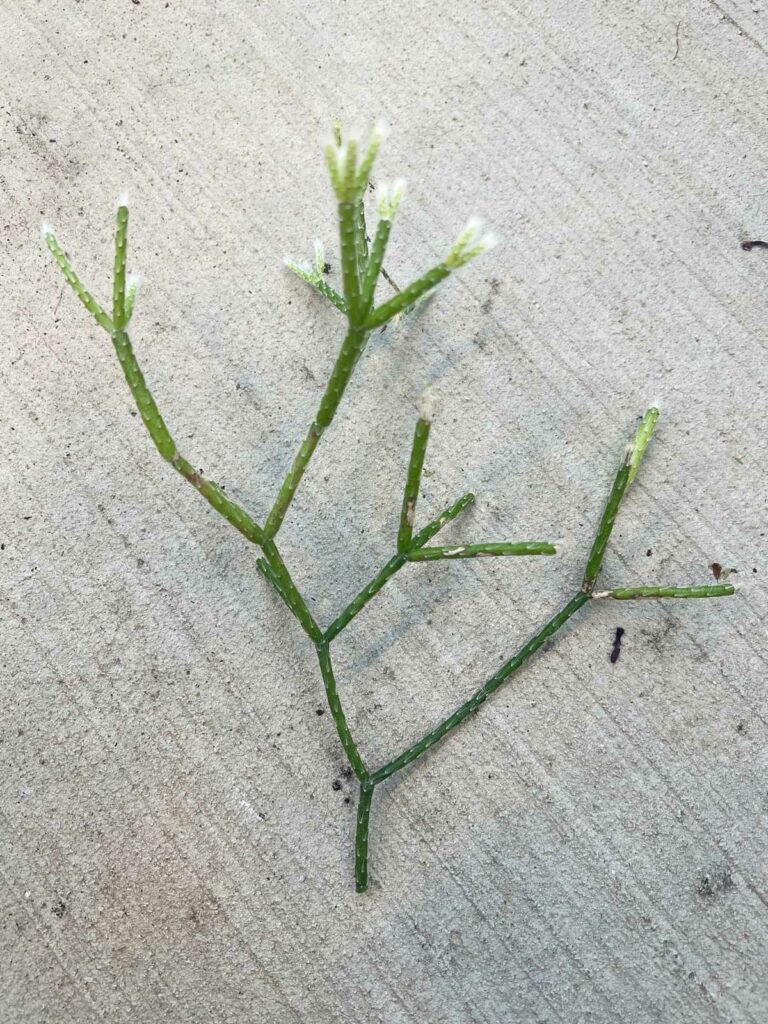
Here is a cutting of Rhipsalis pilocarpa (hairy-stemmed Rhipsalis).
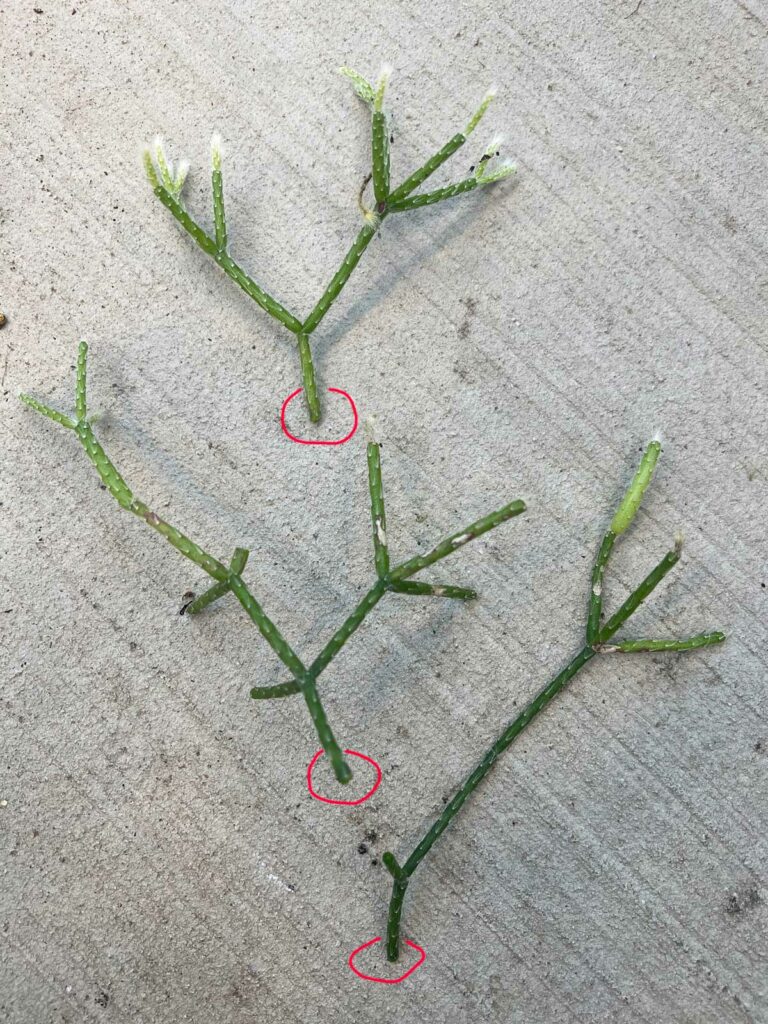
I then took this cutting and snipped it into 3 separate cuttings. I could have snipped them into smaller cuttings as well. It's not a problem to make them smaller. The end that I circled in red is where I snipped, and this will be where roots will start to form.
2. ALLOW CUTTINGS TO AIR DRY
Next, you'll want to take your Rhipsalis cuttings and allow them to air dry for a day or two. This will allow the cut end of the succulent stems to dry and callous over. This is a best practice for any cactus or succulent.
The dry, calloused ends will help prevent the cuttings from rotting while rooting.
3. ROOT YOUR CUTTINGS
At this point, you can either root your cuttings in water, or simply place them directly into potting mix.
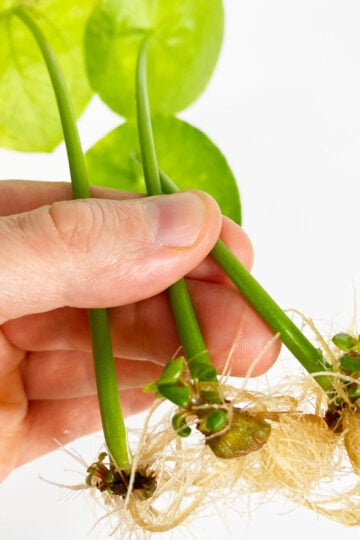
WATER PROPAGATION
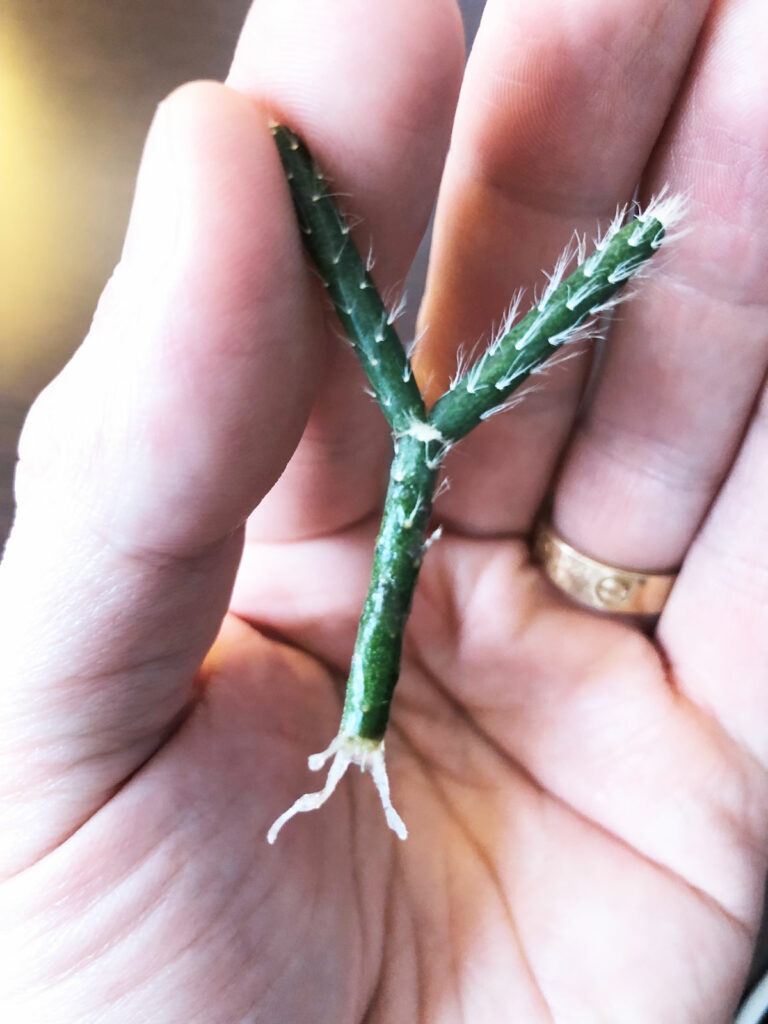
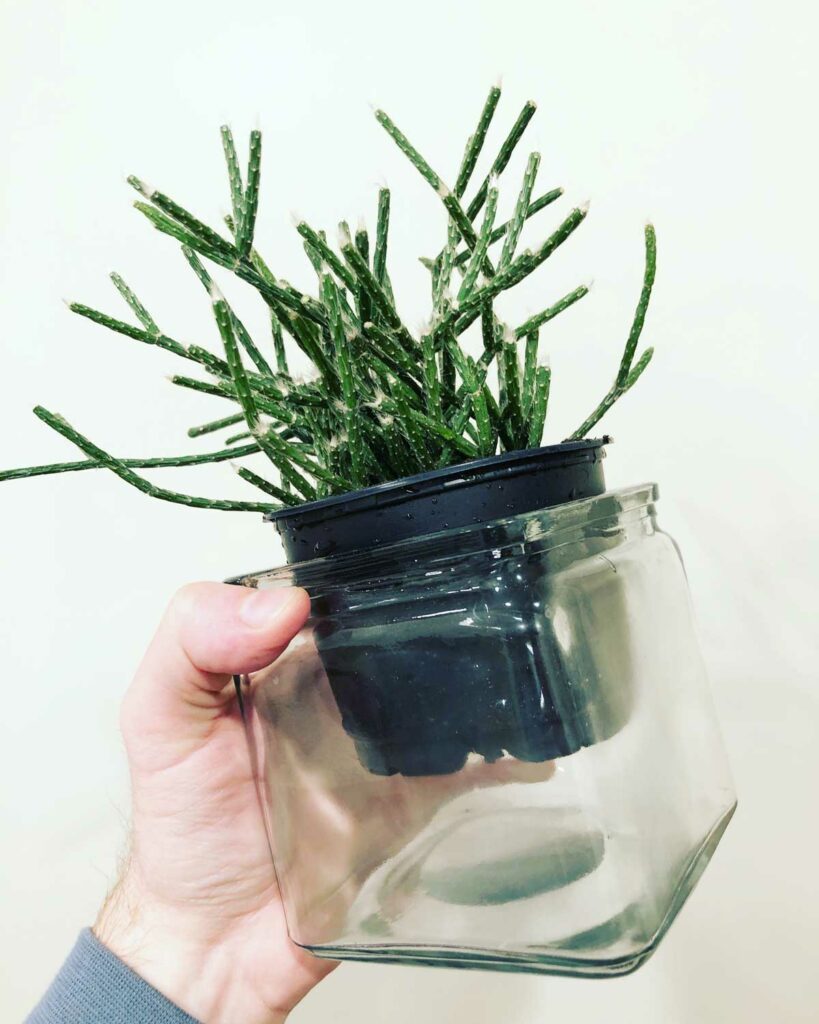
Here is a small cutting of Rhipsalis pilocarpa. I placed it in a small glass of water and you can see the small roots forming. Once your roots are about half an inch long or so, go ahead and pot them up in a small pot.
This small stem broke off of the parent plant so I decided to just place it in water to root. I actually prefer soil propagation, which I'll explain in the next section, for a few reasons.
For propagating Rhipsalis, I prefer soil propagation. There is no right or wrong, but since they have thin stems, I like to make many cuttings and put several small cuttings directly into a pot with soil mix. They are much easier to handle this way, instead of trying to pot up cuttings that have already rooted.
After your cuttings have air-dried for a day or so, all you have to do is simply insert your cuttings right into a small pot of soil.
Remember that the Rhipsalis genus is epiphytic, so these plants grow on tree branches, and therefore they demand good drainage.
I like to mix 2 parts of regular potting soil, or even cactus soil, with 1 part of ¼" pumice (link to Amazon). The pumice will improve the drainage and allow for a more porous growing medium that these plants like.
If you don't have any pumice on hand, you can use other materials like orchid bark or perlite. I prefer pumice vs. perlite because pumice doesn't float to the top of the soil like perlite can.
I would recommend a smaller pot size to begin with. A 4-inch pot is great to start with and you can add several cuttings, maybe 6-8 or so.
Simply insert them right into the potting mixture, and bury the bottom of the stems about ½ inch to ¾ inches or so. Gently pat the soil down, and then give your pot a good watering.
Allow the top of the soil to dry out before watering again. Once the top half-inch or so feels dry, go ahead and water.
Make sure the pot has drainage holes (this is not negotiable). It is not necessary to put a plastic bag over the cuttings in order to increase humidity levels. Your cuttings will root just fine without it.
Here are two varieties of Rhipsalis that I propagated using this soil propagation method.
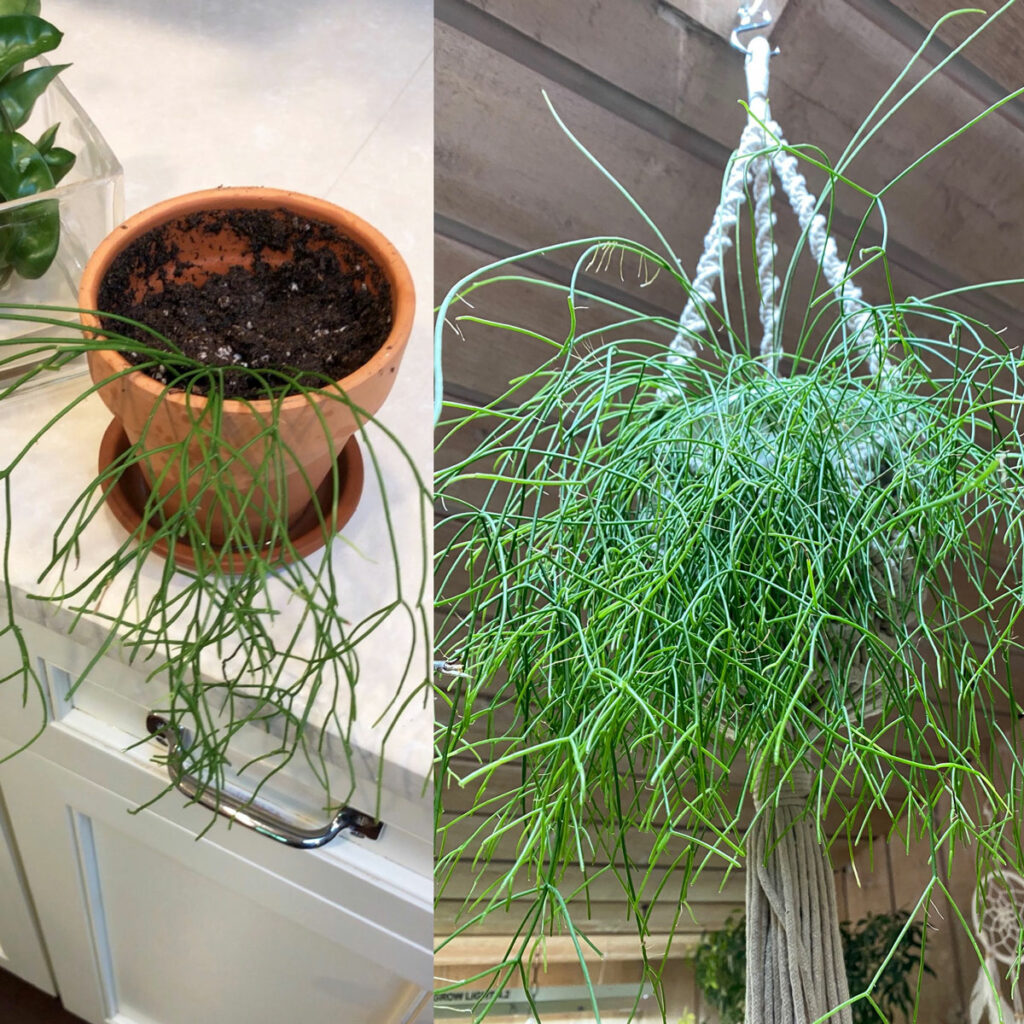
In the photo below is my Rhipsalis campos-portoana, one of my favorite Rhipsalis varieties, and I'd like to show you the dramatic difference from the time I potted up the cuttings to root, to what it looks like now.
In the photo below, the left side shows cuttings of Rhipsalis campos portoana that I had just potted up. On the right side of the photo is the plant a couple years later.
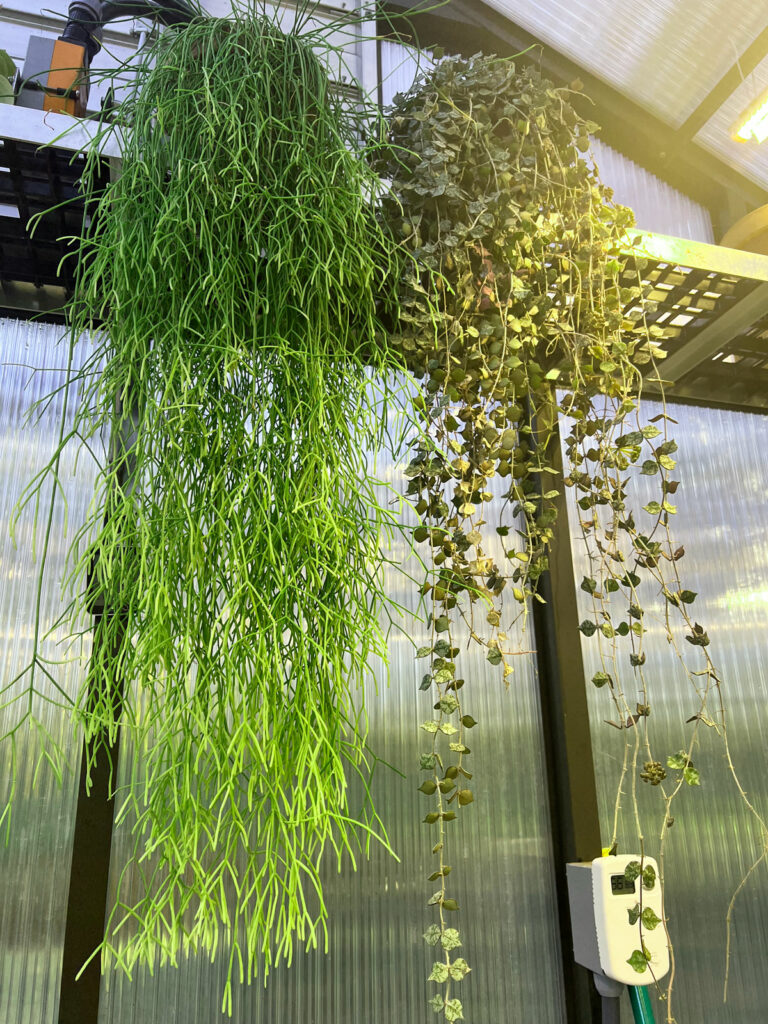
And here is the same plant about 6 years later in my greenhouse. Next to it on the right is my Hoya curtisii growing happily in the same location.
RHIPSALIS CARE
I've already talked about my recommendation for soil mixes, so here are some other important aspects of Rhipsalis care.
LIGHT
Rhipsalis plants naturally grow in filtered/dappled sun on tree branches. Indoors, where light levels are reduced compared to outdoors, your plants will benefit from some direct sunlight.
I now have my plants in my greenhouse, however, when they were in the home, they enjoyed growing in an Eastern-facing window where they received morning sun.
Western-facing windows would be great too. I would avoid windows that receive full sun all day, however, unless you diffuse the light with sheer curtains or blinds. They will still grow well, but may start to turn reddish or purple, or even burn if the light is too intense.
WATERING
With established plants, I typically allow the top inch of the soil to dry out before watering thoroughly again. These are not desert cacti where you need to let them dry out completely. They do love moisture, but not extremes.
Never let your plants sit in water for extended periods of time or they can rot. It is beneficial for the top inch or so of the soil to dry out before watering again.
FERTILIZING
I have been using Dyna-Gro Grow for years on my plants and they have responded beautifully. Dyna-Gro is a complete fertilizer that contains all the macro and micronutrients that plants need to thrive.
You will notice a wonderful difference over time with consistent use.
TEMPERATURE
These plants like it warm and will not typically tolerate cooler temperatures. If you are comfortable, they will be comfortable too. I'd recommend no less than 60°F (16°C) for a minimum temperature.
I hope you have enjoyed this post on how to propagate Rhipsalis. Have you tried yet? Comment below. I'd love to hear!
My Rhipsalis in hanging basket just will not grow GREEN. it looks a sad yellow.
I've others they are green, an get less light.
Ive tried week seaweed fertilizer but nope no change.
How far from a window (exactly, in feet) is that plant from a window, and what exposure is it? Do you fertilize? Tell me about your watering? Approximately how often do you water, and how do you water?


My Rhipsalis in hanging basket just will not grow GREEN. it looks a sad yellow.
I've others they are green, an get less light.
Ive tried week seaweed fertilizer but nope no change.
Any tips
How far from a window (exactly, in feet) is that plant from a window, and what exposure is it? Do you fertilize? Tell me about your watering? Approximately how often do you water, and how do you water?