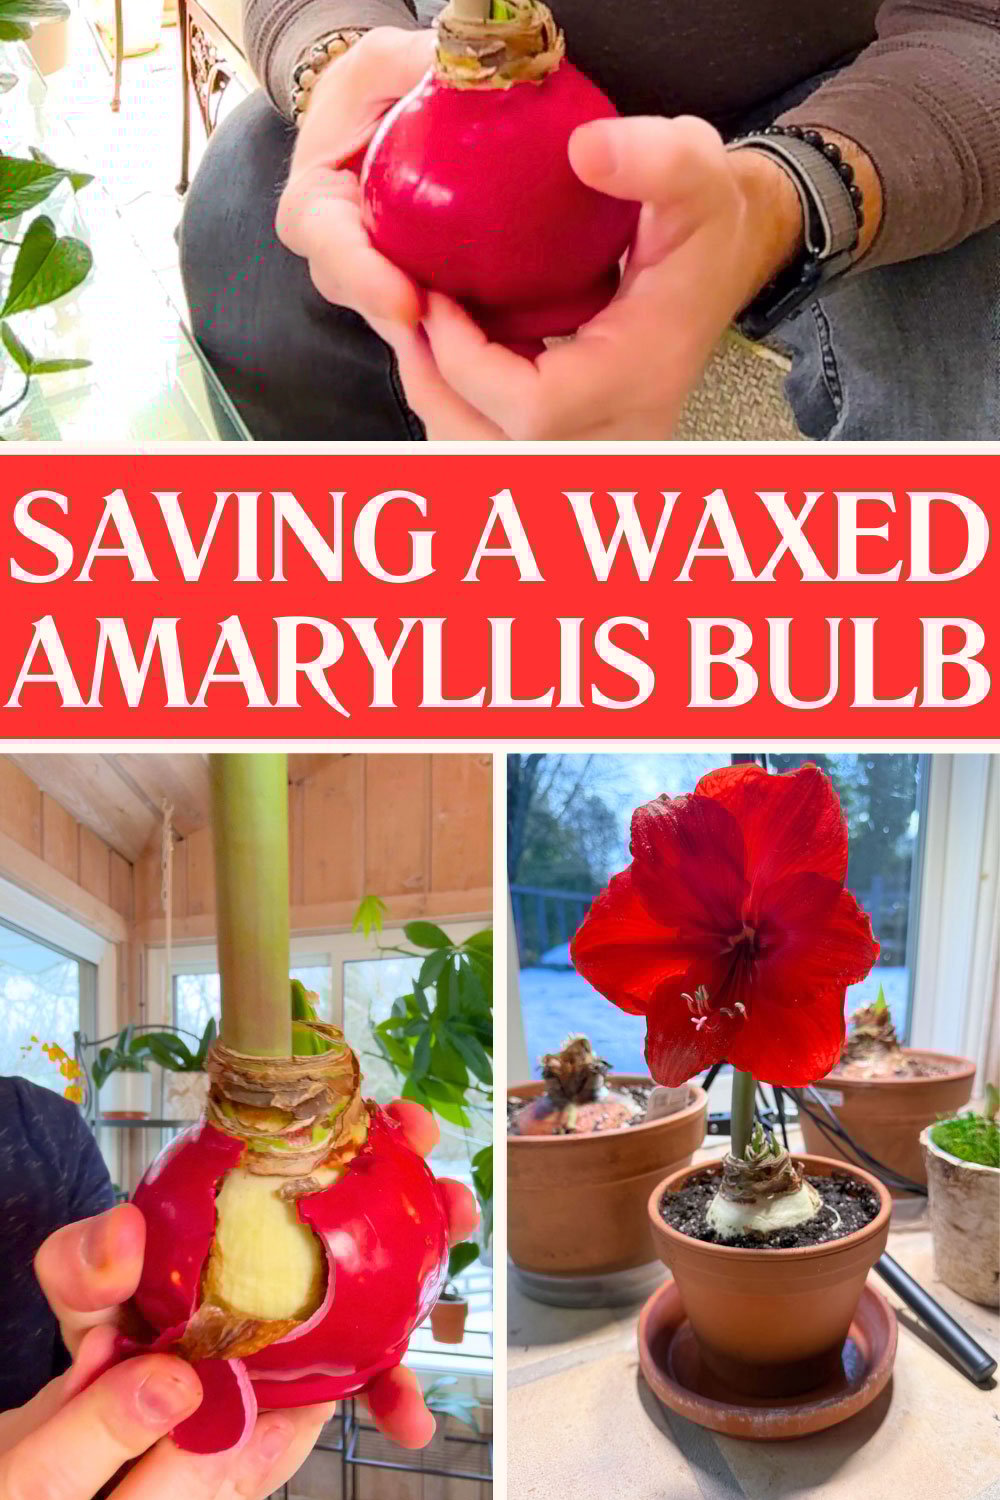
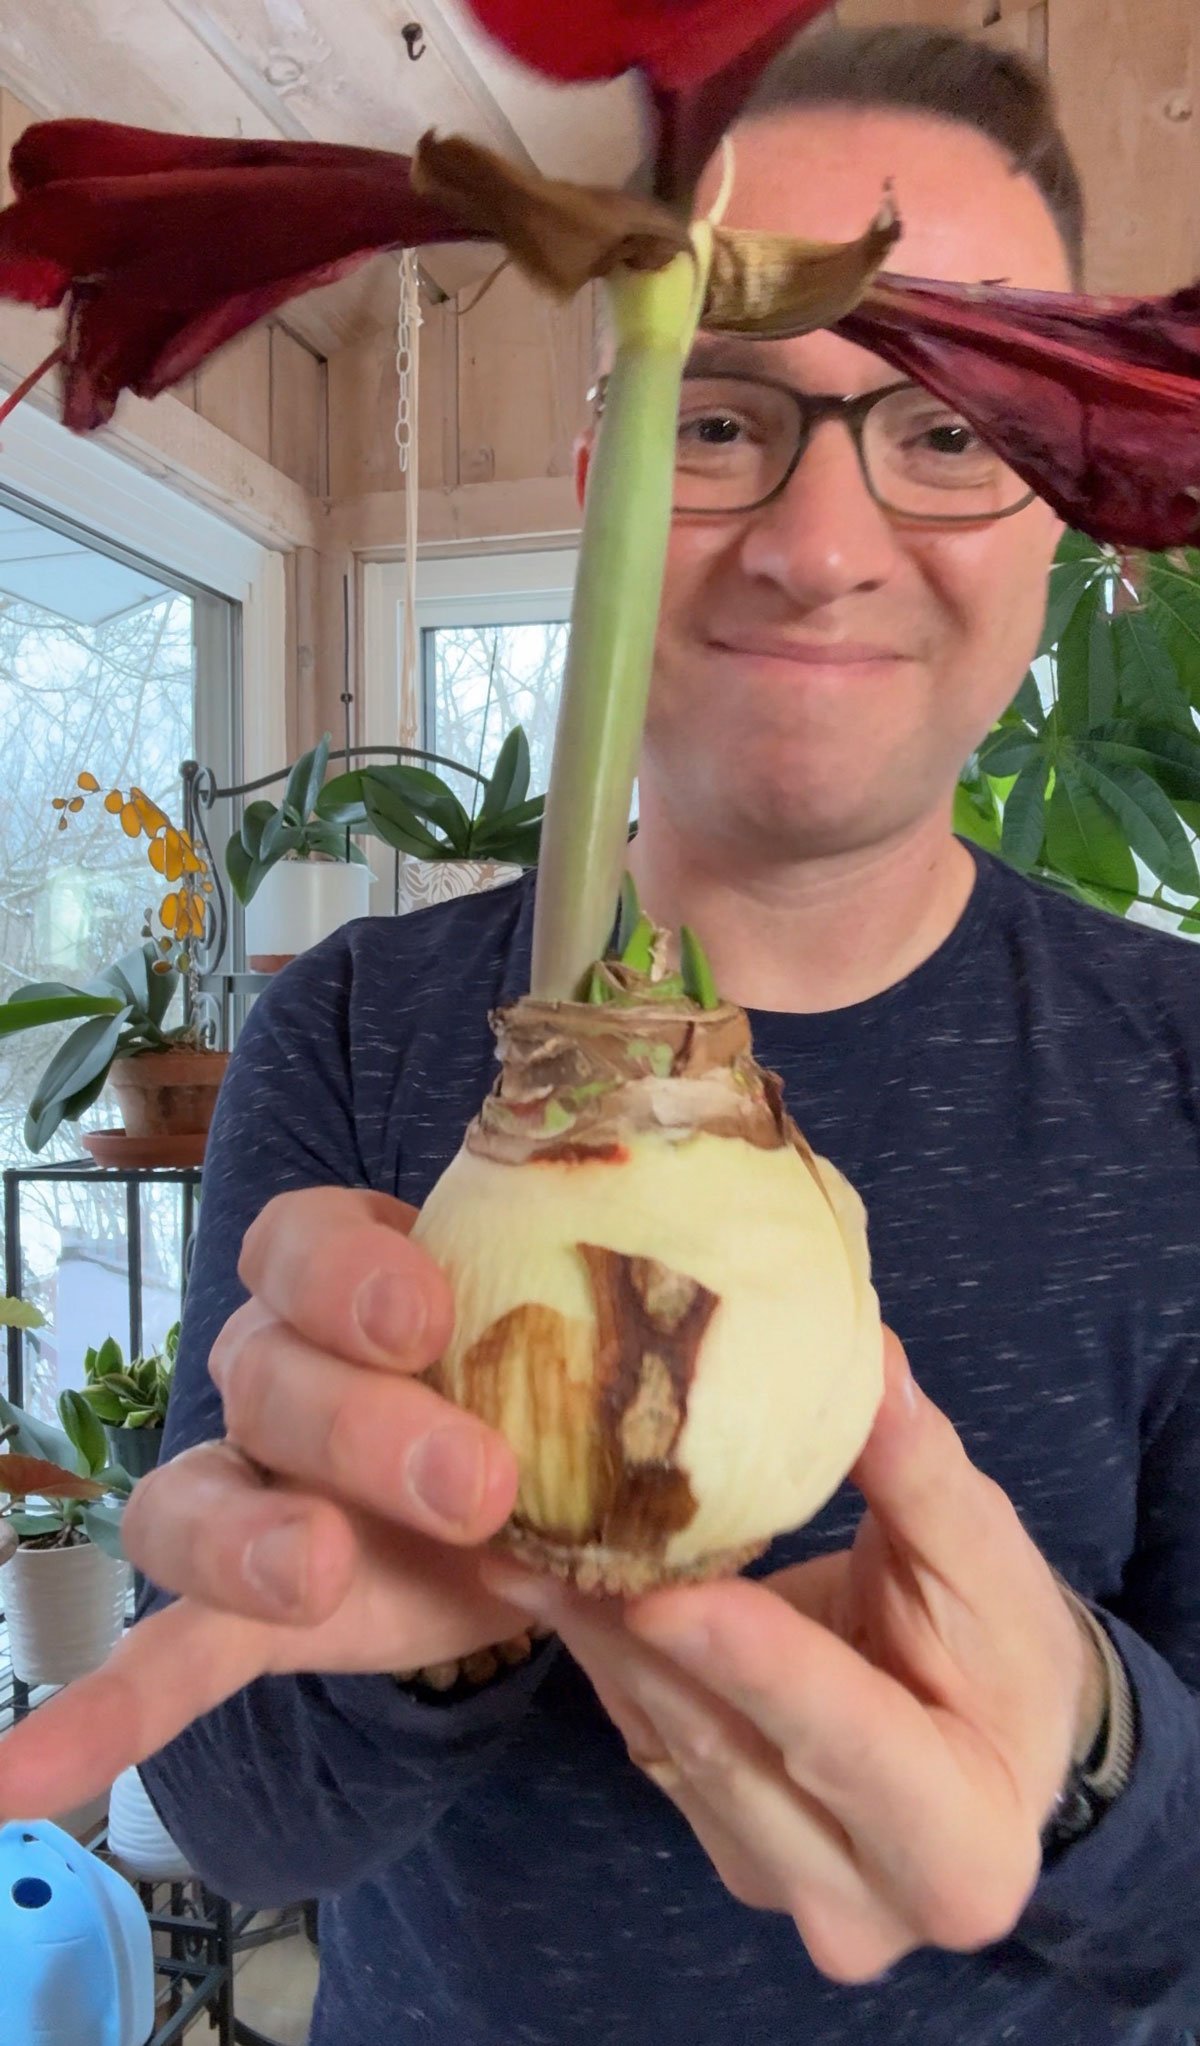
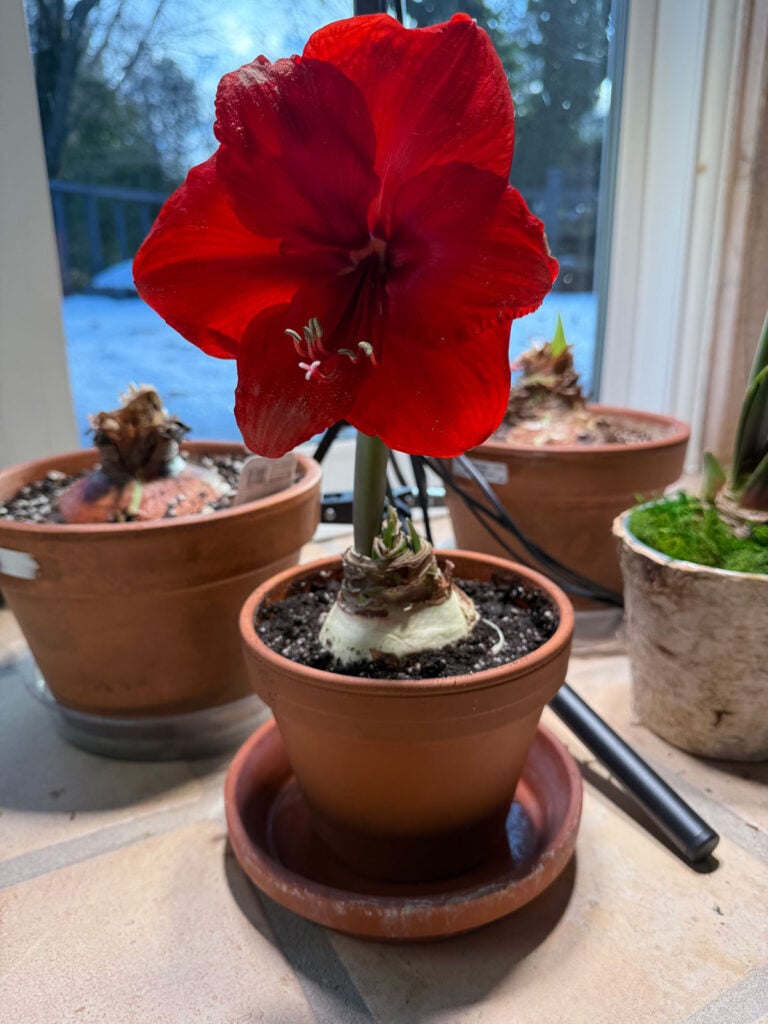
Waxed amaryllis bulbs were not meant to keep long-term. They were developed to bloom for you and then throw away (so that you buy more every year!). But in this post, I'll give you tips on how you can save your waxed bulbs for years to come. I've been growing them for many years, so I'll give you all the useful tips you need.
Would you like to save this post?
Enter your email, and I will send this link straight to you!
Before I show you what to do, here is a little back story on waxed amaryllis bulbs. They were developed to be completely 100% no maintenance. There is no soil, no water, nothing. The bulbs are sealed in waxed to conserve moisture, and treated so that you can set them on a flat surface, allow them to bloom, and then throw away.
If this is what you want, that's totally fine! But if you purchased a waxed bulb, or maybe received one as a gift, and you actually want to keep it long-term, here are the steps you can take.
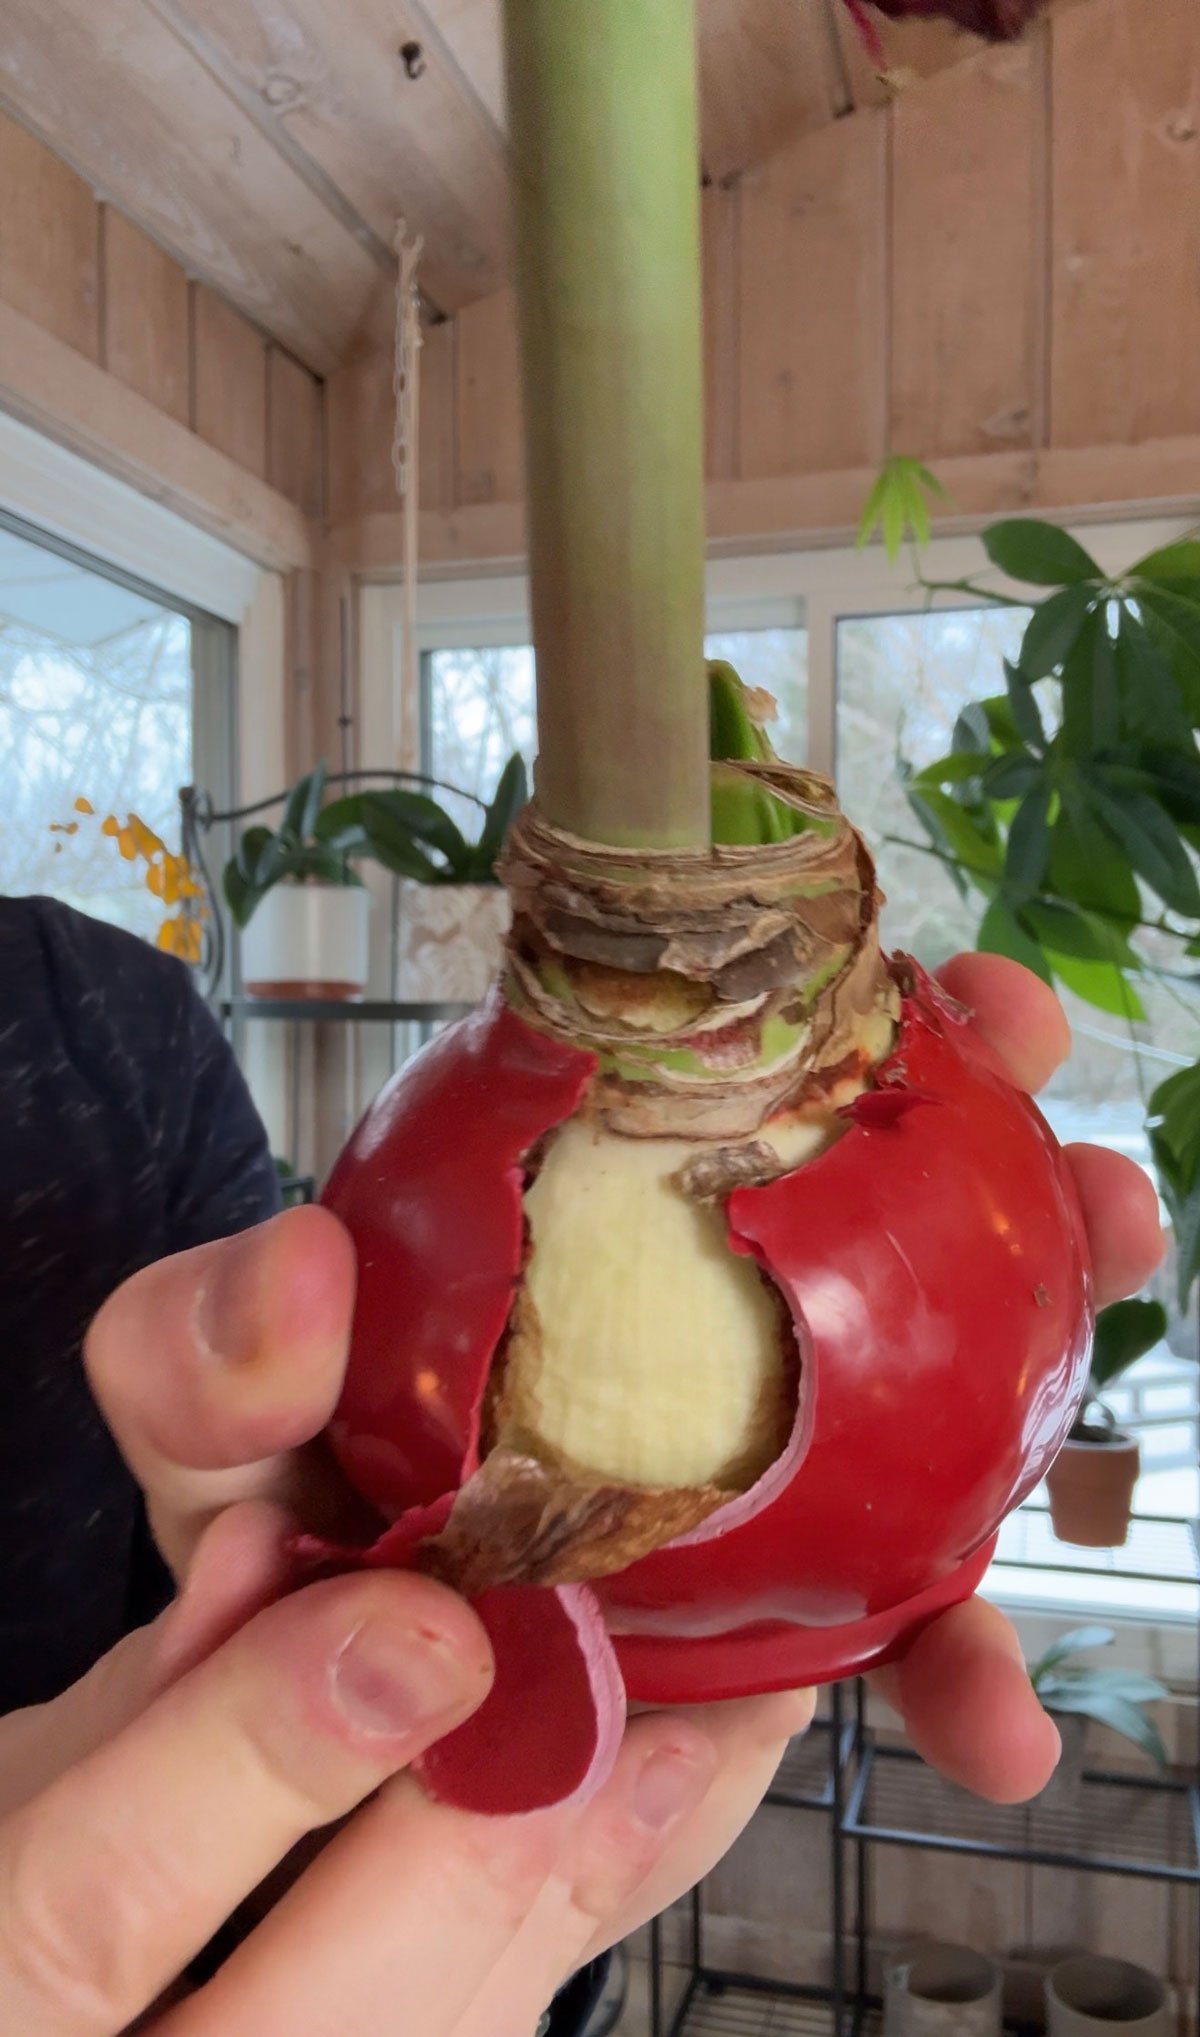
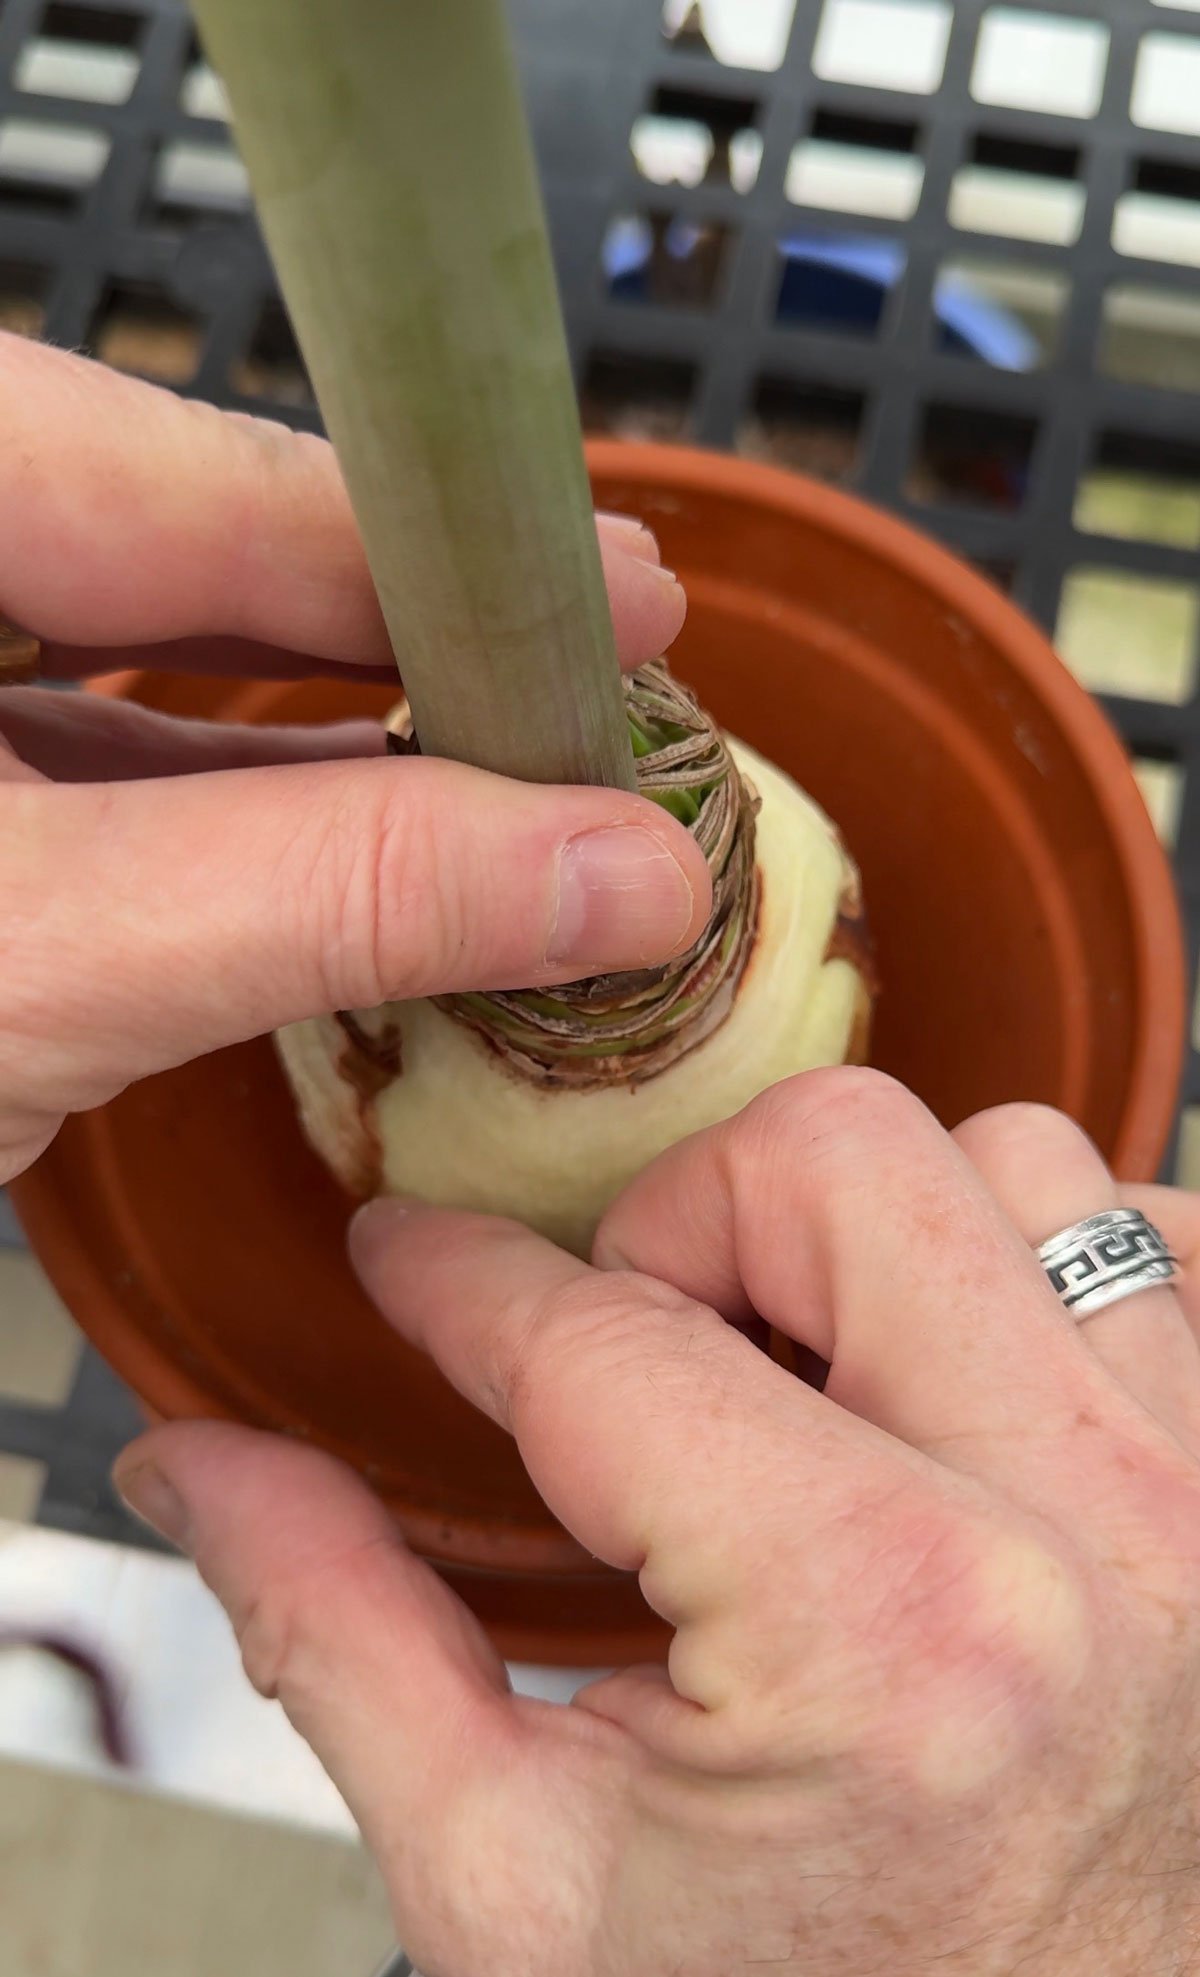
1. Peel off all the wax
You'll want to peel off the wax sooner than later. If you wait too long, you may reduce your chances of success.
The wax is not hard to peel off. Start by grabbing the wax near the top of the bulb, and pull down to start tearing the wax off. The wax doesn't stick to the bulb itself, and once you get that initial tear in the wax, it becomes much easier.
Keep going until all the wax is removed, and don't forget to take the wax off at the bottom of the bulb because this is where the roots will grow into your pot once it is planted.
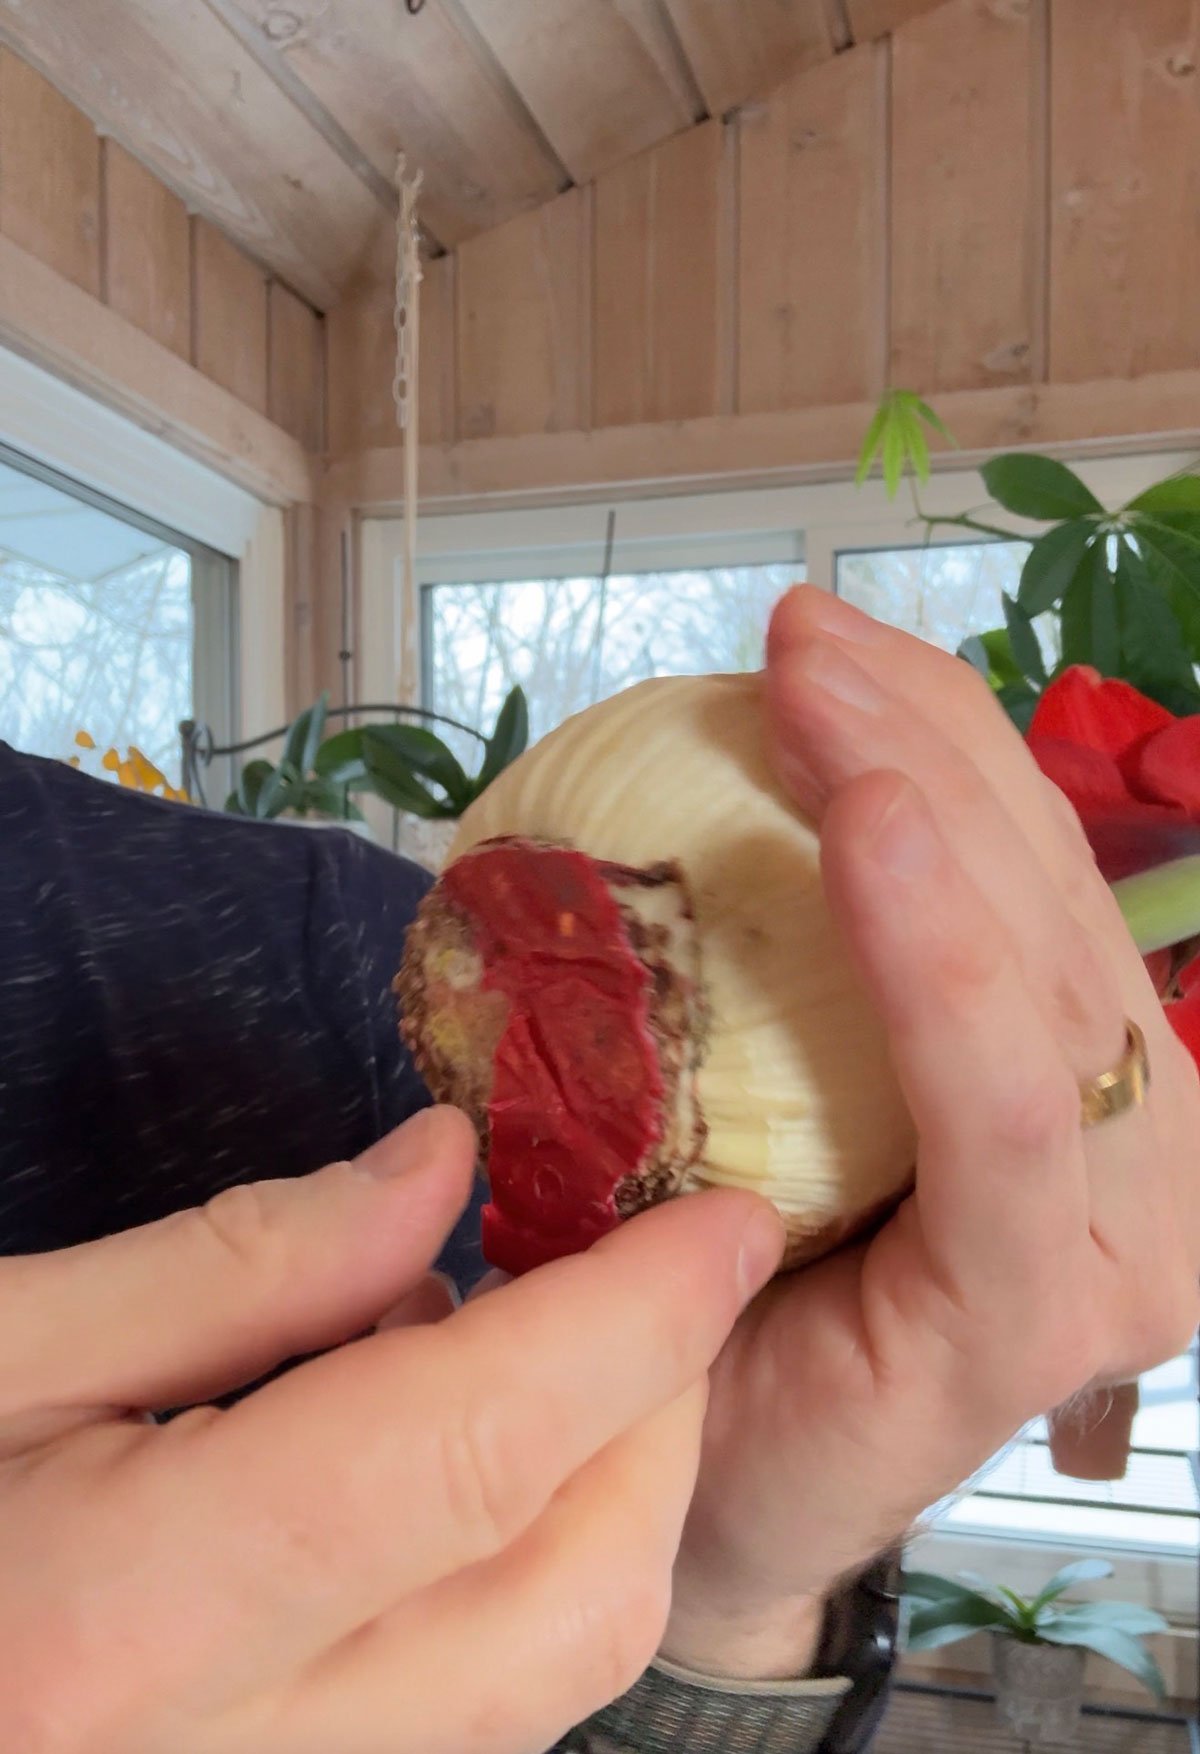
Sometimes, depending on where the bulb came from, you may find a flat metal plate at the bottom of the bulb. Mine didn't have it, but if yours does, gently pull it out and throw it away. This was just added to help the bulb stay securely on a flat surface.
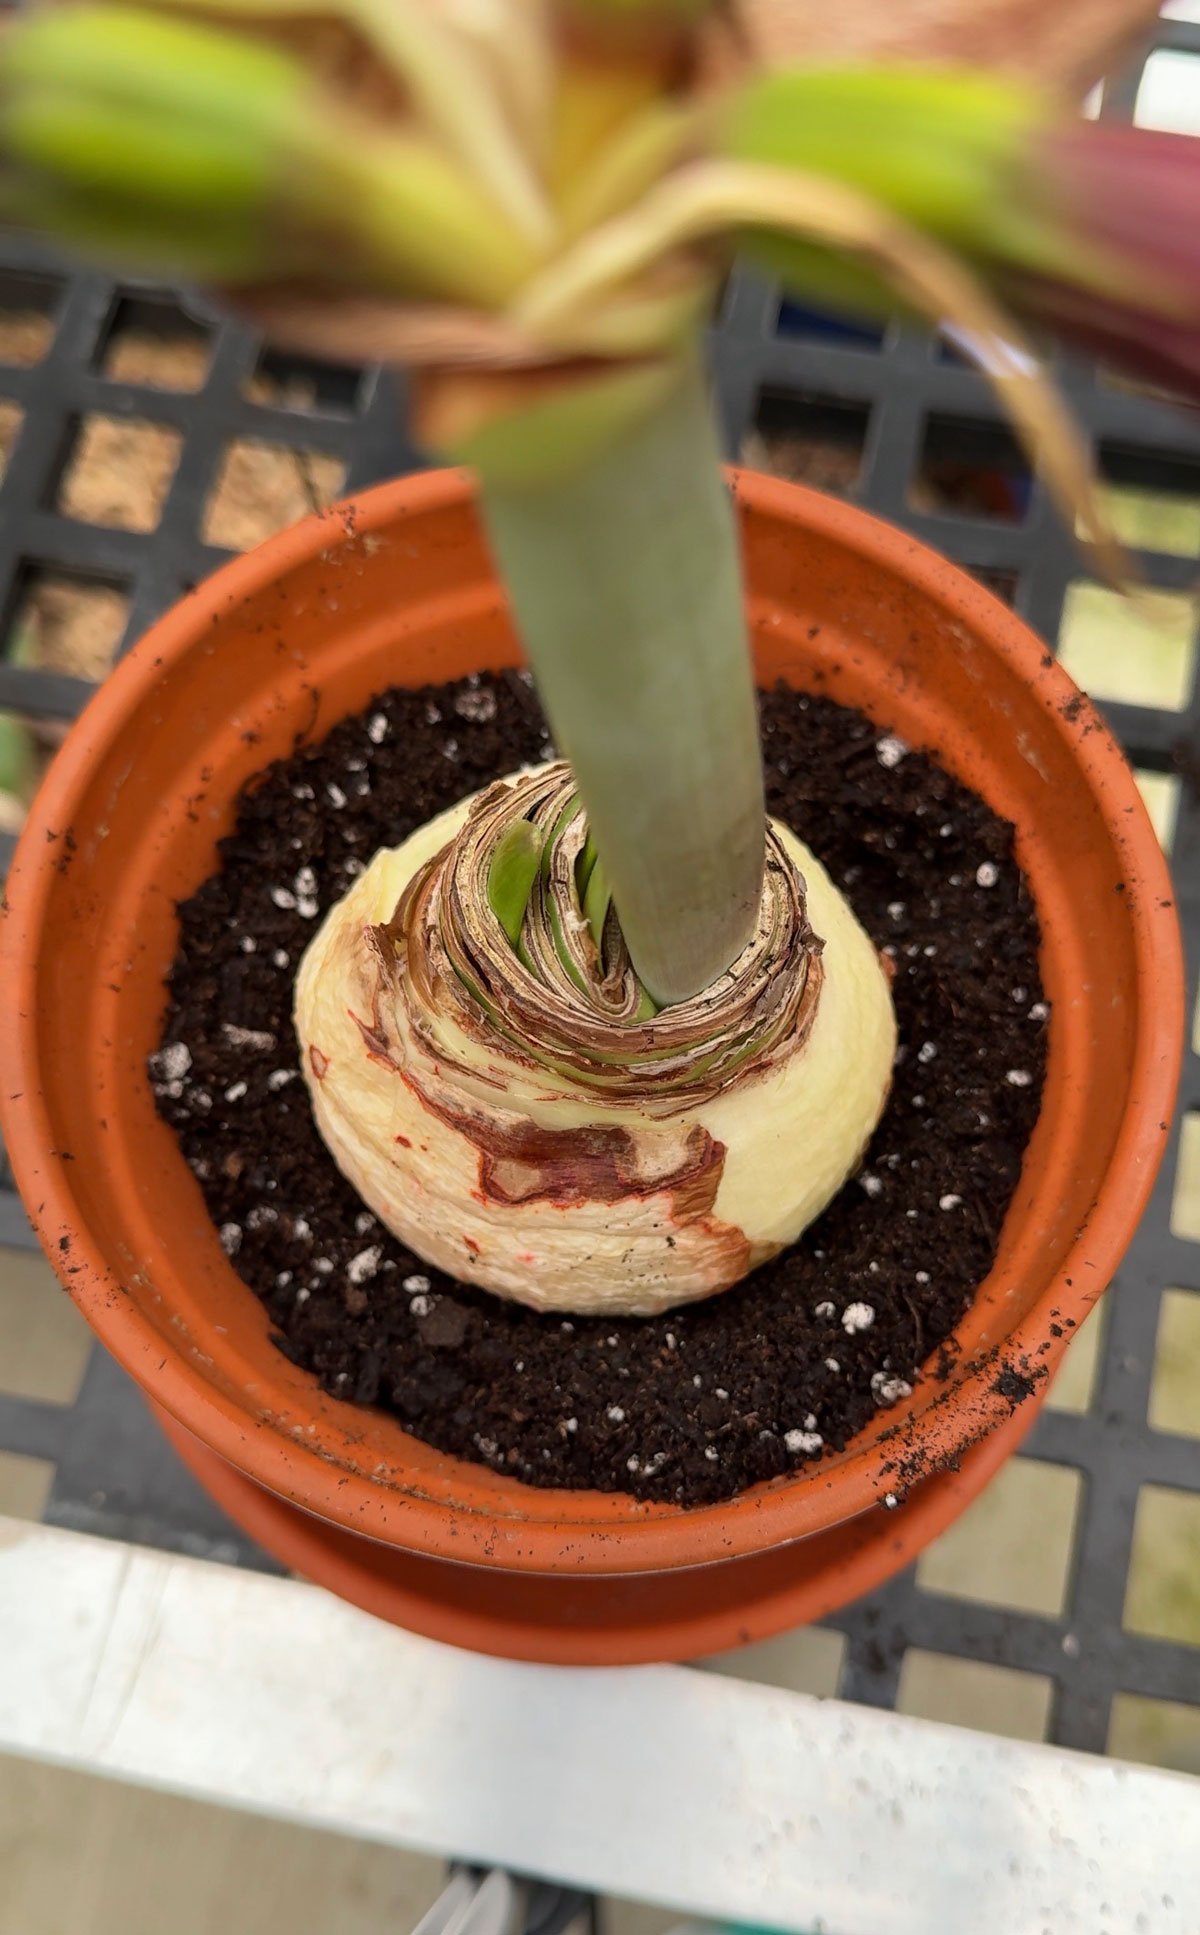
Here is the bulb with all the waxed removed, and next it's time to plant it.
2. Select a pot and plant the bulb
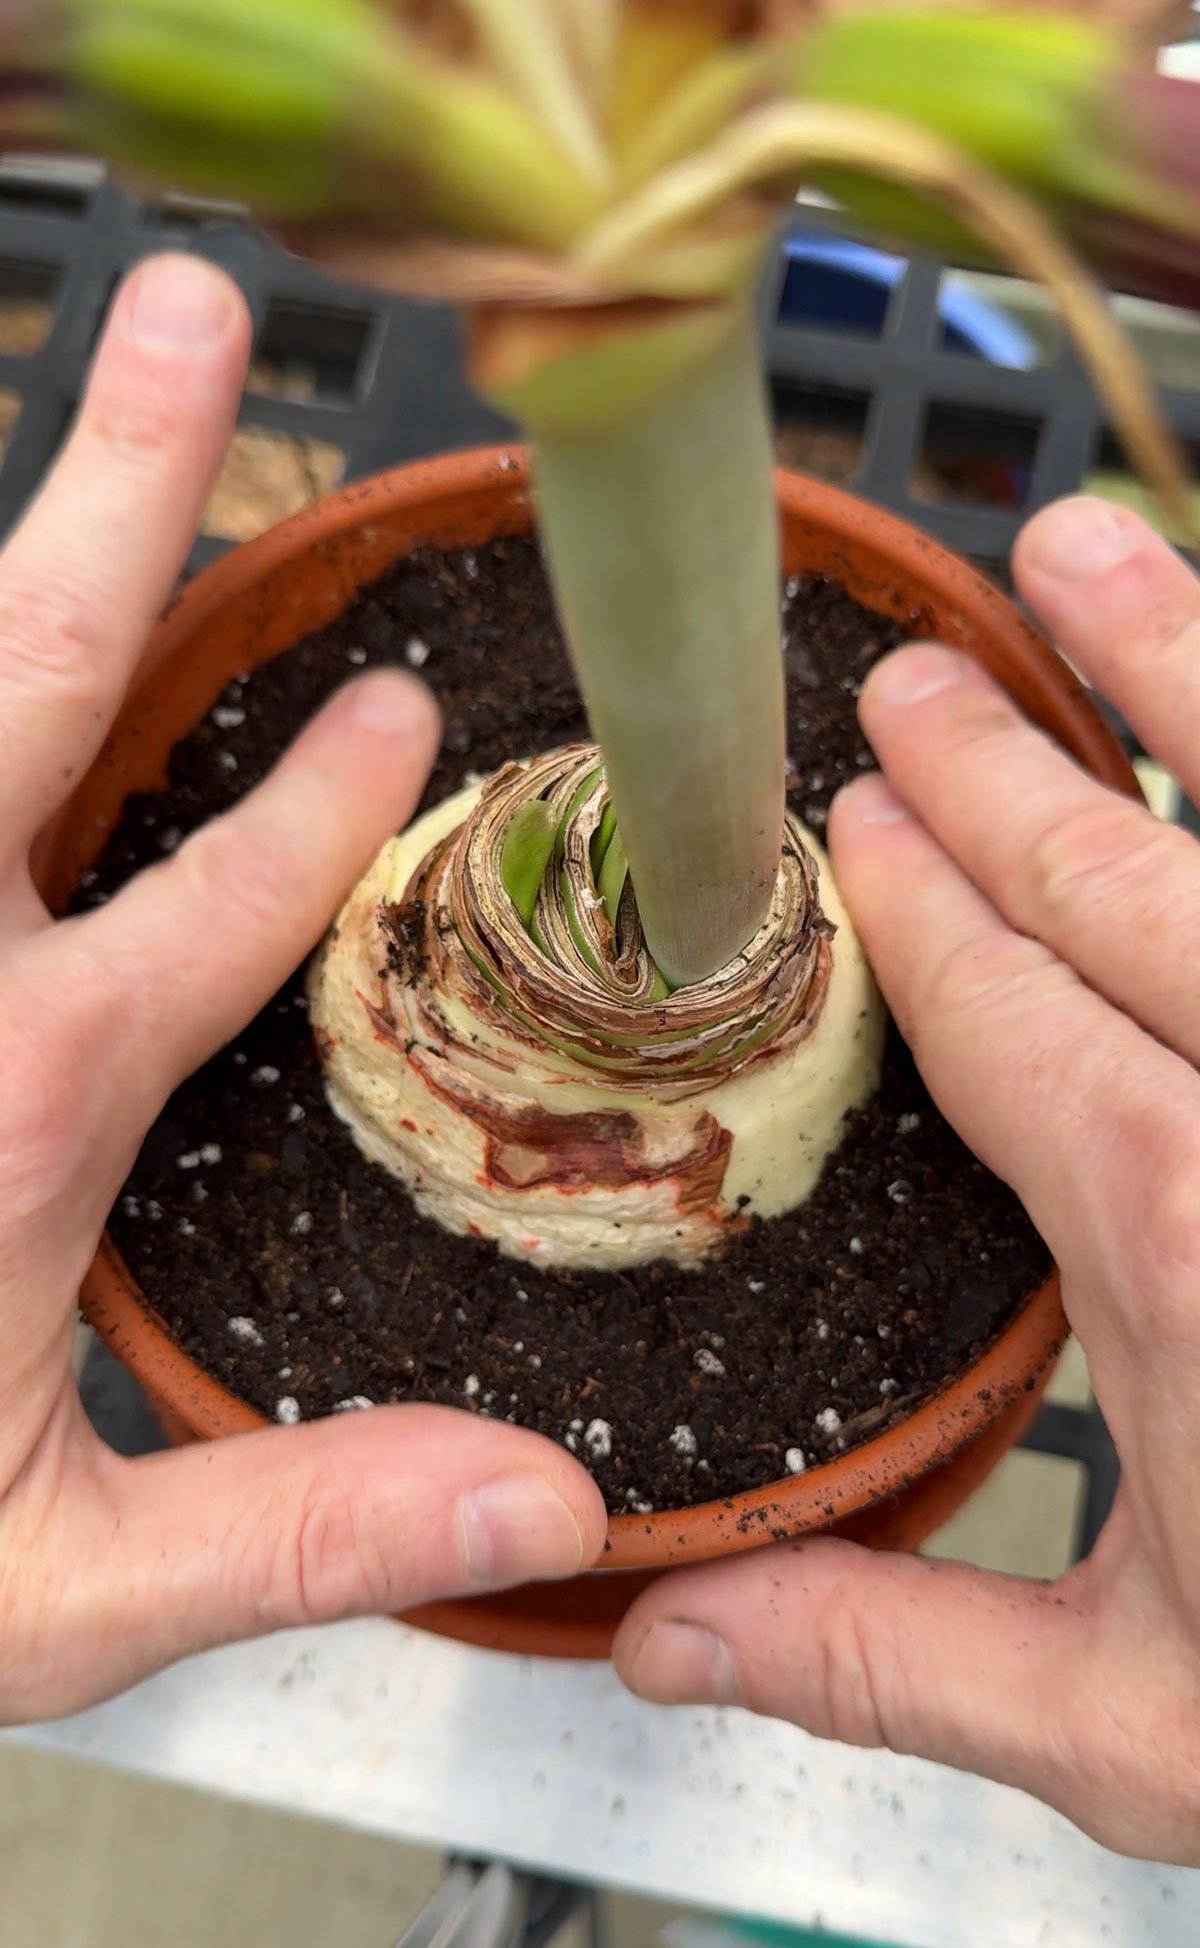
I prefer to use terracotta pots for amaryllis (and make sure your pot has a drainage hole at the bottom!), but you can use any type of pot that you want, as long as you don't start with a pot that is too big. Choose a pot that leaves only about an inch or two from the bulb to the edge of the pot.
Next, I added some soil to the bottom of the pot and set my bulb in. Keep in mind that in the end, you only want to bury about half of the bulb, but don't fill the pot completely with soil. Allow a little room from the top level of the soil to the top of the pot so that it acts as a water reservoire when you water so that you're not making a mess.
I don't have a strict soil mix that I use, and have used different ones in the past. In this case, I used an indoor potting mix from FoxFarm. Any well-draining indoor soil mix is fine, and you can always add some perlite or pumice (link to Amazon) to improve drainage. And if you use terracotta pots, it will help the soil dry out easily because of the porous nature of terracotta.
Here is the finished product. Notice that I buried about half the bulb, but I didn't fill the pot all the way with soil so that it will make watering easier and not make a mess spilling the potting mix everywhere.
3. Water your plant and give it LOTS of light
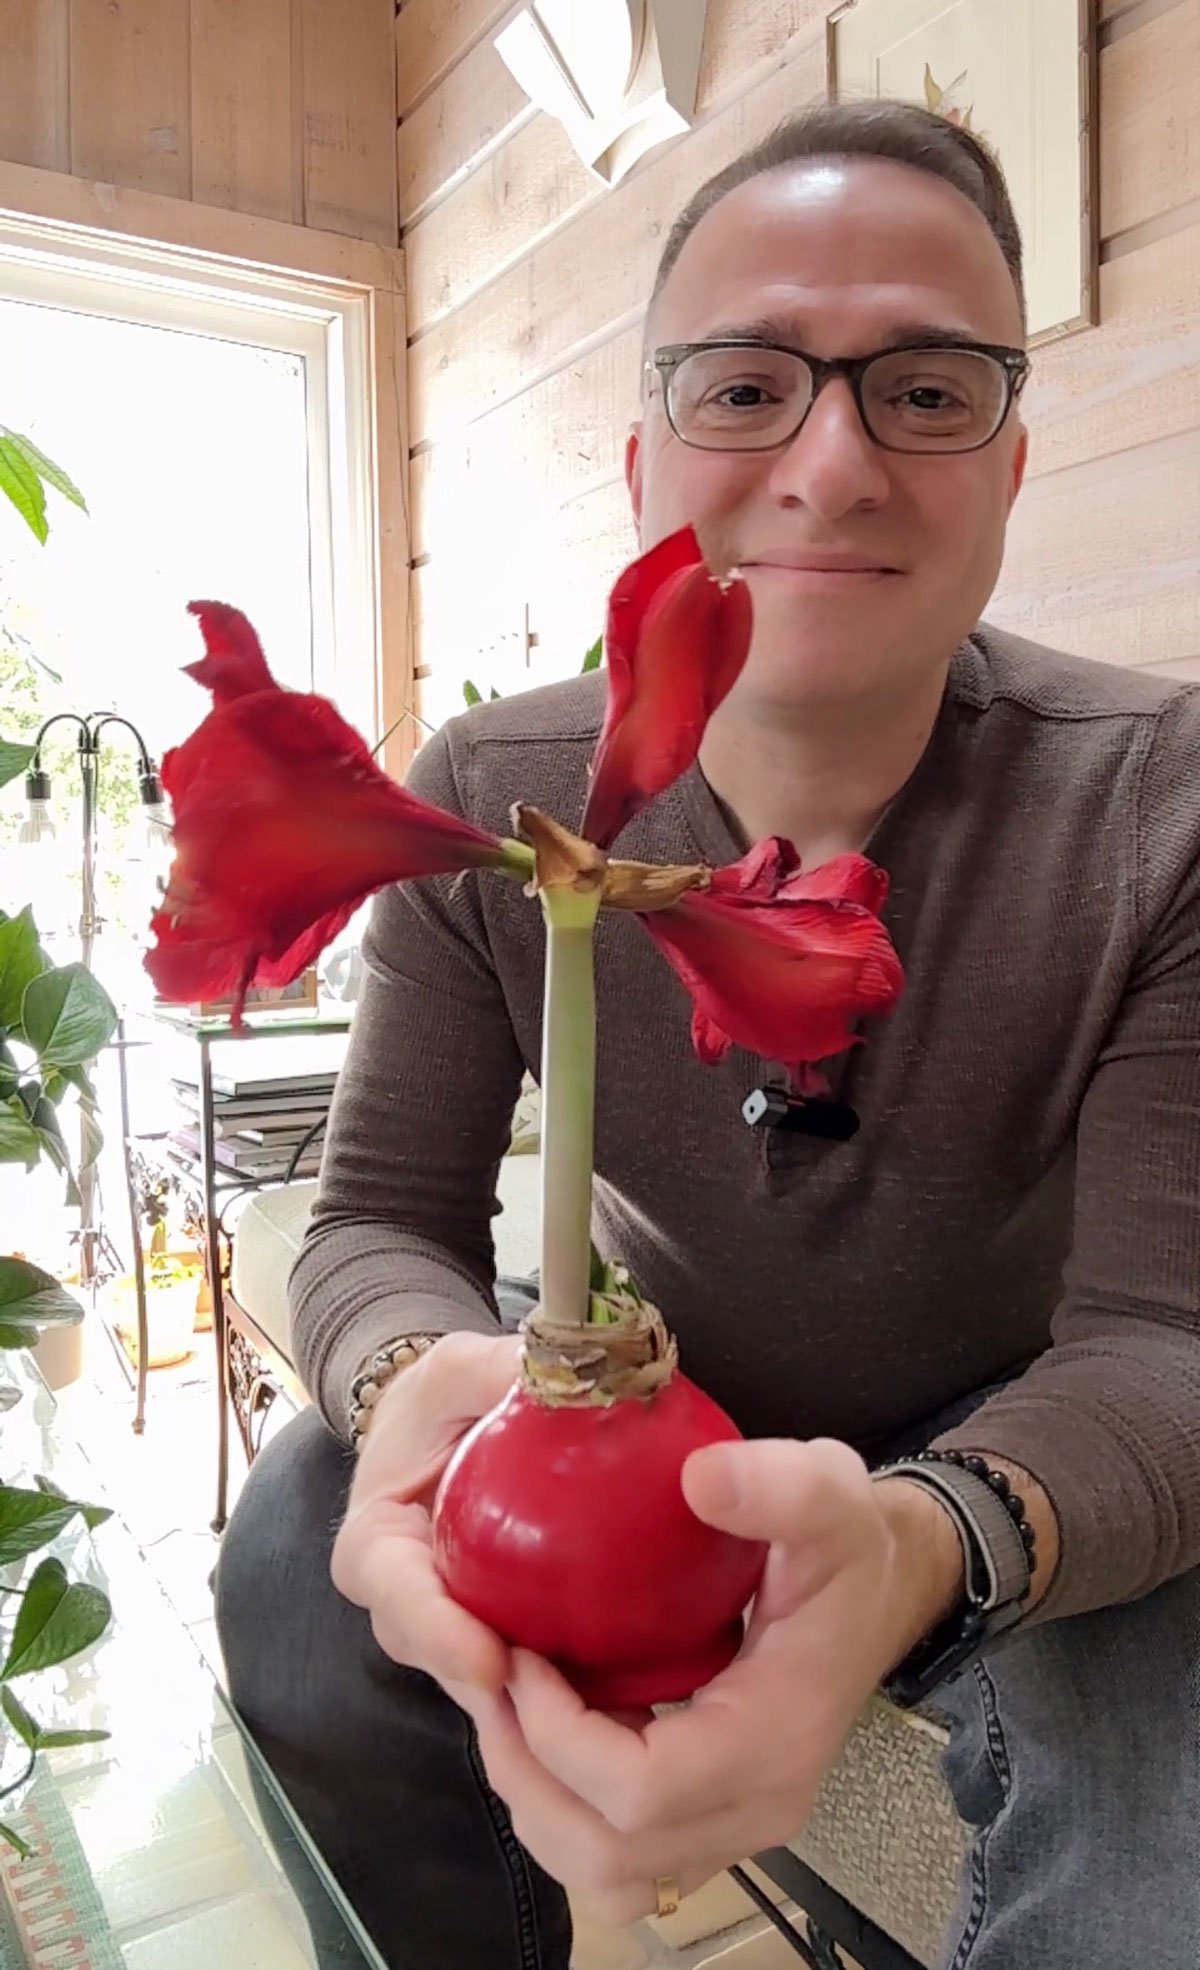
Bring your plant to a sink, give it a nice watering, and set your pot in the sunniest window that you have and wait. You can also use grow lights if you don't have enough light. Amaryllis need LOTS of light, and the care that you provide from this point forward will determine if your plant will bloom again in future years.
If you don't give your plant enough light, the leaves will get very weak and floppy, and it will reduce the chances of blooming again in the future.
At this point, right after planting, allow the top 1-2 inches of soil to dry out, and then water. Your bulb will start to grow roots now that all the wax is gone. If the surface of the soil still feels damp, hold off on watering, especially in the beginning, since the bulb doesn't have any roots yet.
And what you do from this point foward is really important. I'll direct you to my post on amaryllis care after blooming. It will give you all my best tips after growing these plants for over 2 decades. With the right light, watering, fertilization (most people skip this and it's really important), and more, you will be able to keep your amaryllis bulbs for YEARS just like I have.
Thank you so much for all this information! I was given a beautiful Amaryllis “in a sweater” (the bulb wasn’t waxed but in a balloon type thing and shoved in a Christmas sock). Super cute- 4 beautiful blooms. I found your information a little late and the leaves started to yellow and droop. I (unknowingly) cut off one of the leaves 😕). I have now placed it in a terracotta pot and followed your directions, but the other two smaller leaves are yellowed at the tips. Do you think my bulb has a chance?
Thank you for the information. I have followed these steps and have one leaf that has grown to more than 16 inches tall. I staked it so that it stands tall. Patiently waiting for it to grow more leaves and rebloom.
I brought my first waxed amaryllis today. I was given one many years ago but unpotted it and put in a bag ….. not good. I found it and planted it but have only grown leaves..I figured it shrunk in bag .
Tomorrow I’m peeling the wax off the new one …..it has one bloom stock, now maybe two ( new to me the look).
I’m hoping to have it fora couple of years after I repot.
I have several Waxed Amaryllis that I am trying to re-flower. I used your method and waiting for them to bloom. My hobby is re -flowering Amaryllis and have been very successful with them. Most bulbs still have life and it's a matter of proper care and method for re -blooming. I have several in the garage and hopefully y February, I can bring them inside, water them and place them in a sunny window, I have 6 planted outside as an experiment, covered with mulch and a frost free cloth. A friend has them in her yard for over 50 years.


")

 - Easy Guide With Photos")


Thank you so much for all this information! I was given a beautiful Amaryllis “in a sweater” (the bulb wasn’t waxed but in a balloon type thing and shoved in a Christmas sock). Super cute- 4 beautiful blooms. I found your information a little late and the leaves started to yellow and droop. I (unknowingly) cut off one of the leaves 😕). I have now placed it in a terracotta pot and followed your directions, but the other two smaller leaves are yellowed at the tips. Do you think my bulb has a chance?
Yes, just give it time and it should recover! Follow my tips on care in this post in terms of light, watering, etc: https://www.ohiotropics.com/2019/01/25/amaryllis-secrets-what-to-do-with-amaryllis-after-blooming/
Thank you for the information. I have followed these steps and have one leaf that has grown to more than 16 inches tall. I staked it so that it stands tall. Patiently waiting for it to grow more leaves and rebloom.
I brought my first waxed amaryllis today. I was given one many years ago but unpotted it and put in a bag ….. not good. I found it and planted it but have only grown leaves..I figured it shrunk in bag .
Tomorrow I’m peeling the wax off the new one …..it has one bloom stock, now maybe two ( new to me the look).
I’m hoping to have it fora couple of years after I repot.
I have several Waxed Amaryllis that I am trying to re-flower. I used your method and waiting for them to bloom. My hobby is re -flowering Amaryllis and have been very successful with them. Most bulbs still have life and it's a matter of proper care and method for re -blooming. I have several in the garage and hopefully y February, I can bring them inside, water them and place them in a sunny window, I have 6 planted outside as an experiment, covered with mulch and a frost free cloth. A friend has them in her yard for over 50 years.