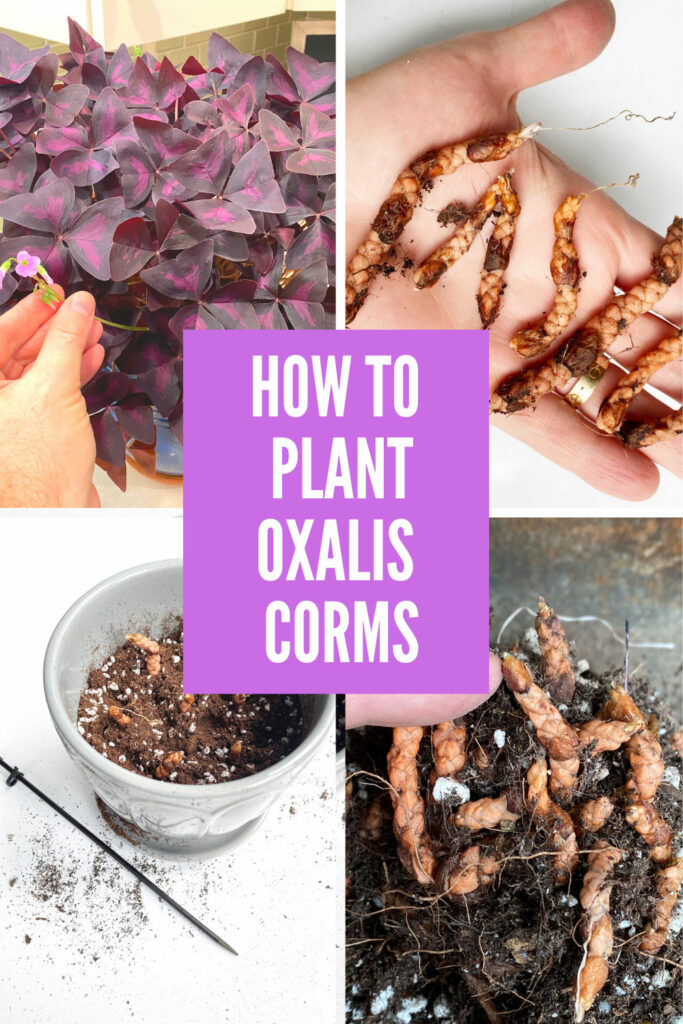
Have you just received some Oxalis triangularis (Purple Shamrock Plant) corms that you'd like to plant? Or maybe you want to learn how to divide and propagate your current plant? In this post, I will show you both of these techniques, step-by-step with photos. It is very easy to do, so keep reading to find out exactly how to plant Oxalis bulbs.
Would you like to save this post?
Enter your email, and I will send this link straight to you!
If you've just received some corms in the mail that you'd like to plant, the process could not be any easier.
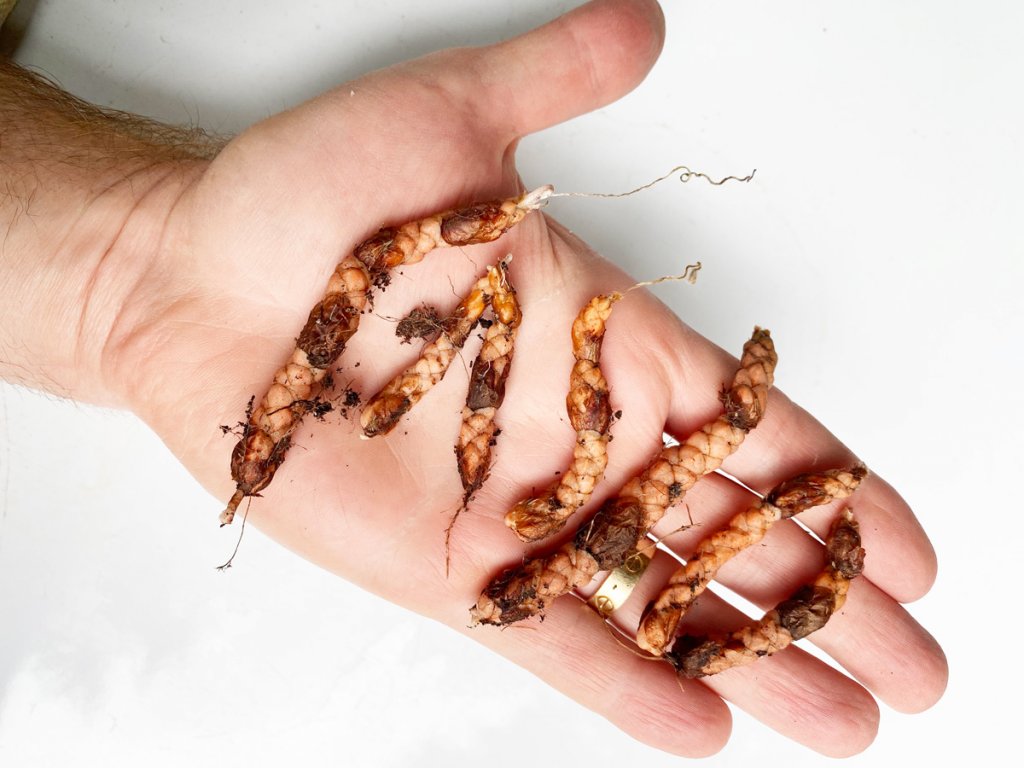
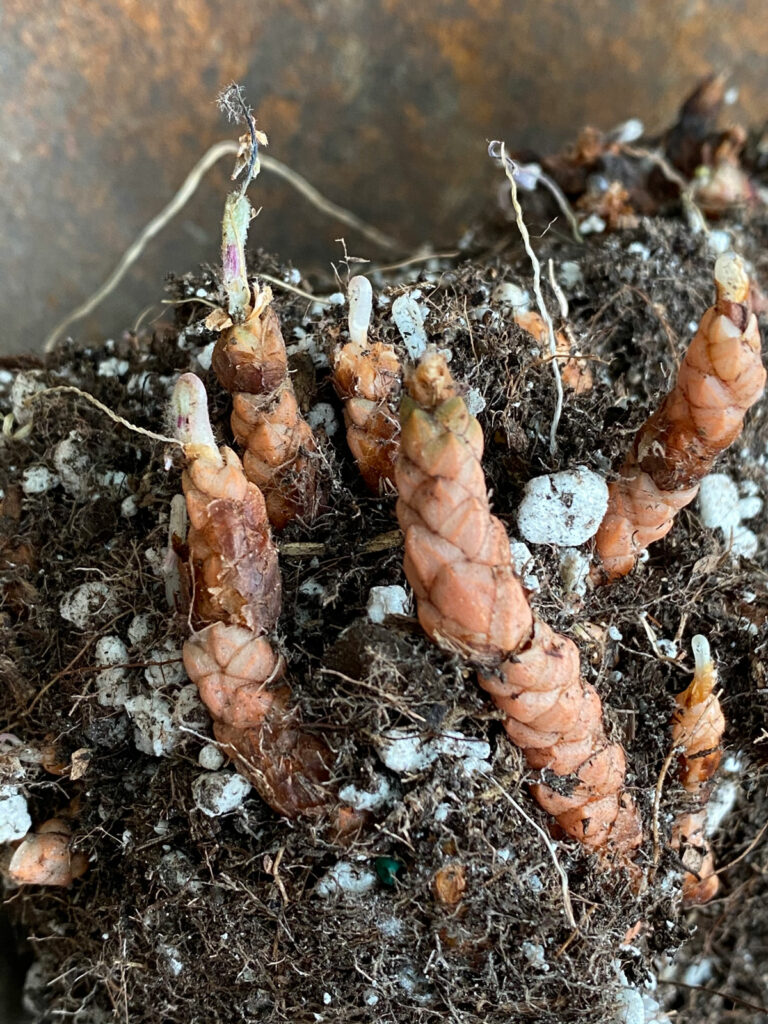
Sometimes you'll hear people call them bulbs or rhizomes, but they're technically corms. Regardless, they almost look like little pine cones.
You'll want to plant them vertically in your pot, with the narrower side of the corm on top.
In the photo above, the narrower side is the side where my thumb is at. If you look closely at the leftmost corm, you can see that the end near my thumb is starting to grow a new leaf.
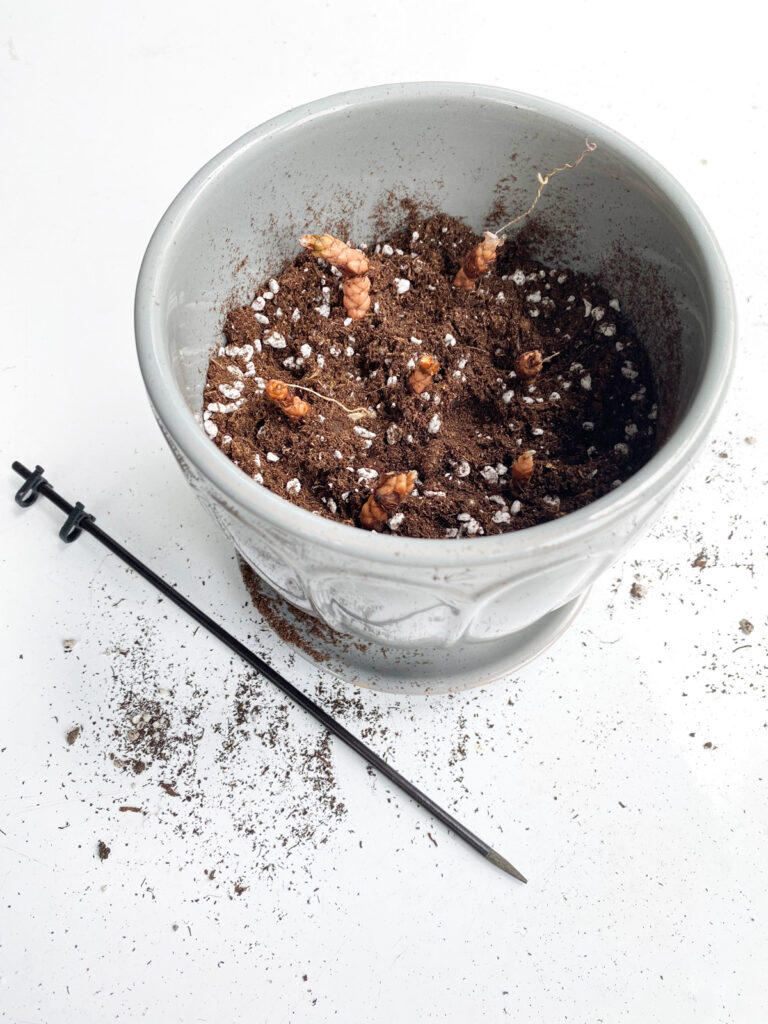
Next, choose a pot with drainage holes and get your potting mix ready. My standard go-to potting mix is 3 parts Miracle-Gro all purpose mix plus 1 part of perlite that I mix all up together.
I like to mix it all up in a wheel barrow outside because it's so much easier so I don't have to make a mess inside.
Next, I placed some of my potting mixture into the pot and gently inserted each corm about an inch apart from each other.
Planting Oxalis corms. I like to use a chopstick or even an orchid stake that typically comes with Phalaenopsis orchids to help poke a hole in the potting mix to insert the corm.
Remember to keep the narrow end on top when you place the corms in. If you place them upside down, they will still grow, but you will be waiting longer to see the new growth.
As far as planting depths does, after you have the corms in, add in more potting mix until you have the top of the corms covered by about 1-1 ½ inches of potting mix.
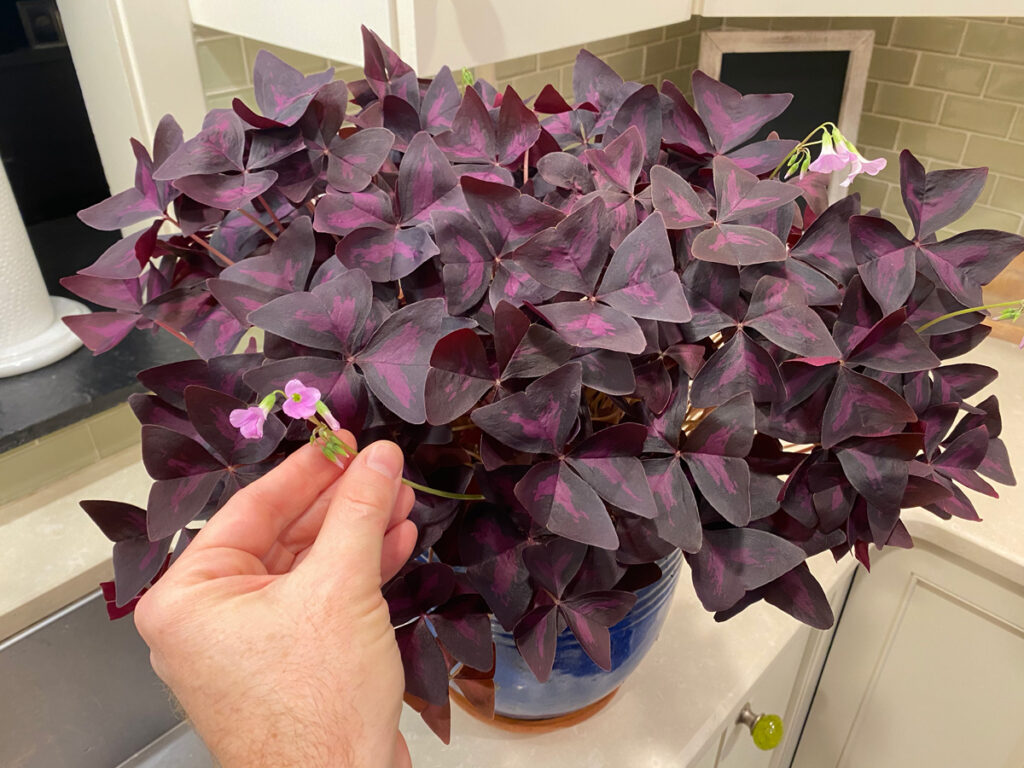
Then go ahead and give your plant a good watering, and you're good to go! I've seen growth start to occur in a matter of days before in good conditions. In no time, you will have a beautiful plant.
If you already have an existing plant and you want to divide it up and make more plants, read over the next section.
DIVIDING AN OXALIS TRIANGULARIS PLANT
The second method of propagating is to simply take an existing plant, let it go dormant until the foliage dies away, and then take it out of its pot and at that point you can divide it up into as many pieces as you want.
If you didn't know that Oxalis can go dormant, this is a really useful technique. Sometimes they will do so on their own, but you can easily induce dormancy for the purposes of dividing your plant up.
Dividing a plant up that has not gone dormant is tricky because, if you have a really full plant, the plants are usually a tangled mess with all the leaves so it can get messy and by the time you're done dividing them, they just don't look right.
If your plant looks a little ratty, is infested with any pests, or you simply want to divide it up, just stop watering and allow all of the foliage to go dry and let it rest for a few weeks. This way you can get a fresh start with new foliage!
And you are NOT harming your plant at all. These are extremely resilient plants.
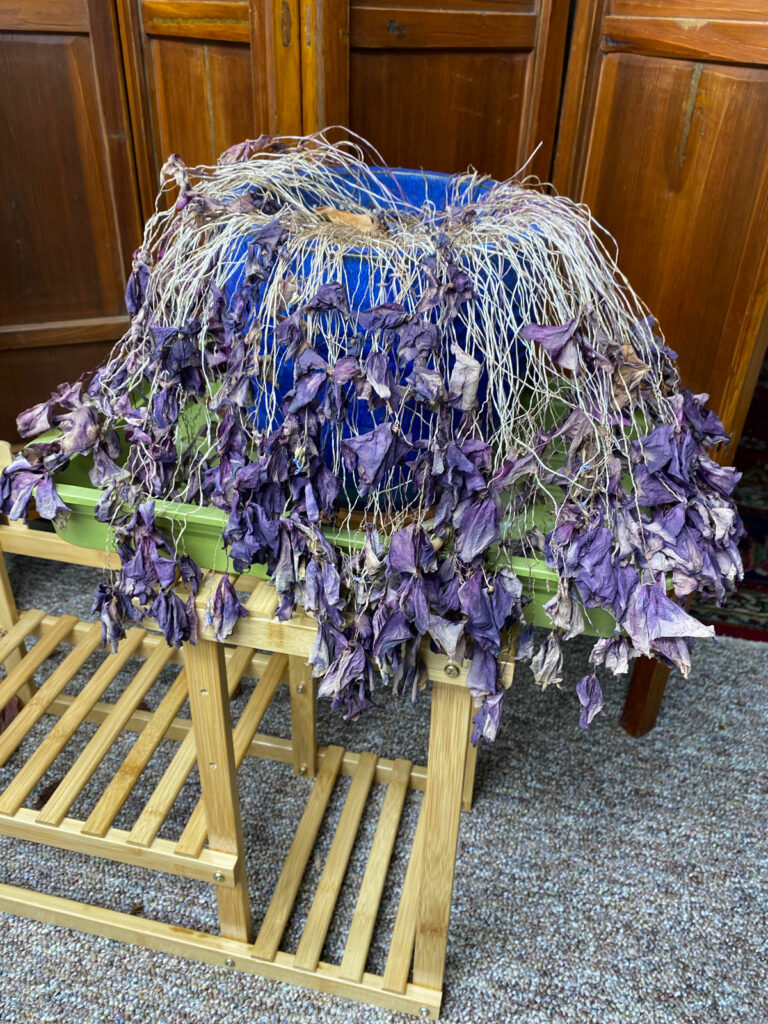
This is the plant that I eventually divided up:
After going on vacation, we came back and my plant had gotten really dry and started to suffer and was a little unsightly.
At that point, I decided to stop watering completely and let the foliage die back until it looked like this:
My Oxalis triangularis in its dormant state
I actually left it like this for a couple months. I did not water all all during this time. You don't have to wait 2 months (I just did so until I finally got my act together to divide it up).
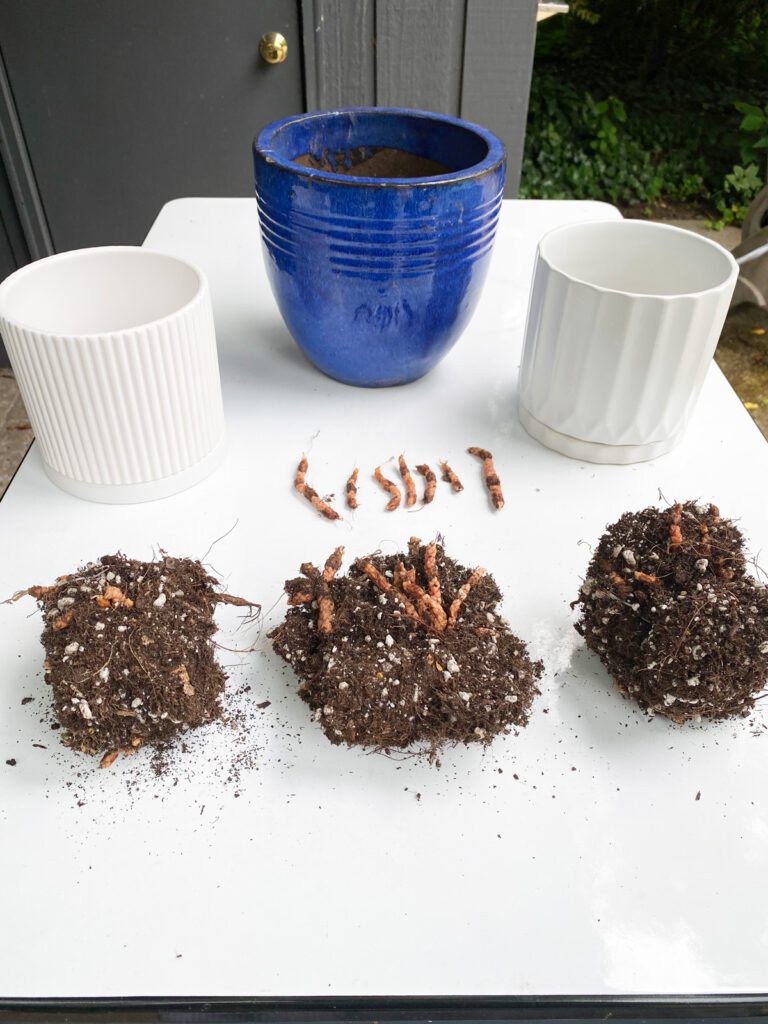
At this point, I cleared out the dead foliage and took it out of its pot. I simply grabbed the root ball and gently pulled it apart into three clumps. Instant propagation!
In the photo below, you can see the 3 clumps that I divided up, as well as a few individual corms that I used to plant in the previous section of this post.
These are such tough plants. Even after a couple months of dormancy with no water, the corms were ready to start growing as you can see in the photo below.
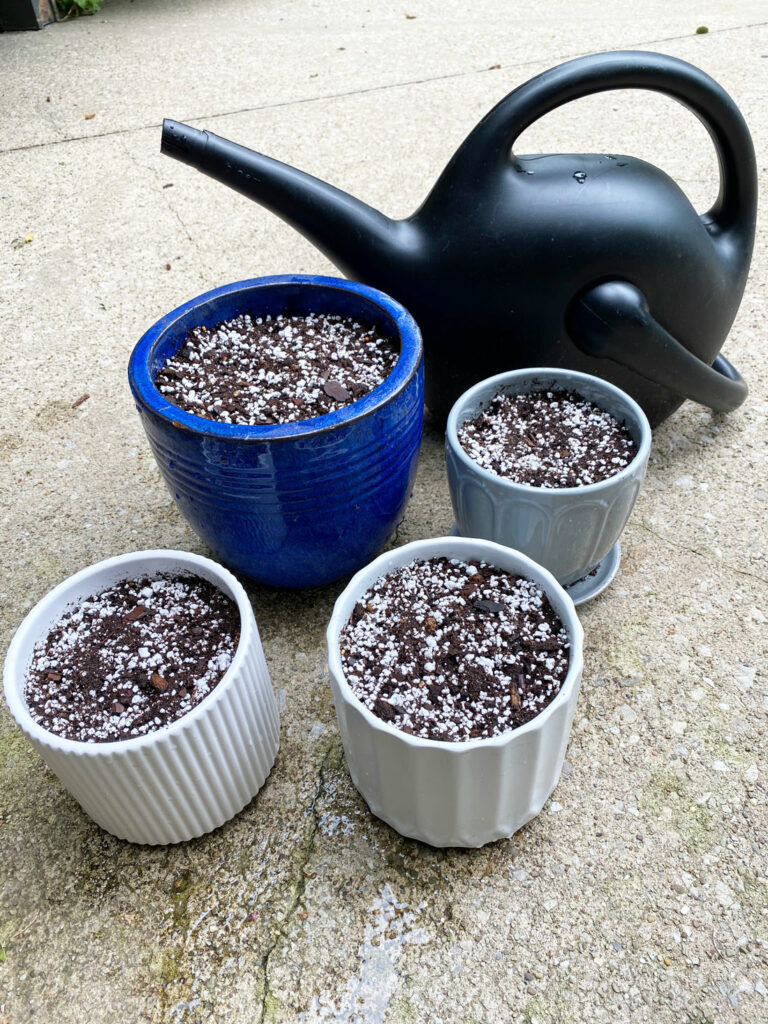
I planted each of the three clumps in separate pots.
Make sure you use a pot with a drainage hole.
I love the two ceramic white pots that I used. You can purchase them on Amazon fromFivoli Home.
I love them because they have a drainage hole, a separate saucer underneath, and it also comes with a wire mesh to place over the drainage hole so that the potting mix stays in place, but lets water through.
Next, I placed some potting mix at the bottom of the pot and set in one of the 3 clumps that I divided up (make sure you plant them in the same orientation that they were originally growing in and not upside down).
You'll want to play with the amount of potting mix at the bottom so that you'll have it at the right spot where you'll be able to cover the top of the corms with about 1 to 1 ½ inches of potting mix on top.
Once you do that, give your pots a good watering, and get ready to watch the growth take off soon!
Do Oxalis triangularis bulbs multiply?
All of the corms that you've seen in this post resulted from planting one 4 inch pot of Oxalis about 2 years prior. The corms multiply like crazy and you can divide them up after a year or two, or whenever you want more plants!
Both of the white pots at the bottom of the photo above are from Fivoli Home.
I'll update this post as the plants grow to show you the progress, and don't forget to visit my Oxalis triangularis care post for details on how to grow this amazing plant!
Help me spread the word and pin the image below on Pinterest!
My green Oxalis seems to be heaving from the clay pot it's been in for years. The corms are all visible on the surface of the soil. The plant has grown tall and spindle. I am planning to divide and repot the plant, with the soil mixture you recommend. Will this take care of the problem?
Thank you so much for this information on transplanting oxalis plants. I also began raising them with a 4" gift plant. I've had mine for 20 years, and have shared them with family and friends all over the country!
If I dig up the outdoor potted plant and separate corms to plant in smaller pots as 'gifts' for a couple friends, I'm assuming I keep them in the house over winter? I will probably plant a clump (if I have one like your photo) in a small pot. Will it be OK to once again repot it in a bigger pot outside in spring? Thank you so much for this informative blog.
I keep my oxalis outside year round (zone 7). It still has flowers and some leaves after many nights in the 20s/30s (12/8/25). It has been in the same pot & dirt for 18 years. I am going to divide it when it has completely died back - the clay pot is crumbling. I have quite a few people that want corms to start their own plants. It starts coming back in early spring. Fish emulsion a couple times a year. Thank you for the great information on how to propagate.
My oxalis plant has developed white spots on the leaves. I have treated with Bon-Neem, but new growth continues to have spotted leaves. I would like to allow the plant to dry out and start again. Are the corms diseased? Should they be treated before repotting? Thank you. Your article is the most thorough I have found.
Hi Mary! I'm glad you enjoyed my post. I'm curious to see photos of it. Are you on Instagram? If so, you can DM me some photos (my account is @ohiotropics) and I can take a look and it would give me a better iday. You can certainly let it go dormant, and then start it back up into growth and see what happens. I just found this article though from Purdue University. Take a look and see if maybe this is what you have? https://www.e-gro.org/pdf/E-GRO_Bulletin_2_07.pdf


My green Oxalis seems to be heaving from the clay pot it's been in for years. The corms are all visible on the surface of the soil. The plant has grown tall and spindle. I am planning to divide and repot the plant, with the soil mixture you recommend. Will this take care of the problem?
Yes absolutely! It sounds like it is due for a repot.
Thank you so much for this information on transplanting oxalis plants. I also began raising them with a 4" gift plant. I've had mine for 20 years, and have shared them with family and friends all over the country!
You're very welcome! And I love your story! It's so fun to share plants 🙂
If I dig up the outdoor potted plant and separate corms to plant in smaller pots as 'gifts' for a couple friends, I'm assuming I keep them in the house over winter? I will probably plant a clump (if I have one like your photo) in a small pot. Will it be OK to once again repot it in a bigger pot outside in spring? Thank you so much for this informative blog.
Yes you can certainly keep them indoors, and you can place in a bigger pot if needed in the Spring too. I'm glad you enjoyed the blog!
I keep my oxalis outside year round (zone 7). It still has flowers and some leaves after many nights in the 20s/30s (12/8/25). It has been in the same pot & dirt for 18 years. I am going to divide it when it has completely died back - the clay pot is crumbling. I have quite a few people that want corms to start their own plants. It starts coming back in early spring. Fish emulsion a couple times a year. Thank you for the great information on how to propagate.
You're very welcome Barbara!
My oxalis plant has developed white spots on the leaves. I have treated with Bon-Neem, but new growth continues to have spotted leaves. I would like to allow the plant to dry out and start again. Are the corms diseased? Should they be treated before repotting? Thank you. Your article is the most thorough I have found.
Hi Mary! I'm glad you enjoyed my post. I'm curious to see photos of it. Are you on Instagram? If so, you can DM me some photos (my account is @ohiotropics) and I can take a look and it would give me a better iday. You can certainly let it go dormant, and then start it back up into growth and see what happens. I just found this article though from Purdue University. Take a look and see if maybe this is what you have? https://www.e-gro.org/pdf/E-GRO_Bulletin_2_07.pdf