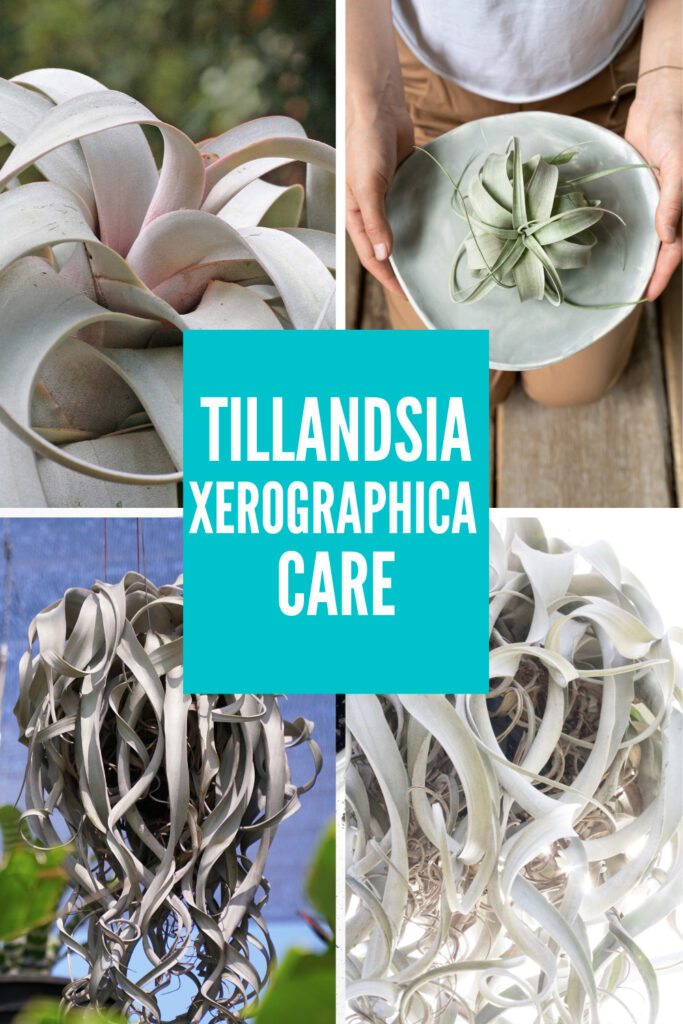
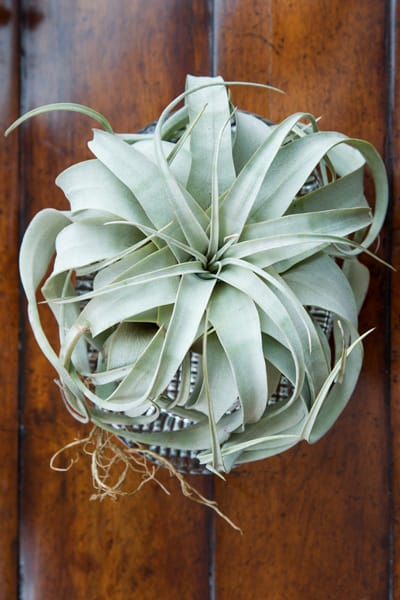
Tillandsia xerographica is often considered the King of Air Plants! This is due to its grand size when compared to most other Tillandsias. On top being a beautiful air plant, it is exceedingly easy to grow and can tolerate a lot more neglect than many Tillandsias. Keep reading to learn all about this amazing air plant and how to care for it!
In my experience, these are among the easiest air plants to grow in the home, and I will explain to you why. It is no wonder that this is one of the most popular air plant species.
It helps to know where plants grow in nature in order to give us a clue about how to grow them in our homes.
Tillandsia Xerographica is native to southern Mexico, El Salvador, Guatemala, and Honduras. They grow in semi-arid regions and in very sunny and dry conditions.
It is a very drought tolerant plant. In fact, the air plant species name, xerographica, says it all. The words "xeros" in Greek means dry.
Most of the moisture that they get is from morning dew in nature.
Tillandsias grow as epiphytes (attached to trees) or lithophytes (attached to rocks or stones) in nature. They often grow on the highest tree branches where they will receive very bright light.
They are in the Bromeliaceae family of plants (bromeliad family).
How Do You Care For Tillandsia Xerographica?
1. LIGHT
I have my Tillandsia xerographica growing right in front of a large wall of Eastern windows. It gets morning sun and is very happy in this location.
This particular air plant does like some direct sun so don't be shy about placing it in some direct sunlight inside your home for best results.
Many people make the mistake of not providing their xerographica air plants with enough light, and this species needs more light than most airplants.
During the winter months, don't be afraid of giving your T. xerographica plenty of sunny conditions if you can.
If you don't have enough natural light, artificial light from a nice, strong grow light will also work.
2. WATERING
Compared to many of the thinner leaved tropical air plant cousins, the thick leaved Tillandsia xerographica needs to be watered much less frequently.
For a while I was watering my plant about every other week. Then I started to let it go a little longer and it was still fine.
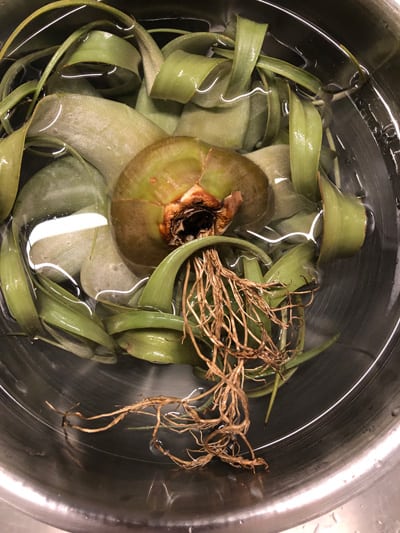
My preferred way of watering my xerographica air plant is to use the soaking method. I simply turn my plant upside down and place it in a deep bowl of water so it can be completely submerged.
I would say that I water my xerographica this way about once or twice a month. This is the procedure I follow:
Place the plant upside down in a deep bowl.
Fill the bowl with tepid (never cold!) or lukewarm water.
Let it soak for 30 minutes to an hour or so.
Take the plant out and shake it lightly several times while holding it upside down. You want to get all excess water out of any crevices to avoid rotting. Indoors, this is important because we don't have the benefit of good air circulation that is present outdoors that will dry out your plant.
Then I place the plant upside down onto a kitchen towel until it is dry.
Finally I place it back in its normal growing location.
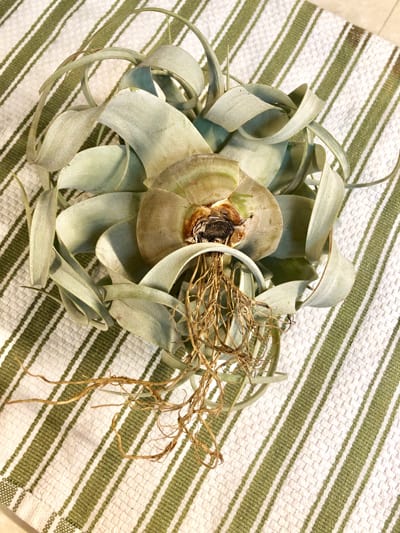
The fun part about growing Tillandsia xerographica is that you can "customize" how it looks! Depending on how dry you let it get, the leaves will be straighter or curlier.
If you let your plant dry out more, the leaves will be curly. If the plant is fully hydrated, they will be straighter.
Check out this very interesting and short YouTube video below where a Tillandsia grower illustrates this fact. You can visually see exactly what I'm talking about and then decide for yourself which one you prefer!
Would you like to save this post?
Enter your email, and I will send this link straight to you!
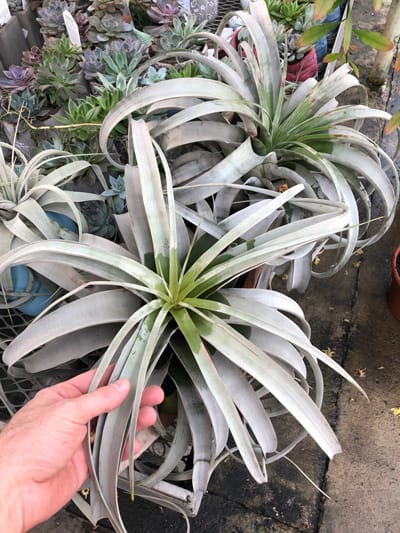
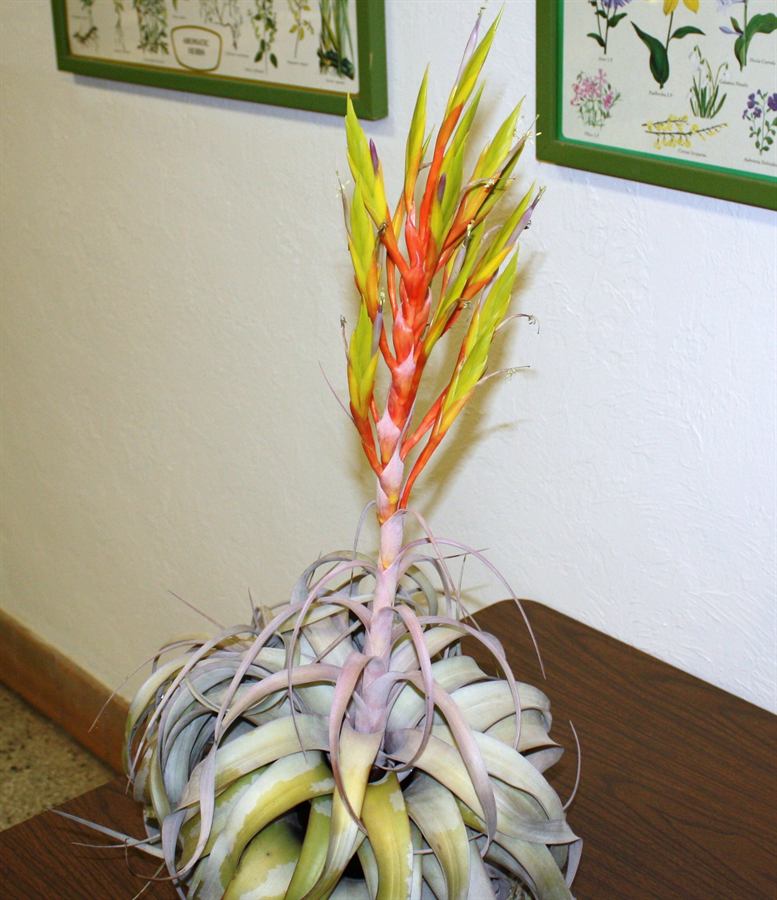
Depending on the subspecies, the size of this plant can vary. Take a look at this larger variety that I spotted at a nursery:
According to Tillandsia grower Airplant Man, never use distilled water to water your Tillandsias. Distilled water will remove nutrients by osmosis and kill your air plants.
Rainwater is of course preferred for any plant, but tap water or filtered water will work fine. I personally use plain tap water when I water my Tillandsia xerographica and all my other plants.
Compared to many other airplants (namely the ones with green leaves whose native habitat has much more rainfall), these require much less water, making them much easier to manage indoors since they will tolerate quite a bit of neglect.
3. FERTILIZING
I do have a special fertilizer that I like to use for my air plants. You'll have to check out my general Tillandsia care blog post where I detail this information!
Or if you want to keep it simple and use a fertilizer for all your houseplants, I'd recommend Dyna-Gro Grow. It's an amazing, complete fertilizer that is urea-free and you will see a difference with regular use!
It is not absolutely necessary to fertilize your air plants, but they will be healthier, bigger, have better flowering, and produce more pups if you do.
The xerographica plant is a slow grower, so ensuring that they receive enough light, combined with period fertilizing, will result in faster growth.
4. HUMIDITY & TEMPERATURE
The ideal temperature range is 22-28C or about 72-79F (this is the average temperature range in its natural habitat).
The average humidity range is about 60-72%, but in the home, if you can't provide high humidity, this plant is very forgiving.
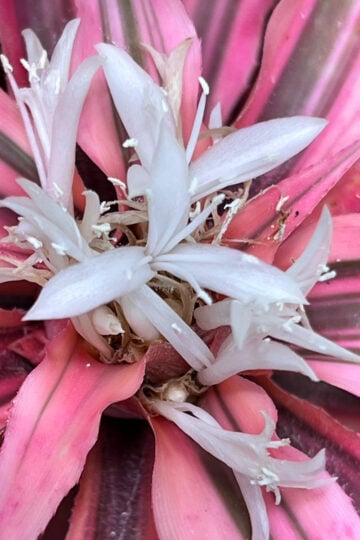
5. FLOWERING
If you are lucky enough, you will eventually get your xerographica to bloom. The most important factor to blooming is to have enough light, but good general care as well as applications of bromeliad fertilizer will encourage things along.
The floral bracts are quite stunning as you can see from the photo below!
There are various reasons why your air plant might be dying and many important things to remember so that you can avoid this.
My Air Plant is Rotting
One way to kill your Tillandsia xerographica, or any air plant for that matter, is to leave water sitting between the leaves for extended periods of time. In order to avoid this, you can do the following:
Give your Tillandsia a few good shakes after you soak it. Turn it upside down and shake it!
Allow your Tillandsia to dry upside down after you shake it.
I've never lost an air plant due to rotting before and it is because I follow these methods.
You might wonder why air plants don't rot in nature. This is simply because they have much better air circulation outdoors and are able to dry out on their own. Indoors, we need to make some adjustments to make up for lack of air circulation.
My Air Plant is Drying Out
Is your air plant drying out too much and you can't seem to keep it hydrated?
If you find this is the case, start soaking your Tillandsia like I described above in the watering section. You will not rot your Tillandsia out as long as you follow the procedure of shaking excess water and letting it dry upside down.
Be sure not to miss my YouTube video where I discuss air plant care tips including watering techniques.
It’s physically impossible for nutrients to be pulled out of a plant via osmosis, into distilled water. Osmosis is the pulling of water from a dilute solution into a more concentrated one. By definition, distilled water is dilute. It contains virtually no solutes. In contrast, a plant contains relatively concentrated nutrients. The exact opposite will happen. Water is drawn across the permeable membrane of the plant’s cell walls and into the cell contents which contain more solutes.
There is nothing wrong with using distilled water, as long as you also fertilize the water at some point.
Help! Even though I religiously soaked my Tillandasia xerographica I must not have shaken it well. Today I noticed some black spots on the leaves and when I shook it, it started to fall apart. It has been beautiful up to now. I have it upside down drying on a towel now. Is there any chance it sill recover? I’m heartbroken as I purchased the plant in memory of my mom who passed away last winter.
Hi Diane. I'm sorry to hear about your mother. It's hard to say without seeing photos though. Did all the leaves come off? If you're on Instagram or Facebook, feel free to send me a private message there (Instagram: @ohiotropics and on Facebook, I can be found under Ohio Tropics Houseplant and Garden Care).
Hello, thank you so much for the good information!!
I just purchased a xerographica air plant. I live in Wisconsin and I'm wondering if a south-facing window would be okay (you mentioned yours does good in an east-facing window).
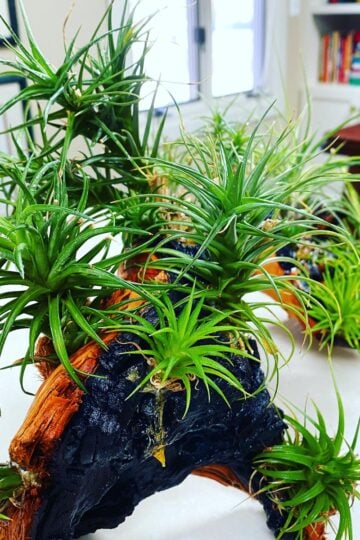
Hi Dori. This is an air plant and it does not grow in soil. You can grow it loose, by itself, or attach it to a piece of driftwood or something similar.
hi, I have a xerographic that bloomed and I cut the flower because it was already dry, I cut it in half and now it has a stem with leaves but very ugly, can I cut it flush with the stem?
I think I went too long in between waterings, and my baby looks so dried out on most of the leaves, and I can see on the outer leaves that the base looks brown. But I've resumed soaking as directed, and now the center looks green and healthy and happy. Should I strip away what I think is probably dead, or leave it all alone? Thanks in advance for your help!
Sadly, I'm on my third xerographica. The first one I was dunking once a week (very dry climate here) and shaking out the excess, drying upside-down on a towel, etc. and it developed rot in the center and fell apart.
I bought a second one and was told never to dunk it because it was impossible to get all the water out of the thick, curved center. I only dipped the side and ends of the leaves in water and never got a drop of water in the center and it's only been a month and the center fell out with rot again. I'm baffled since I didn't get *any* water within the center or folds of the leaves and my indoor humidity has only been between 30-40% lately.
I want to figure it out rather than giving up, so I went back and bought a third one yesterday. The shop owner suggested I turn it upside down and mist the bottom of the leaves and plant only. Will that give it sufficient water and prevent internal rot sufficiently? Or do you have a different suggestion for me?
Hi Andrea, that is a little perplexing and I can sense your frustration! What kind of water are you using? When you were dunking it, were you just dunking it quickly and taking it out, or letting it soak?
I just bought a plant from the florist for a Christmas present. It has no roots on the bottom like I see in pictures. Is it going to be okay without the roots?
Hi Diane! Yes, your plant should be just fine! They just mainly use the roots to attach onto trees in nature. That's the main purpose that they serve. I have one with roots and one without.
I just received 2 large xerographica that I ordered 2 weeks ago and when they were getting their 10min bath yesterday, when I went to pick up one the center fell out of it? I’ve never seen such and definitely not finding much on here that could tell me what caused this. It’s the 2nd bath since I’ve had it. I use bottled spring water mixed with my saved rain water. It looks healthy as ever is why it’s so puzzling. I emailed the company late yesterday so if I hear anything from them it’ll be next week but in meantime do you know what caused this? Is it done? Dead? Sick? It has dark green leaves, no brown anywhere and baby shoots were coming out of the center. I stuck it all back in but that’s probably not the right thing to do? Dunno I’m stumped. I appreciate your time and help.
Hi Amanda, did it spend time in cold weather during shipping at all? When you water, do you shake it out to dislodge any water so that it doesn't rot? What kind of light do you have them in?
I bought a large box of air plants including three xerographica about a month ago. I read that air plants like rainwater, so I've been using rainwater from our rainwater collection system for my plants by filling my bathtub every 9 to 10 days and dunking them. This morning is my third time giving them all a dunk, and I noticed one of my xerographica has reddish/brownish areas on the center of leaves. The other two xerographica seem healthy, and they've all been watered and dried together.
One possibility is that I picked up my air plant while I had oil on my hands. Could this harm the plant? (I regularly moisturize my hands with almond or jojoba oil.) I suspected oil as a possibility because when I dunked it, it had little spots that seemed like oil spots which I was able to rub away in the water. The only thing is that these spots weren't possibly created by my touching it. It looked more like it had been spritzed with oil, which isn't something that seems possible in the location I've been keeping it (fairly high up in a corner of a room).
The other possibility would be light. I have most of my plants on glass shelves *above* my windows. This means they get virtually no direct light at all, but indirect light all day long. I'm unsure how it compares to being 4 feet from a window at a lower location. They're about 1 foot from the window, but above is very different than below (because of the angle of the sunrays).
The one xerographica that shows some browning has been located on a lower shelf further away from my windows, about three feet from the window, but still near the top of the window height. It's been very cloudy, so I doubt it received direct sunlight during this time.
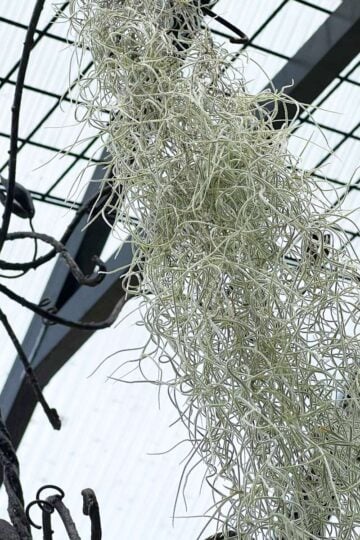
Interestingly, my one other air plant that is looking ill was in a nearby location. That's my Spanish Moss. In the case with the moss it seems that the part of the plant that was on the underside is unhealthy and I suspect it wasn't dry enough when I put it on the shelf. Either that, or the bottom side just hasn't been getting enough light.
The last factor that maybe could be affecting my unhappy xerographica is my humidifier. It runs on a timer for only 15 minutes at a time, hours apart. I have it on the glass shelf above my western window and many air plants are near it. I figured they'd like that since it doesn't get them wet really, but it does make the air moist. All the plants around the humidifier look as healthy as when they arrived, so I would think it's a problem, except that this xerographica is the xerographica closest to the humidifiers line of mist (many of the air plants are much closer than any of the xerographicas).
After writing this all out I thought I might have a clearer idea what's the matter. But I don't. 🙁
Hi Raederle! Tillandsia xerographica come from drier climates so they actually don't need high humidity. You had some interesting observations that helped me give you some recommendations. If you are regularly handling your airplants, the spotting could very well be from your hand creams. Perhaps try and moisturize your hands after you handle the plants. As far as light, I would move them so that they are actually in front of the window and not above it. Xerographica actually benefit from some direct sun and need more light than many other Tillandsias. I hope this helps!


")


It’s physically impossible for nutrients to be pulled out of a plant via osmosis, into distilled water. Osmosis is the pulling of water from a dilute solution into a more concentrated one. By definition, distilled water is dilute. It contains virtually no solutes. In contrast, a plant contains relatively concentrated nutrients. The exact opposite will happen. Water is drawn across the permeable membrane of the plant’s cell walls and into the cell contents which contain more solutes.
There is nothing wrong with using distilled water, as long as you also fertilize the water at some point.
Thanks for the commentary Cavan.
I am wondering if it would be a good idea to display my Xerographica in a jute hanger and if so how would I go about watering it?
I don't see why you couldn't! As long as it's getting enough light and air circulation. You can just take it out the hanger when you need to water it.
Help! Even though I religiously soaked my Tillandasia xerographica I must not have shaken it well. Today I noticed some black spots on the leaves and when I shook it, it started to fall apart. It has been beautiful up to now. I have it upside down drying on a towel now. Is there any chance it sill recover? I’m heartbroken as I purchased the plant in memory of my mom who passed away last winter.
Hi Diane. I'm sorry to hear about your mother. It's hard to say without seeing photos though. Did all the leaves come off? If you're on Instagram or Facebook, feel free to send me a private message there (Instagram: @ohiotropics and on Facebook, I can be found under Ohio Tropics Houseplant and Garden Care).
@Raffaele Di Lallo, sent a message and photos through facebook
Hello, thank you so much for the good information!!
I just purchased a xerographica air plant. I live in Wisconsin and I'm wondering if a south-facing window would be okay (you mentioned yours does good in an east-facing window).
Thank you!!
Hi Kathy! YES! They love a lot of light and direct sun.
I have a question.Do u grow this plant in soil.IDN how it grows?Can u help please.Thanku.
Hi Dori. This is an air plant and it does not grow in soil. You can grow it loose, by itself, or attach it to a piece of driftwood or something similar.
hi, I have a xerographic that bloomed and I cut the flower because it was already dry, I cut it in half and now it has a stem with leaves but very ugly, can I cut it flush with the stem?
Hi Gisela! Yes, you can cut the rest of the stem off. Your plant should start to grow pups at the base of the plant soon.
I think I went too long in between waterings, and my baby looks so dried out on most of the leaves, and I can see on the outer leaves that the base looks brown. But I've resumed soaking as directed, and now the center looks green and healthy and happy. Should I strip away what I think is probably dead, or leave it all alone? Thanks in advance for your help!
Sadly, I'm on my third xerographica. The first one I was dunking once a week (very dry climate here) and shaking out the excess, drying upside-down on a towel, etc. and it developed rot in the center and fell apart.
I bought a second one and was told never to dunk it because it was impossible to get all the water out of the thick, curved center. I only dipped the side and ends of the leaves in water and never got a drop of water in the center and it's only been a month and the center fell out with rot again. I'm baffled since I didn't get *any* water within the center or folds of the leaves and my indoor humidity has only been between 30-40% lately.
I want to figure it out rather than giving up, so I went back and bought a third one yesterday. The shop owner suggested I turn it upside down and mist the bottom of the leaves and plant only. Will that give it sufficient water and prevent internal rot sufficiently? Or do you have a different suggestion for me?
Hi Andrea, that is a little perplexing and I can sense your frustration! What kind of water are you using? When you were dunking it, were you just dunking it quickly and taking it out, or letting it soak?
I just bought a plant from the florist for a Christmas present. It has no roots on the bottom like I see in pictures. Is it going to be okay without the roots?
Hi Diane! Yes, your plant should be just fine! They just mainly use the roots to attach onto trees in nature. That's the main purpose that they serve. I have one with roots and one without.
I just received 2 large xerographica that I ordered 2 weeks ago and when they were getting their 10min bath yesterday, when I went to pick up one the center fell out of it? I’ve never seen such and definitely not finding much on here that could tell me what caused this. It’s the 2nd bath since I’ve had it. I use bottled spring water mixed with my saved rain water. It looks healthy as ever is why it’s so puzzling. I emailed the company late yesterday so if I hear anything from them it’ll be next week but in meantime do you know what caused this? Is it done? Dead? Sick? It has dark green leaves, no brown anywhere and baby shoots were coming out of the center. I stuck it all back in but that’s probably not the right thing to do? Dunno I’m stumped. I appreciate your time and help.
Hi Amanda, did it spend time in cold weather during shipping at all? When you water, do you shake it out to dislodge any water so that it doesn't rot? What kind of light do you have them in?
I bought a large box of air plants including three xerographica about a month ago. I read that air plants like rainwater, so I've been using rainwater from our rainwater collection system for my plants by filling my bathtub every 9 to 10 days and dunking them. This morning is my third time giving them all a dunk, and I noticed one of my xerographica has reddish/brownish areas on the center of leaves. The other two xerographica seem healthy, and they've all been watered and dried together.
One possibility is that I picked up my air plant while I had oil on my hands. Could this harm the plant? (I regularly moisturize my hands with almond or jojoba oil.) I suspected oil as a possibility because when I dunked it, it had little spots that seemed like oil spots which I was able to rub away in the water. The only thing is that these spots weren't possibly created by my touching it. It looked more like it had been spritzed with oil, which isn't something that seems possible in the location I've been keeping it (fairly high up in a corner of a room).
The other possibility would be light. I have most of my plants on glass shelves *above* my windows. This means they get virtually no direct light at all, but indirect light all day long. I'm unsure how it compares to being 4 feet from a window at a lower location. They're about 1 foot from the window, but above is very different than below (because of the angle of the sunrays).
The one xerographica that shows some browning has been located on a lower shelf further away from my windows, about three feet from the window, but still near the top of the window height. It's been very cloudy, so I doubt it received direct sunlight during this time.
Interestingly, my one other air plant that is looking ill was in a nearby location. That's my Spanish Moss. In the case with the moss it seems that the part of the plant that was on the underside is unhealthy and I suspect it wasn't dry enough when I put it on the shelf. Either that, or the bottom side just hasn't been getting enough light.
The last factor that maybe could be affecting my unhappy xerographica is my humidifier. It runs on a timer for only 15 minutes at a time, hours apart. I have it on the glass shelf above my western window and many air plants are near it. I figured they'd like that since it doesn't get them wet really, but it does make the air moist. All the plants around the humidifier look as healthy as when they arrived, so I would think it's a problem, except that this xerographica is the xerographica closest to the humidifiers line of mist (many of the air plants are much closer than any of the xerographicas).
After writing this all out I thought I might have a clearer idea what's the matter. But I don't. 🙁
Help?
Hi Raederle! Tillandsia xerographica come from drier climates so they actually don't need high humidity. You had some interesting observations that helped me give you some recommendations. If you are regularly handling your airplants, the spotting could very well be from your hand creams. Perhaps try and moisturize your hands after you handle the plants. As far as light, I would move them so that they are actually in front of the window and not above it. Xerographica actually benefit from some direct sun and need more light than many other Tillandsias. I hope this helps!
how to know when it is through flowering.
You'll just see the flowers dry up. Is this what you were asking?
Can I cut the long flower stem when it's done flowering
Yes absolutely! Your original plant will start to slowly die, but should produce pups soon and you will have another generation! 🙂