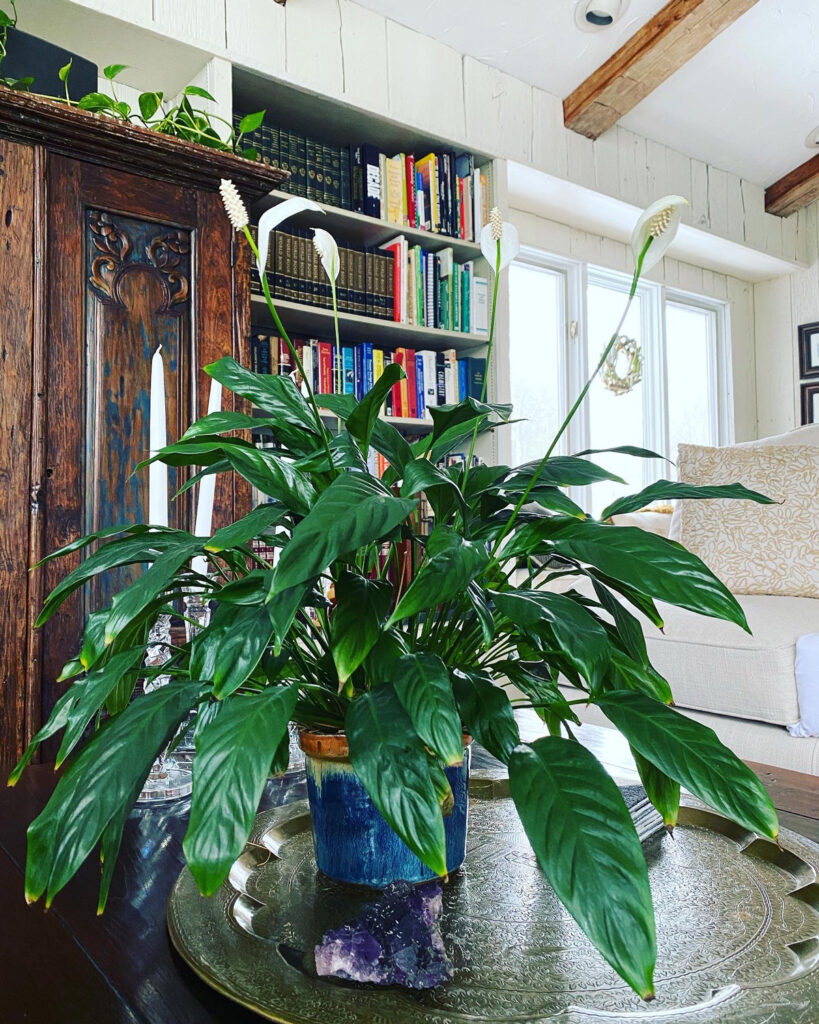
When you have a peace lily (Spathiphyllum) that is extremely root bound and it is time to repot into a bigger pot, there is one important step that many people miss. And if you miss this step, your plant will not benefit from the repotting. In fact, it may even continue to decline!
Keep reading so you can ensure that you don't miss this very important step so that your plant will thrive after repotting.
Before I get into the steps of repotting a root bound peace lily, how do you know if your plant potentially needs repotting?
Before taking the plant itself out of its pot, there are a few indications that will tell you that your peace lily may need a bigger pot.
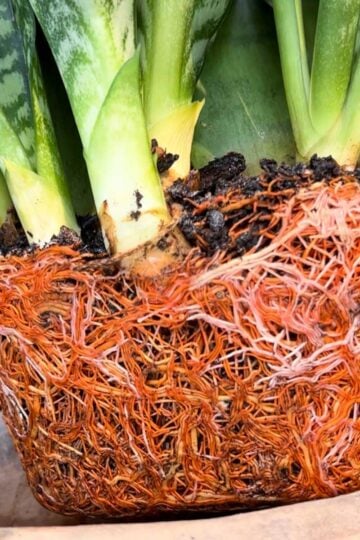
There are a lot of hard, matted roots on the surface of your soil.
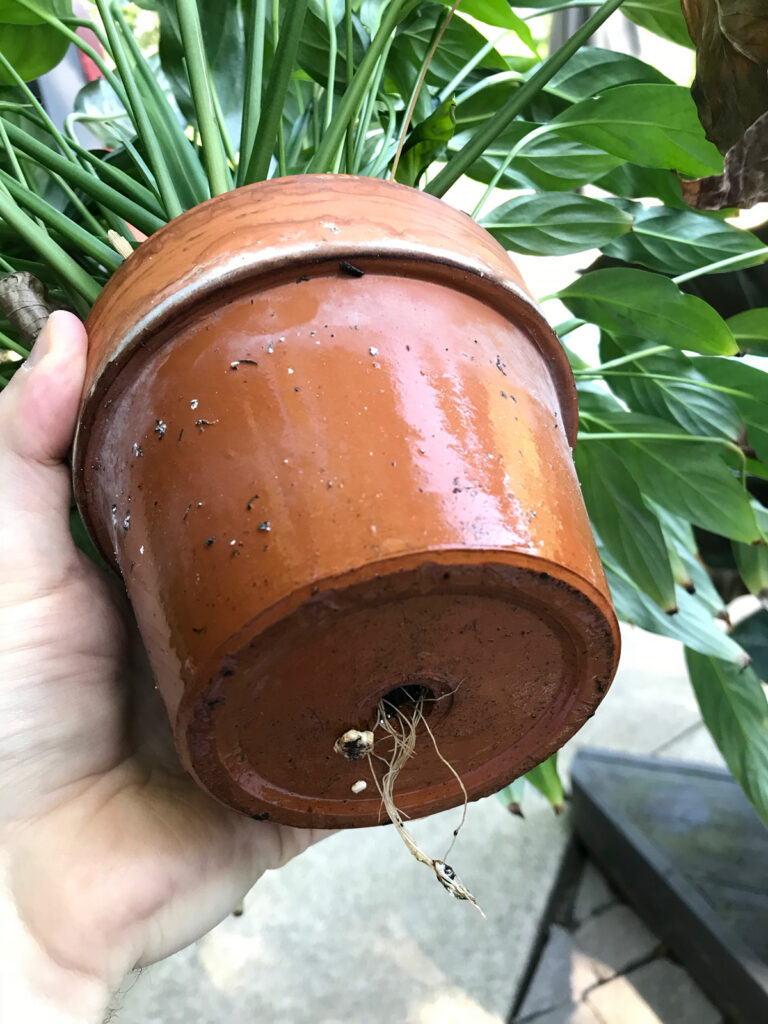
Roots may be growing out of the drainage hole(s).
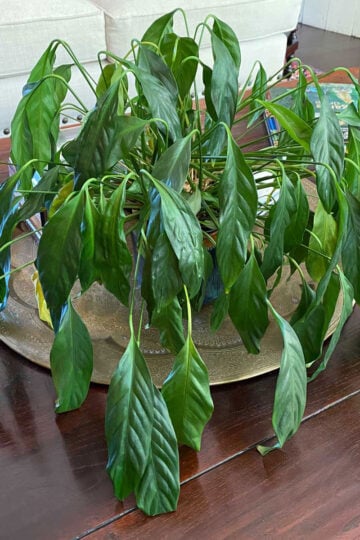
Your peace lily's soil seems to be drying out much faster than it used to and you may find it difficult to keep up with watering it.
Roots growing out of the drainage hole is one indication that your peace lily is root bound.
These are all indications that your peace lily's roots are filling up the pot and that it needs help! Let's get into the 3 steps to repot.
1. Remove from the pot and loosen the root ball
First, remove your plant from the pot. If you have it growing in a plastic nursery pot, simply squeeze the perimeter of the pot and gently pull the plant out. If you have your plant in a rigid container, run a knife around the inside perimeter of the pot, and this should help you pull the plant out of the pot.
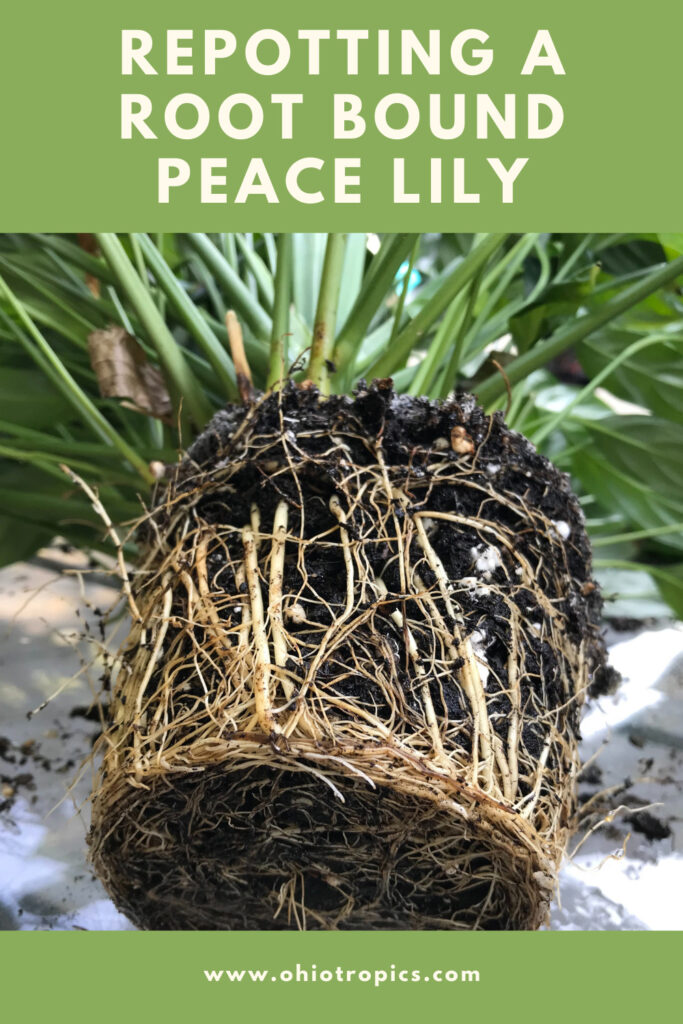
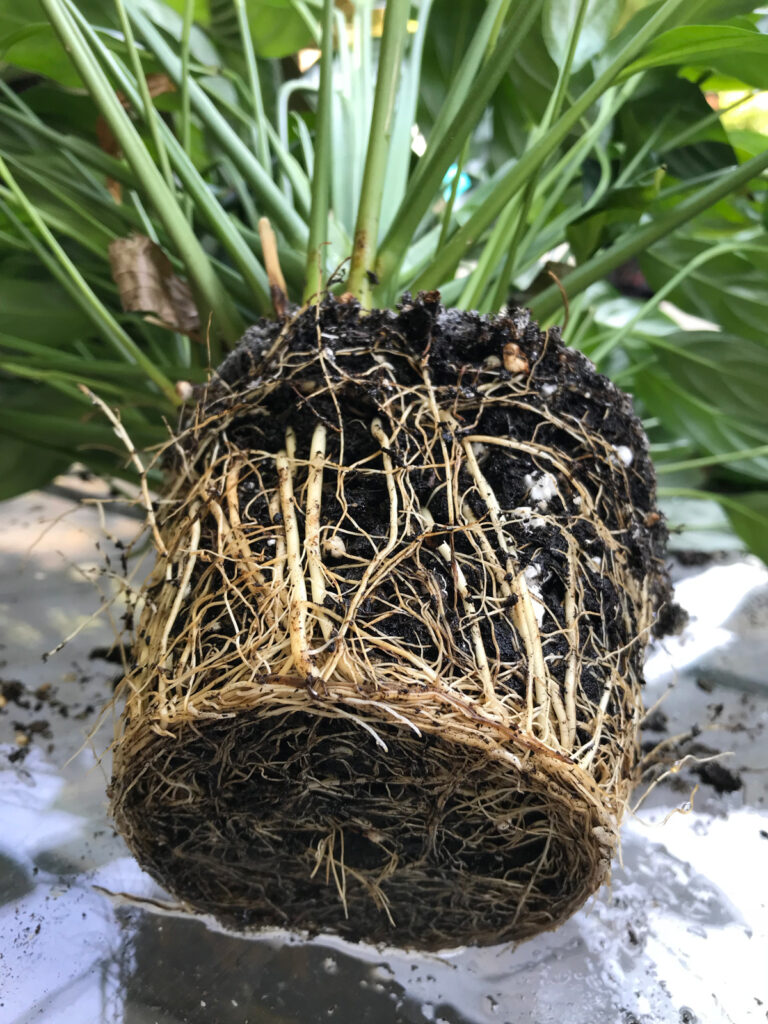
Here is one of my peace lilies after I removed it from its pot. Take a look at how root bound it is. Note the roots circled around the bottom and how tightly packed they are.
Loosening the rootball is a very critical step in repotting a plant. If you fail to do this (particularly for peace lilies or any plants that are extremely root bound), your plant will not benefit at all when you place it in its new pot.
Once I had a peace lily (Spathiphyllum) that I had in a big pot and I couldn't figure out why it wasn't doing well.
The plant was growing very little and had started to decline. I had repotting it a few years back, and the plant wasn't growing to my liking, so I decided to take it out of its pot to check it out.
What I found was a little shocking. No new roots had grown into the pot! And it had been in that pot for years! The roots stayed contained to the tight rootball, which I obviously did not loosen when I repotted. Shame on me! It was probably out of laziness, but at least I determined what happened.
How how do you loosen a peace lily root ball?
Two Ways to Loosen the Rootball
There are two ways that I would recommend to loosen the rootball.
I would always start by making sure that your peace lily is watered. Then wait for a few hours, or even the next day, to begin working on it. This will make it easier to tease the roots apart.
Would you like to save this post?
Enter your email, and I will send this link straight to you!
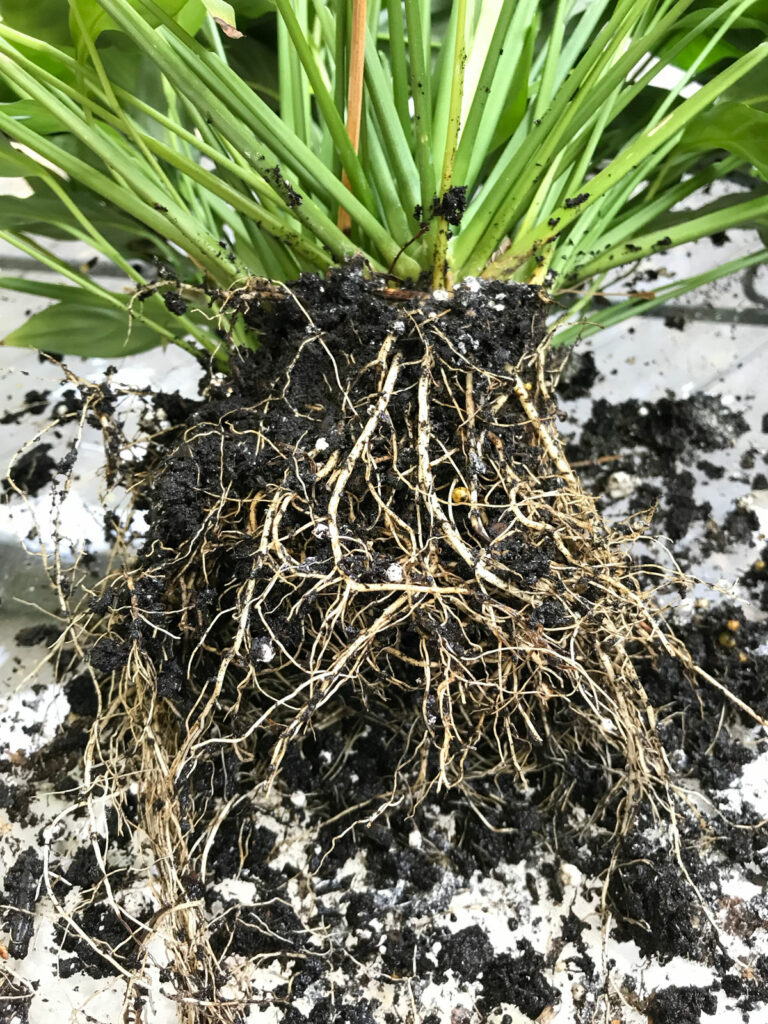
When you have your plant out of the pot, start by loosening the roots at the bottom, and then work on the sides.
Gently pry and separate the roots to loosen them up a bit. You don't have to go crazy, but this will go a long way in stimulating more root and plant growth once you repot into a larger pot.
Here is what the peace lily looked like after I loosened the root ball.
You are essentially loosening the roots so that they are more available to start growing into new potting mix in its new pot.
Sometimes if you have a SUPER rootbound plant, especially plants with fine, tight and fibrous roots, it may not be possible to use your hands to loosen the rootball.
In these cases, simply take a sharp knife and make several vertical slashes or cuts (1-2 inches long or so) on the sides and at the bottom of the rootball. This will at least give your plant an opportunity to grow new roots where you made the cuts.
Don't worry about damaging a few roots here and there. They will recover, and your plant will be much better off!
If you have a tight rootball and you don't take either of the measures mentioned above, your plant might suffer the same fate of my poor Spathiphyllum that I mentioned above (which is doing great now by the way!)
2. Choose a new pot
Next, choose a new pot. My rule of thumb when repotting is to choose the next pot size up from the old pot. For example, if you have a plant in a 4 inch diameter pot, your new pot should be a 6 inch diameter pot.
If you choose a pot that is much bigger, the potting mix will potentially take too long to dry out.
By all means, always choose a pot with a drainage hole. I find myself planting directly into plain green nursery pots with drainage holes. Then I slip the plant into a decorative pot.
3. Pot it up using a well-drained potting mix
Lastly, choose a well-drained potting mix, but one that retains a good amount of moisture since these are moisture loving plants.
My go-to for peace lilies, and many other leafy tropicals, is 3 parts of a good potting soil (like Miracle-Gro or Espoma that you can purchase on Amazon) and 1 part perlite.
Another option, if you want to buy an AMAZING mix that you can use straight out of the bag is to use the Rainforest Soil Blend from Oh Happy Plants. You will receive 10% off at checkout automatically, for any product, if you use my link.
That's all there is to it! Be sure not to miss my peace lily care post which describes all the conditions that you plant needs to thrive. I've also written a post on all the causes of why your peace lily is drooping and what you can do to fix it.
Have you repotted your root bound peace lily lately? Comment below. I'd love to hear!
Hi Raffaele,
I wish I had seen your instructions before I repotted my 20 year old peace lily a week ago. It had never been repotted. I may have been too aggressive in untangling the roots and pulled many of the thinner ones off. I really only wanted to add more soil to the bottom of the pot since a lot had eroded over the years. I washed the pot, added fresh soil, then the plant and watered it (including plant food). The very next day the leaves started yellowing and are droopy. It’s looking worse by the day. Can I save it?
Hi Lucy! It's hard to say without actually seeing the plant and what you did, but I wouldn't disturb it or take it out of the pot. Let it be and see what happens. Don't cut off any green leaves, even if they're droopy. You can cut the yellow ones off if you'd like. If you're on Instagram or Facebook, private message me some photos and I can take a look. Here are my accounts:
Instagram: https://www.instagram.com/ohiotropics
Facebook: https://www.facebook.com/OhioTropics/
I needed to repot a new peace lily that was extremely root bound. I cut off only the circle of roots stuck at the bottom. As I was reflecting on where and how to loosen such a large and tight root ball, my brain had a light go off on.... Use the toilet bowl instead of the sink or a pail. A few swishes up and down in the toilet bowl and the roots became 100% free of old soil. I did this twice in fresh water and flushed the dark brown liquid away. The roots were completely bare and not damaged.
A week after repotting and my peace lily is smiling. I will definitely use this new method (new for me) for future repotting.


")
")
I’m just seeing this after repotting my gifted peace lily in Leca. It seems to like it but now I’m wondering if a soil mix is best?
They can really grow in either one!
Hi Raffaele,
I wish I had seen your instructions before I repotted my 20 year old peace lily a week ago. It had never been repotted. I may have been too aggressive in untangling the roots and pulled many of the thinner ones off. I really only wanted to add more soil to the bottom of the pot since a lot had eroded over the years. I washed the pot, added fresh soil, then the plant and watered it (including plant food). The very next day the leaves started yellowing and are droopy. It’s looking worse by the day. Can I save it?
Hi Lucy! It's hard to say without actually seeing the plant and what you did, but I wouldn't disturb it or take it out of the pot. Let it be and see what happens. Don't cut off any green leaves, even if they're droopy. You can cut the yellow ones off if you'd like. If you're on Instagram or Facebook, private message me some photos and I can take a look. Here are my accounts:
Instagram: https://www.instagram.com/ohiotropics
Facebook: https://www.facebook.com/OhioTropics/
@Raffaele Di Lallo, thank you. Sending pics now.
Hello Raffaele,
I forgot to mention that your info about Peace Lily was excellent. I learned some facts and the photos helped. Thank you
You're very welcome Lorraine!
I needed to repot a new peace lily that was extremely root bound. I cut off only the circle of roots stuck at the bottom. As I was reflecting on where and how to loosen such a large and tight root ball, my brain had a light go off on.... Use the toilet bowl instead of the sink or a pail. A few swishes up and down in the toilet bowl and the roots became 100% free of old soil. I did this twice in fresh water and flushed the dark brown liquid away. The roots were completely bare and not damaged.
A week after repotting and my peace lily is smiling. I will definitely use this new method (new for me) for future repotting.
Now that is a very creative way that I've never heard anyone do 😀 Thanks for sharing!