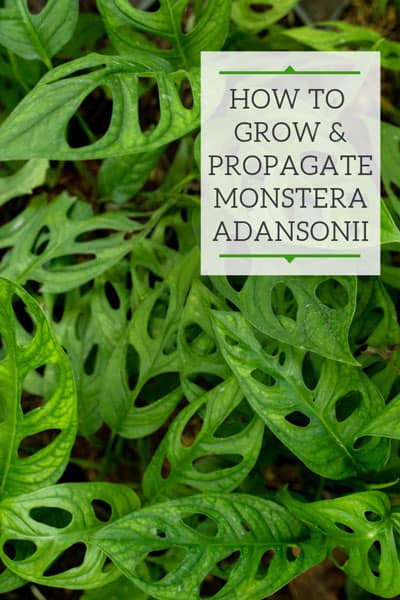
There are more Monsteras out there than the enormously popular Monstera deliciosa...and Monstera adansonii is one of them! Also known as Swiss Cheese Plant or Swiss Cheese Vine, Monstera adansonii is a much more space conscious plant.
Keep reading and I will tell you all about the care and propagation of this amazing and easy to grow plant!
Would you like to save this post?
Enter your email, and I will send this link straight to you!
Allow me to have a rant about common names though before we talk about care and propagation.
If you do a search engine query on Swiss Cheese Plant, you will find both Monstera adansonii as well as Monstera deliciosa.
Although both Monsteras, they are completely different species. To make it even more confusing, another common name for this plant is Monkey Mask plant.
Hence, my frustration with common names! If you have been following me for a while on my blog or my Instagram (@ohiotropics), you know that I prefer to use the Latin names for plants in most cases, so Monstera adansonii it is!
Sometimes this plant is mistakenly listed under Monstera friedrichsthalii, but adansonii is the correct species name.
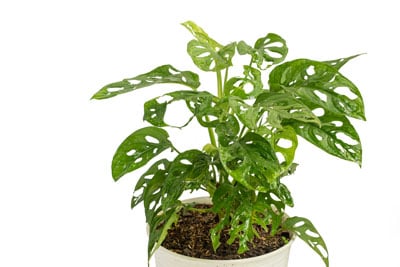
One of the reasons I like Monstera adansonii is its ease of care, as well as its rapid growth rate. In no time, you will be propagating this plant and have more than you know what to do with!
Table of Contents
FUN FACTS ABOUT MONSTERA ADANSONII
This plant is a pretty widespread climbing plant that is native to many areas in South America and Central America.
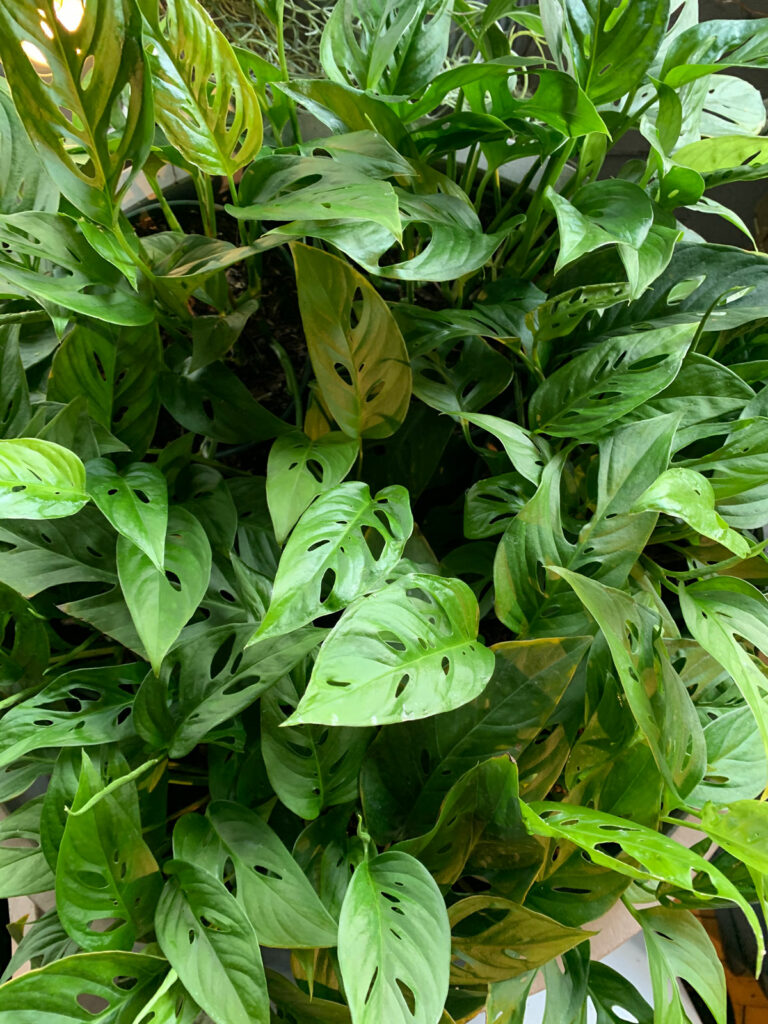
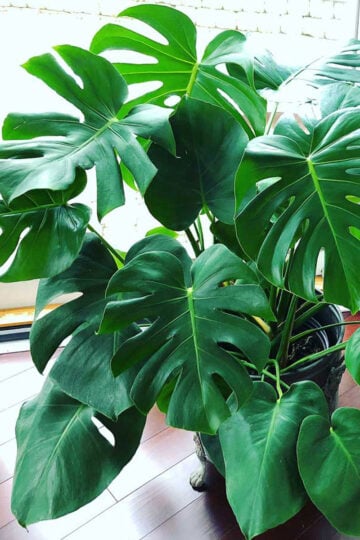
Although many times they are sold as hanging baskets, these are actually climbers! But of course you can grow these either way.
When grown with a support, such as a moss pole or wooden post or something similar, the plant will grow larger and larger leaves over time as the plant gets taller. Don't expect this overnight though. It will take a while!
Be sure to check out my blog post on how to make your own moss pole if you are interested. They're very high quality and better than anything I've been able to purchase.
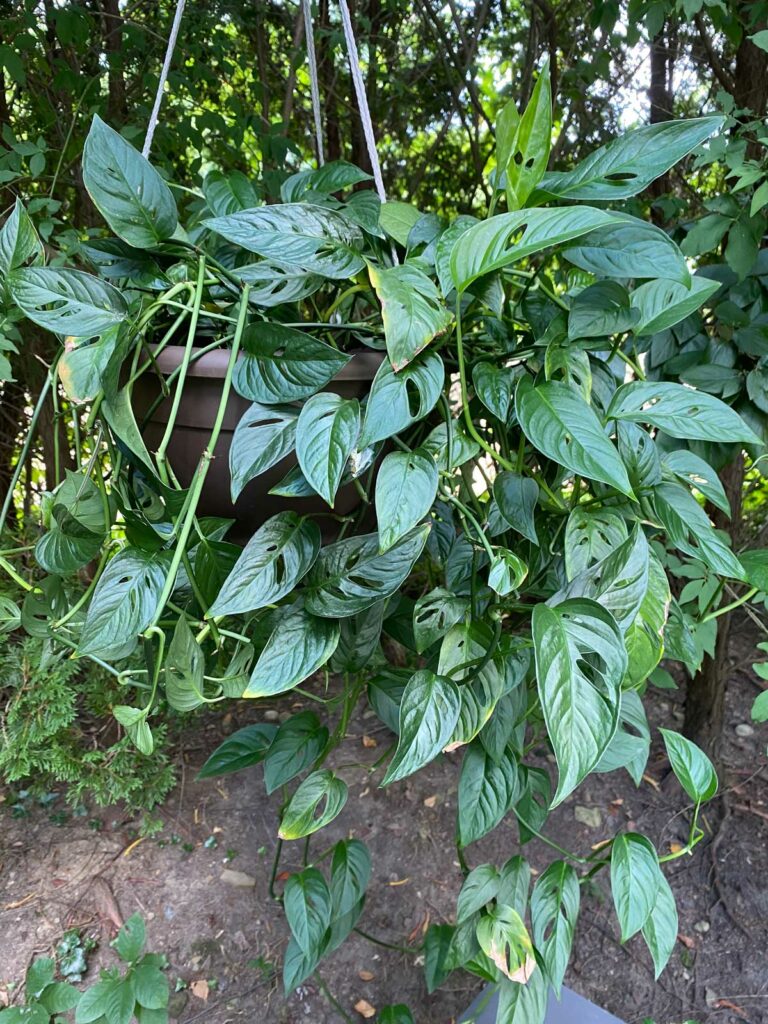
Or you can just simply have it cascading down as a hanging basket. It just all depends on what you want to do. They are beautiful either way!
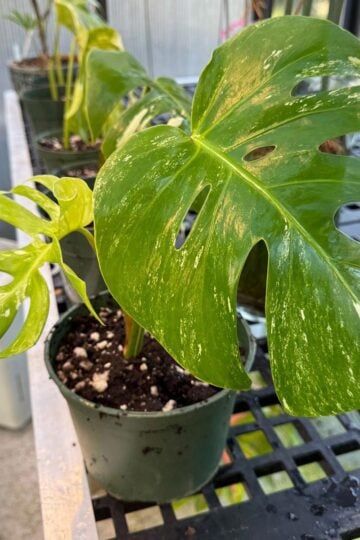
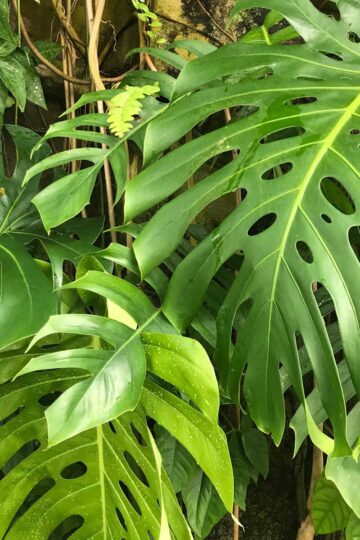
Remember though that juvenile leaves will have no holes. As the plant grows older, the newer leaves will develop more and more holes, which are called fenestrations.
Monstera fenestrations
It is thought that the fenestrations evolved in order to allow the plant to be better suited to withstanding windy and wet tropical environments in nature.
Take a look at a mature Monstera adansonii growing on a tree. Notice how different the leaves look.
One last point before we get into the care and propagation, is that Monstera adansonii is often sold as Monstera obliqua which is a very rare and very expensive species.
Please be sure to purchase from a reputable seller to avoid scams!
This plant is amazingly adaptable to many different light conditions. It is quite tolerant of lower light, but if you understand how these plants grow in nature, it will give you a clue on how to care for these plants.
Monstera adansonii, like some other species in the Monstera genus, will start off by growing at the base of a tree, and climb its way up to the canopy. At the base of a tree, the conditions will be pretty shady.
Near the canopy, there will be direct sun. So these are tolerant to different light conditions.
In the home, in order to provide the best appearance, I would at a MINIMUM place it by any window. Although these may be listed as "low light" houseplants, it just means they tolerate low light.
If you place these plants in a location too far from a window with dim light, they will grow very spindly. They will survive for a while, but they won't look too great!
I have my own plant growing in front of big Northern window in our sunroom. That room also has a wall of Eastern windows and a skylight, so it gets plenty of bright indirect light, and also some direct morning sun.
I would say the best lighting conditions for these plants is bright indirect light provided by a Northern window or Eastern windows work beautifully too. Gentler morning sun can be very beneficial.
If you live in areas that have intense sun, you may want to diffuse the direct sun with blinds or a sheer curtain. Contrary to popular belief, these plants can take some direct sun! I would experiment and see what works for you.
This is not a magic recipe and there is no ONE soil recipe that will work. Sometimes I add a bunch of orchid bark to my mixes instead. This works equally well!
I normally have orchid bark on hand anyway since I grow tons of orchids.
But the perlite/soil blend that I mentioned works exceedingly well! The intent is to provide a nice airy mix that these plants love because it provides lots of oxygen to the roots as well as incredibly drainage.
As far as watering goes, avoid extremes. These plants HATE to go completely dry and they hate staying wet just as much.
If you let them go completely dry, a couple things will happen. You will get plenty of yellow leaves (especially at the base) and the tips of your leaves will be brown and crispy.
On the other hand, if they stay constantly wet, then you will increase the possibility of root rot. One of the keys to avoiding a constantly wet soil is to make sure your plant is growing in good light and that you have a nice airy potting mix like I mentioned above.
What I like to do for watering is to let the top inch or two dry out (depending on the size of your pot) and then water thoroughly. Then you would simply wait for the top inch or two to go dry again, and repeat!
It's that simple. Just don't go by a calendar. If you tend to be one of the "once a week" waterers, and you go to check your plant's soil and it is still wet on the surface, don't water. Wait a little longer.
One thing that you have to watch though is that the airier potting mixes will dry out much more quickly. This is MUCH better than your potting mix taking too long to dry out.
This is how root rot happens. When soil stay wet for too long, especially if your potting mix is not aerated properly. Wet roots for extended periods along with lack of oxygen will cause their demise.
So keep an eye on your plants! Use your finger to determine how dry your potting mix is and water accordingly.
FERTILIZING MONSTERA
I have written about fertilizers in the past and the ones I've recommended are great. If you'd like to simplify though and get a fantastic all-purpose fertilizer, look no further than Dyna-Gro Grow.
The link will take to you amazon and I've totally been converted. This is an amazing, COMPLETE and very versatile fertilizer.
There are so many benefits. It is urea free so it won't burn your plants. You can use it very effectively as a part of your normal fertilizing routine as well as with any hydroponic growing.
The instructions for usage are very simple and right on the bottle. You will never get any nutrient deficiencies since it contains all the major macro and micronutrients.
I now use Dyna-Gro Grow for most of my houseplants as my go-to all-purpose fertilizer. The results are just fantastic.
For Monstera adansonii, and all of my foliage houseplants, I mix about ¼ teaspoon per gallon and water with that every time I water. The directions are right on the bottle for various methods of fertilizing.
Sometimes I skip the fertilizer and water with plain water. This is mainly out of laziness though 🙂
Remember though that you should NOT use fertilizer to compensate for poor lighting conditions or poor watering practices! It will not make up for poor conditions!
PROPAGATING MONSTERA ADANSONII
In my opinion, this plant is one of the easiest plants to propagate. Just as easy as propagating pothos. In fact, the plant basically tells you what to do! Let's take look at how.
My own plant that I have was started by cuttings that were sent to me by a friend. I received them in the mail and they were slightly wilted when I received them, but they bounced back quickly.
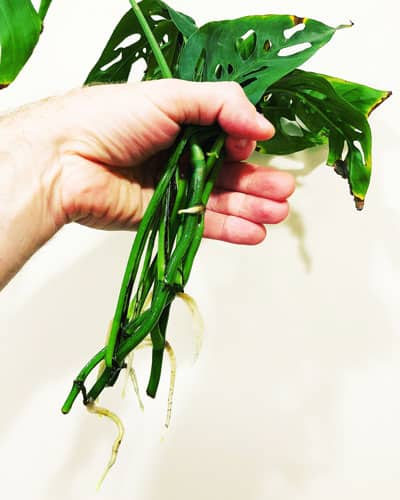
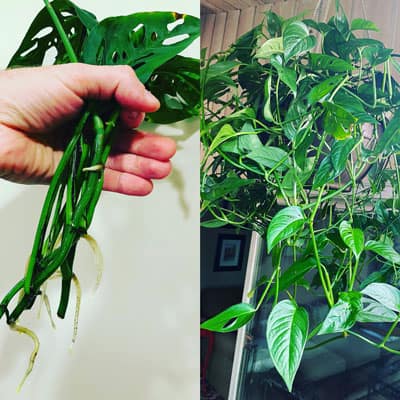
Here is the handful of cuttings that I rooted to make my original plant.
A year later, this small handful of cuttings resulted in a plant that had 10 foot vines! Let me take you step by step now into how to propagate Monstera adansonii.
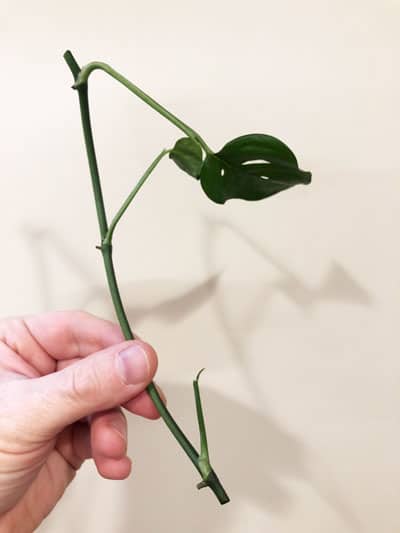
The water propagation process is pretty simple! You basically want to make cuttings of the vine so that each cutting has at least one node and one leaf.
The node is where the leaf and petiole attach to the vine. In fact, chances are that you can even see roots already forming on each node. Take a look at the two roots that are already visible.
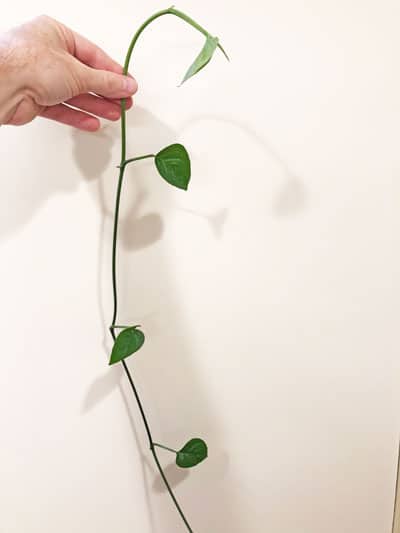
So, just start off with your long vine, and cut it into as many cuttings as you want. Here is a long vine that I'm holding up before I cut it up.
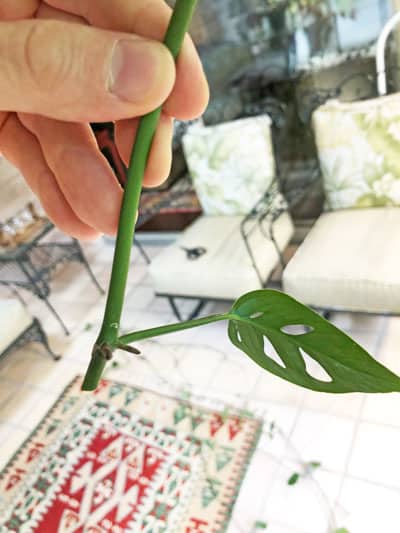
Then simply cut up as many cuttings as you want. Here is an example of where to cut. You'll want to cut a little bit below each node.
But remember to keep at least one node and one leaf on each final cutting, like in the photo below.
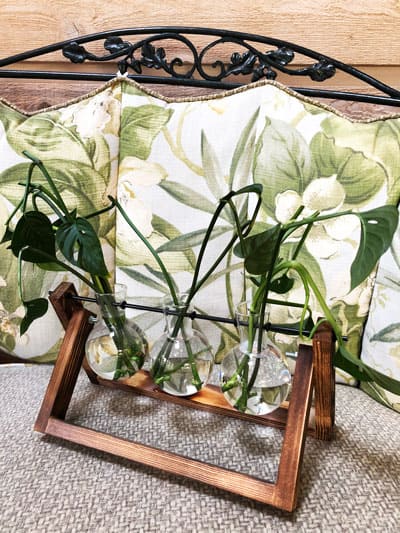
Finally place all the cuttings in a vase and change the water regularly. Bare minimum once a week. If the water appears to get dirty, then change the water more frequently.
The cuttings should root fairly quickly and should appear right at the node that is under water.
You should start to see beautiful white roots showing up within a handful of weeks or less. Once the roots are about an inch long (2.5cm) or so, you can pot them up.
If they get a bit longer, don't worry. Pot them up anyway. So many people get so worried about the water to soil transition. Don't be a barrier to yourself. Just do it!
I'm going to use my cuttings to plant back into the original pot that my plant is growing in, in order to make it fuller. Or you can use them to start brand new plants.
Take a look at the before and after photo below. I started out with the cuttings on the left hand side that I received from a friend, and the right side is about two years later.
On the right side, I had even pruned that plant multiple times. With the cuttings, I planted some back into the same pot, and gave others away. It's a really vigorous, fast-growing plant!
If you want a bushier, fuller plant from the beginning, you will have to plant several cuttings into a pot. If you only use one or two cuttings, you will be waiting forever and you may never get the look you're going after.
If you want to create a climbing plant, check out my blog post on how you can make your own moss pole. You can easily train your plant to climb and it looks beautiful too!
You can use any type of pot for your plant, as long as it has drainage holes. Keep in mind though that the material that your pot is made of will have a big effect on how quickly your potting mix dries out.
Terra cotta pots will dry out much more quickly than other types of pots since they are extremely porous. If you use a terra cotta pot along with a very chunk potting mix, your potting mix may dry out much more quickly than you may prefer.
To learn about all the factors that affect how quickly your potting mix dries out, I want to refer you to my book, Houseplant Warrior: 7 Keys to Unlocking the Mysteries of Houseplant Care. I teach a holistic approach to houseplant care, and it will be well worth reading it cover to cover.
As far as pot size goes, as a general rule of thumb, if your plant is root bound, only go up one size.
For example, if your plant was previously growing in a 4 inch diameter pot and it is root bound, move it up to a 6 inch diameter pot and no bigger. This way your potting mix isn't taking an excessively long time to dry out.
TEMPERATURE AND HUMIDITY
As I always say, if you're comfortable in your home, your plants probably will be too. Keep your Monstera adansonii on the warm size and try not to go below a minimum of 60F (about 15.5C).
Native to the tropical jungles of Southern Mexico and Tropical South America, these plants enjoy high humidity, so increase your humidity if at all possible.
This is especially important if you have very dry indoor air during winter time if you are running forced air heat.
COMMON MONSTERA ADANSONII PROBLEMS
BROWN EDGES ON LEAVES
Browning leaf edges on your adansonii can have numerous causes including
Keeping your potting mix too dry
Keeping your potting mix too wet (to the point of the roots starting to rot)
Using poor quality water
Keeping your plant too root bound and struggling with keeping it well-watered.
Overfertilizing
Low humidity
Be sure not to miss my blog post that elaborates on all these causes of brown, crispy leaves on your plants.
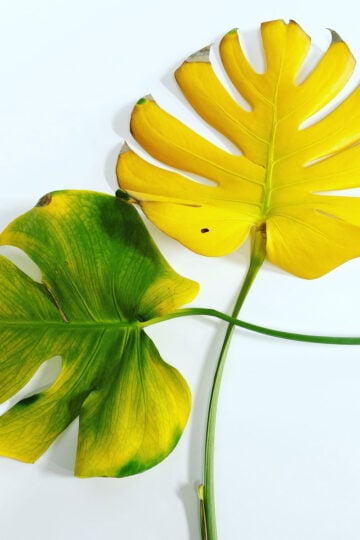
YELLOW LEAVES
Much like brown, crispy leaf edges, there are numerous causes for yellow leaves on your adansonii.
The most common cause is allowing your potting mix to dry out too much for too long. In this particular case, you will see the lower leaves on the vines turning yellow before all others.
Make sure to never allow your potting mix to dry out completely for too long, if you can help it.
If you do see yellow leaves, you can gently pull them off or cut them off.
DROOPY PLANT
The most common reason your adansonii is drooping is extremes in soil moisture.
One scenario is that you left your potting mix dry out completely for too long. If this is the case, simply give your plant a nice, thorough soaking and it should recover.
The other scenario is if your plant has stayed wet for too long. Perhaps you left it sitting in water or your growing conditions didn't encourage your soil to dry out fast enough.
If your plant has exhibited root rot, this can also cause your entire plant to wilt. You would have to inspect the root system though to determine that this was indeed the case and your roots have turned mushy and have rotted.
In this case, try and salvage the plant by repotting it into a fresh potting mix and into a smaller pot.
MOSAIC VIRUS
All too often, people think their plants are plagued with mosaic virus. Plants that have mosaic virus are characterized by mottled leaves that are a different color than your leaf is supposed to be (yellow, white, etc.) and appear as either spots or streaks in the foliage.
Your plant's growth may also be stunted and leaves can grow in twisted and deformed.
If you suspect that your plant may have mosaic virus, isolate your plant and quarantine it from your other plants.
The only way you'll know if your plant has mosaic virus is if you have your plant tested. You can take a foliage sample to your state's local USDA extension office, or maybe even an extension office of your state's Master Gardener organization.
If you are looking for other species of Monstera to grow (and there are LOTS), check out my post on 15 Amazing Monstera Varieties to add to your collection.
That's it folks! I hope you've enjoyed this blog post and comment below if you have an Monstera adansonii!
Hi, absolutely love this post, found you on Pinterest. So helpful! One quick question! Where did you find your three vase thingy for propagation? I need it! Thank you so much!
Glad you enjoyed it! I don't remember the name of the company for the propagation unit since that was a while ago! I'm not really that happy with that one. It is poorly designed and constructed, though it appears nice in the photo. I do have a relationship with a company that makes amazing units. If you visit https://modernbotanical.shop/ and use code OHIOTROPICS, you will get 20%. They're pricier than many, but they're absolutely amazing and super high quality. They have single, double, and triple units. I would highly recommend those :-). I have several.
Hi! Thanks for the info , is great . I’ve been really lucky making adansonii to grow, so I’ve also made a lot of cuttings with roots. My question is, could I combine it with a monsters deliciosa that I have to make them both grow within the same pot, makin them grow up with the same coconut fibre support ?
Hello there! I love this information, its so straight-forward and easy to understand. Thank you!
I'm looking at how to look after my sisters adasonii because she just ain't doin' it right ??
The roots in the adasonii are super long (and tangled which makes propagation impossible lol) She's water propagating them, and they just arent growing. One of the baby leaves have gone white and brown and curled up. Other leaves are just getting yellow patches.
My sister's adasonii's are about the size of my pinkie finger, and she's had them for a year and a half-ish.
Anyone able to help me grow and fix the water-propagated adasoniis?
Hi Emma! Glad you enjoyed the post! Are they still in water? If they are, go ahead and plant them in a pot and put them in appropriate light like I describe in the post. Or are you saying that you planted them already and they aren't growing?
This is all great info, thank you! My plant is growing pretty rapidly but on some vines there are nodes... but no leaves. Is this caused by anything in particular? Could it be fixed by pruning?
Hi Abby! What kind of light is your plant growing in? How far from a window is it? Sometimes this happens when your plant needs more light. If this is the case, then you can increase the light, and trim the leaf-less parts off and it should grow back with leaves in brighter light. Hope this helps!
@Raffaele, Believe it or not its directly in front of a south facing window! It only has one vine out of several that is doing this, so thats good. Maybe I should try to fertilize it again since its still growing. I'm still relatively new to plant parenting and read to not fertilize indoor plants over the winter because they go dormant... but I'm starting to believe that doesn't hold true to all plants. I'll surely prune that vine though, thanks for your input!
Hi again Abby! Leafless vines can occur for other reasons too. Was that one always leafless? Or were there leaves previously there and they yellowed and fell off? Regardless why this occurred, you can just trim that vine back to where it has a leaf and it should grow back (hopefully with leaves!) As far as fertilizing goes, you can fertilize in winter if there is any growth, but I try not to encourage more growth during winter when light is less so I don't during that time. (If you have plants under grow lights though year-round, they won't know it's winter and you can safely fertilize year-round). Otherwise, I typically start fertilizing in late winter/early Spring when there is more light. Hope this helps!
@Raffaele, Thanks for the tips, you and your blog are great and really informative!
I have a small mosntera adansonii that was gifted to me set up to eventually be a climbing plant but I would prefer a trailing plant. How can I repot it to make that happen? Thanks!
Hi Mimi! Is it currently supported by a post or pole of some sort? If it's tied to the post, just remove whatever is securing it to the post, remove the post, and let the plant go. If I misunderstood your question, just let me know 🙂 If you'd like to send a photo to me, email me using the contact form on my website, and when I reply, you can attach a photo.
Thank you! This was so comprehensive and helpful! I have a growing plant that I love, but was hoping to propagate. Once I do, will the original vine I cut grow back and become long again or will cutting for propagation stop it’s growth? Thanks!!
You're very welcome! Yes, the vines that you cut will grow back. 🙂 Don't cut the vine all the way down though. Make sure you leave at least one or two leaves on it.
I’m not sure if I have a monstera adansonii but it does look like I do (based on Google images). The leaves on mine though have fenestrations on them as soon as they’re about to unfurl. Do I have a fake plant?
Hi Katie, I propagated a monstera and it started growing one little vine with smaller leaves and each leave started growing smaller and smaller and losing fenestrations. What should I do?
I totally misunderstood the propagation instructions in regards to cutting the vine... I cut each piece so literally it was one node and one leaf, rather than having an additional node and leaf at the next section. The cuttings are reported and are putting out new leaves, but all coming from the one original leaf, and not growing a vine. Should I give up and buy a new plant? Will it ever vine again? Thanks for any advice!
Hi Katie! You are fine! Give it time and they will all grow vines. All you need is one node and each one will form a vine. You'll just have to have some patience and it can take at least a few weeks to see one depending on your conditions.
Hello Mr. R. Thanks a bunch for this awesome outline of propagating?& great photography!!!
I do have a green thumb & home visitors are always asking me 2root? So everyone knows their “special day” they’ll be blessed with a ? but a different one?
Peace and blessings?Will check & join in your IG.
Take care & be blessed. Will send you pix from this project & will be looking for new projects during this pandemic.
Do Monstera Adansonii typically branch into multiple vines from a single plant/vine? I recently took a cutting from my single vine and the ‘mama’ has begun to form new little vines and leaves on 6 nodes.
Thanks for the fantastic information!! Love your Instagram page too!
Can I just ask your recommendation for pot size and potting up. I have a reasonably small plant in a 6" pot.
If I see roots at the bottom of the pot should I move to a bigger pot in the spring?
Also terracotta?
Thanks!
You're very welcome Ballal! It all depends on how big the root system is. I'd have to see a photo to have a better idea. Having roots come out through the bottom is an indication, but you won't know until the you take the plant out of its pot. If the root are completely circled around and the root balls seems pretty tight, you can repot. Terra cotta is up to you. If you can keep up with the watering, they're great pots. It's personal preference though since they tend to dry out more quickly.


Hi, absolutely love this post, found you on Pinterest. So helpful! One quick question! Where did you find your three vase thingy for propagation? I need it! Thank you so much!
Glad you enjoyed it! I don't remember the name of the company for the propagation unit since that was a while ago! I'm not really that happy with that one. It is poorly designed and constructed, though it appears nice in the photo. I do have a relationship with a company that makes amazing units. If you visit https://modernbotanical.shop/ and use code OHIOTROPICS, you will get 20%. They're pricier than many, but they're absolutely amazing and super high quality. They have single, double, and triple units. I would highly recommend those :-). I have several.
Hi! Thanks for the info , is great . I’ve been really lucky making adansonii to grow, so I’ve also made a lot of cuttings with roots. My question is, could I combine it with a monsters deliciosa that I have to make them both grow within the same pot, makin them grow up with the same coconut fibre support ?
Glad you enjoyed the post Adrian! There is nothing wrong with that since they like similar conditions, so go for it if you want to!
Hello there! I love this information, its so straight-forward and easy to understand. Thank you!
I'm looking at how to look after my sisters adasonii because she just ain't doin' it right ??
The roots in the adasonii are super long (and tangled which makes propagation impossible lol) She's water propagating them, and they just arent growing. One of the baby leaves have gone white and brown and curled up. Other leaves are just getting yellow patches.
My sister's adasonii's are about the size of my pinkie finger, and she's had them for a year and a half-ish.
Anyone able to help me grow and fix the water-propagated adasoniis?
Thank you!
Hi Emma! Glad you enjoyed the post! Are they still in water? If they are, go ahead and plant them in a pot and put them in appropriate light like I describe in the post. Or are you saying that you planted them already and they aren't growing?
This is all great info, thank you! My plant is growing pretty rapidly but on some vines there are nodes... but no leaves. Is this caused by anything in particular? Could it be fixed by pruning?
Hi Abby! What kind of light is your plant growing in? How far from a window is it? Sometimes this happens when your plant needs more light. If this is the case, then you can increase the light, and trim the leaf-less parts off and it should grow back with leaves in brighter light. Hope this helps!
@Raffaele, Believe it or not its directly in front of a south facing window! It only has one vine out of several that is doing this, so thats good. Maybe I should try to fertilize it again since its still growing. I'm still relatively new to plant parenting and read to not fertilize indoor plants over the winter because they go dormant... but I'm starting to believe that doesn't hold true to all plants. I'll surely prune that vine though, thanks for your input!
Hi again Abby! Leafless vines can occur for other reasons too. Was that one always leafless? Or were there leaves previously there and they yellowed and fell off? Regardless why this occurred, you can just trim that vine back to where it has a leaf and it should grow back (hopefully with leaves!) As far as fertilizing goes, you can fertilize in winter if there is any growth, but I try not to encourage more growth during winter when light is less so I don't during that time. (If you have plants under grow lights though year-round, they won't know it's winter and you can safely fertilize year-round). Otherwise, I typically start fertilizing in late winter/early Spring when there is more light. Hope this helps!
@Raffaele, Thanks for the tips, you and your blog are great and really informative!
I have a small mosntera adansonii that was gifted to me set up to eventually be a climbing plant but I would prefer a trailing plant. How can I repot it to make that happen? Thanks!
Hi Mimi! Is it currently supported by a post or pole of some sort? If it's tied to the post, just remove whatever is securing it to the post, remove the post, and let the plant go. If I misunderstood your question, just let me know 🙂 If you'd like to send a photo to me, email me using the contact form on my website, and when I reply, you can attach a photo.
Very useful info.. especially regarding my calathea..i have 70% humidity but still getting new leaves with crusty edges so your info was a lifesaver.
I have shared your post on our Abu Dhabi plant lovers fb group.
Hi Saira. I'm glad you found the information useful and thanks for sharing it! 🙂
Thank you! This was so comprehensive and helpful! I have a growing plant that I love, but was hoping to propagate. Once I do, will the original vine I cut grow back and become long again or will cutting for propagation stop it’s growth? Thanks!!
You're very welcome! Yes, the vines that you cut will grow back. 🙂 Don't cut the vine all the way down though. Make sure you leave at least one or two leaves on it.
I’m not sure if I have a monstera adansonii but it does look like I do (based on Google images). The leaves on mine though have fenestrations on them as soon as they’re about to unfurl. Do I have a fake plant?
I'd have to see a photo, but what you described is normal.
Have you ever tried to grow these hydroponically?
No, I've only rooted them in water and then transferred to soil. But you can grow them hydroponically, absolutely!
Can’t wait to snip some babies off for a fuller look! I have trapezoidal planter on my mantle above my mirror that needs some green.
Sounds like fun!
thanks! Once ready to plant, do you water straight away if the mix is damp or do you wait till it dries a bit? I've used a chunky succulent mix.
I would water it 🙂
Hi Katie, I propagated a monstera and it started growing one little vine with smaller leaves and each leave started growing smaller and smaller and losing fenestrations. What should I do?
Link to photo:
https://drive.google.com/file/d/183H3k-qCC1DmFB20XV36F0-mrMf8Cnlt/view?usp=sharing
I totally misunderstood the propagation instructions in regards to cutting the vine... I cut each piece so literally it was one node and one leaf, rather than having an additional node and leaf at the next section. The cuttings are reported and are putting out new leaves, but all coming from the one original leaf, and not growing a vine. Should I give up and buy a new plant? Will it ever vine again? Thanks for any advice!
Hi Katie! You are fine! Give it time and they will all grow vines. All you need is one node and each one will form a vine. You'll just have to have some patience and it can take at least a few weeks to see one depending on your conditions.
Hello Mr. R. Thanks a bunch for this awesome outline of propagating?& great photography!!!
I do have a green thumb & home visitors are always asking me 2root? So everyone knows their “special day” they’ll be blessed with a ? but a different one?
Peace and blessings?Will check & join in your IG.
Take care & be blessed. Will send you pix from this project & will be looking for new projects during this pandemic.
Hi Sherry! Thank you for the kind comment and I'm glad you enjoyed the post! Keep propagating and sharing, and stay safe! 🙂
Do Monstera Adansonii typically branch into multiple vines from a single plant/vine? I recently took a cutting from my single vine and the ‘mama’ has begun to form new little vines and leaves on 6 nodes.
They can yes, especially if you trim the ends of the vine off.
Thanks for the fantastic information!! Love your Instagram page too!
Can I just ask your recommendation for pot size and potting up. I have a reasonably small plant in a 6" pot.
If I see roots at the bottom of the pot should I move to a bigger pot in the spring?
Also terracotta?
Thanks!
You're very welcome Ballal! It all depends on how big the root system is. I'd have to see a photo to have a better idea. Having roots come out through the bottom is an indication, but you won't know until the you take the plant out of its pot. If the root are completely circled around and the root balls seems pretty tight, you can repot. Terra cotta is up to you. If you can keep up with the watering, they're great pots. It's personal preference though since they tend to dry out more quickly.