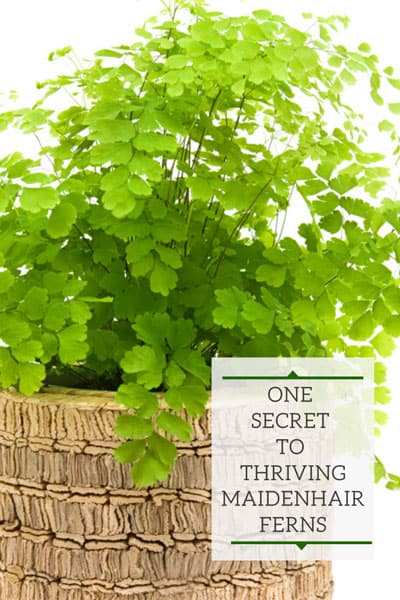
I have one secret for you that will make it ridiculously easy to keep your maidenhair fern alive. I know many people have struggled to keep this fern alive, but you'll be shocked at some of the information you'll read here. Why? Because I know from experience that it works, and there is a LOT of misinformation out there.
Stick with me, and let explain how you can easily get your maidenhair fern thriving indoors!
After you read this post, you will wonder why you hadn't found this information earlier. It will help your maidenhair fern thrive will little effort.
The key to any kind of houseplant care is understanding what each type of plant likes and doesn't like. Maidenhair fern care requires an extra bit of understanding.
Here are the keys to helping your fern thrive, and after that, I will reveal my ultimate tip on how you can set your plant on autopilot so you don't have to keep fussing over it!
BALANCING LIGHT AND WATER
I've grouped these two topics together in this post because they really go hand in hand, and from my experience with growing ferns, it will make it easier to understand.
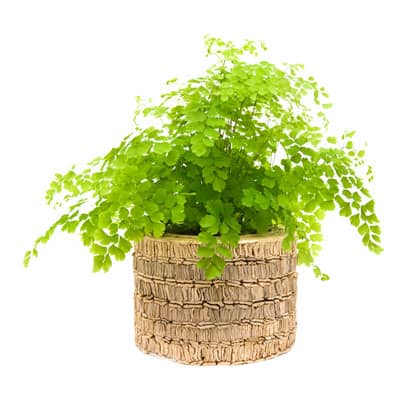
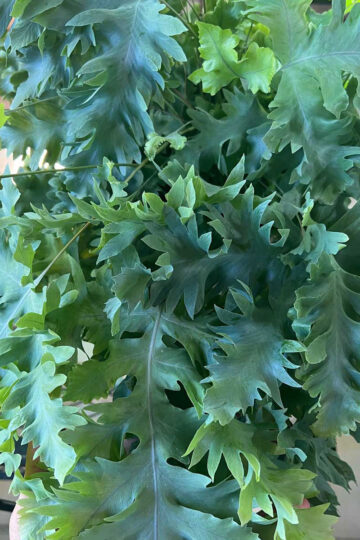
There are many types of maidenhair ferns (they belong to the genus Adiantum) and they grow all over the world. There are species that grow in tropical regions, and also in temperate climates such as mine.
The ones grown indoors are normally the ones that grow in warm regions.
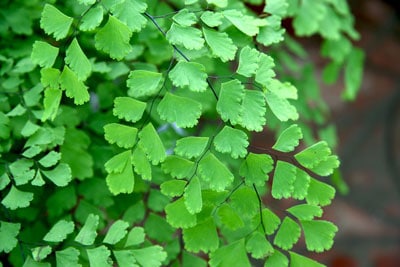
The most important part of maintaining your maidenhair fern indoors is to have evenly moist soil.
I can't emphasize this enough! Probably the most rapid way people kill these plants is by letting them dry out. And they will die QUICKLY if you do!
If you purchase one in a small pot...say a 4" pot, it will dry out very quickly. And you will quickly have a crispy, dead plant if you neglect your fern.
It looks all beautiful and perky when you purchase it, but when you take it home, it will die a quick death if you fail to provide enough moisture.
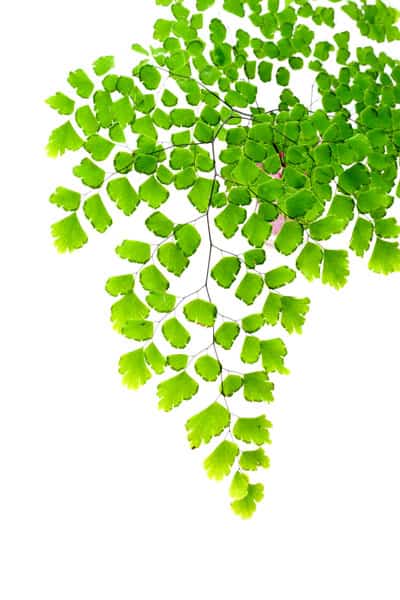
This is not because it is a finicky plant...it is because you let it dry out! And maidenhair ferns HATE to dry out.
When keeping ferns, you need to dispel the rampant fear of overwatering. It is very difficult to "overwater" a maidenhair fern. You'll want to make sure that the soil is as evenly moist as possible.
What are some of the things that you need to consider when growing this plant? Again, you will have to balance out the light and moisture requirements. Let's take a look at these tips:
TINY POTS ARE TOO DIFFICULT
If you purchased a maidenhair fern in a tiny pot, it is time to repot into a larger one immediately. Why?
Because tiny pots dry out MUCH too quickly and unless you are willing to check on it every day or two, you will be setting yourself up for failure!
BRIGHTER SPOTS WILL CAUSE YOUR SOIL TO DRY OUT QUICKER
I'm not saying not to put your maidenhair in a bright spot (sorry for the double negative), but this is where you need the balance between light and water!
Know that if you have your plant in a brighter spot, it will dry out quicker. and if you have a tiny pot in a bright spot, you will be hard pressed to keep up with the watering!
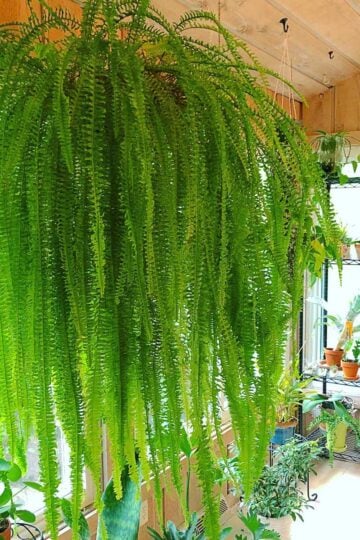
Always keep your fern directly in front of a window. For maidenhair ferns, a nice big Northern exposure window is ideal.
You can even grow them in windows with some direct sun indoors (East or West), but just be vigilant with watering as they will dry out quicker. Southern exposures may be too difficult to manage so avoid those in most cases because ferns in general don't prefer to be in full sun.
Whatever you do, please don't place your plant much further than a foot or two from a window.
Before I give you my maidenhair fern secret hack, and walk through it step by step, let's talk a little about basic soil moisture.
WATERING TIPS
Later on in this post, I will give you a growing setup to minimize the amount of time you spend checking on your plant, and help to maintain even soil moisture, but for now let's look at the basics of soil moisture.
The second your maidenhair fern starts to dry out on top, you must immediately water it. Aim to have the most consistently moist soil that you can.
Like I mentioned before, it is very difficult to "overwater" this plant! Of course, you must be following my light recommendations at the same time.
When you water, ALWAYS water thoroughly. Completely soak the soil, let the excess drain away, and back by the window it goes.
HUMIDITY
Many of the houseplants that we grow indoors love humidity. But I must say that maintaining proper soil moisture is much more important than maintaining high humidity.
If you let your fern's soil dry out but maintain high humidity, you really won't be doing yourself much of a favor. Make sure you nail down your watering practices first before you worry about humidity.
That being said, ferns DO love higher humidity and if you can master good soil moisture and high humidity, you will truly be winning with your maidenhair.
When you're done reading this post, go back and read my humidity blog post where I describe the best ways to increase humidity and I also talk about my absolutely favorite humidifier.
TIPS TO REVIVE YOUR MAIDENHAIR
If you have a lot of brown leaves and fronds on your plant, go ahead and cut them away if they have completely dried.
Your soil has probably dried out too much. Just follow my light and soil moisture tips above and your plant will come back! Slowly but surely, with consistent care, you will see new fiddleheads emerging.
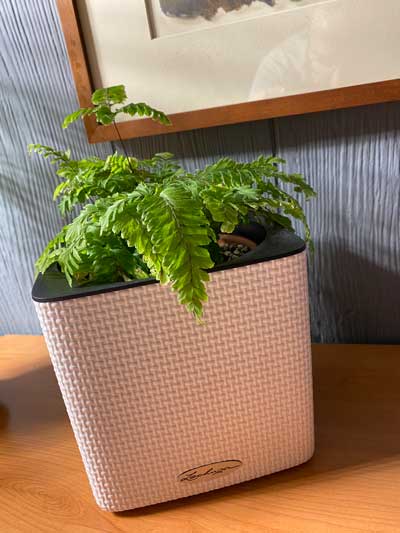
MAIDENHAIR FERN SELF WATERING POT
This is the secret for success! If you follow my cultural tips above, you can have success as well, but it requires more vigilance and more work.
I know I get busy a lot, so I love any methods that will help minimize work for my houseplants!
I don't like to use self-watering pots for many plants, but ferns are one of the exceptions.
There are many species of maidenhair ferns, but I used Adiantum raddianum
By using a self watering pot for your maidenhair fern, it will help you keep the soil consistently moist, greatly minimize the time needed to babysit soil moisture, and help your plant to finally thrive!
There are a few important things to know though when setting up your self-watering pot though. I love experimenting and I've used other types of self-watering pots for another fern I have, but I wanted to try this different pot.
Below, I go through all the recommended steps that I've compiled from my personal experience and also from some research I've done.
SETTING UP A SELF-WATERING POT
I will update this post as my fern grows, but here are the steps I took to plant my new maidenhair fern in its new self-watering pot. I purchased all my supplies on Amazon.
1.GET A SELF-WATERING POT
I purchased a square Lechuza self-watering pot. I love the shape of the pot and the simple, intelligent German design. The only thing that I didn't like was the wick it came with, but I will show what I did instead.
I used everything the self-watering pot came with except this.
Also, you can NOT plant directly into this pot. You'll actually take a plant that's already in a pot and set it inside this container. You'll see why shortly.
Read through all these instructions before you go get all your supplies. I will also summarize the supplies at the end.
Lechuza makes many different sizes of self watering pots, so if you don't like the one I am showing in this post, choose one that works for your needs.
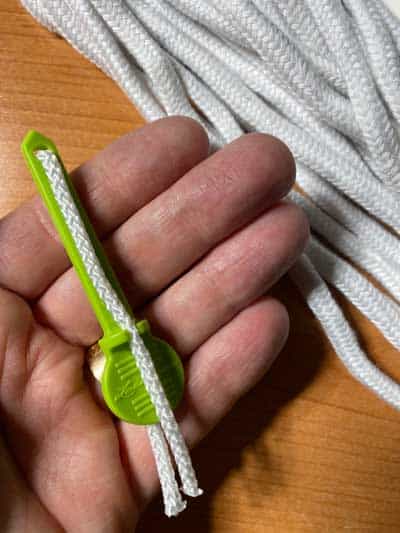
2. GET SOME SELF WATERING CAPILLARY WICK CORD
I didn't feel like the tiny wick that the pot came with was sufficient, so I purchased my own ¼ inch capillary wick cord and customized it for my pot.
Since this one is made out of a polyester-mixed fiber and not pure cotton, it will not rot and will last much longer. It also gives you plenty of cord and is very cheap so you can have lots of fun with making self-watering pots!
The instructions that it comes with also show you how to use this cord to keep your plants watered and alive while you're on vacation. How great is that?
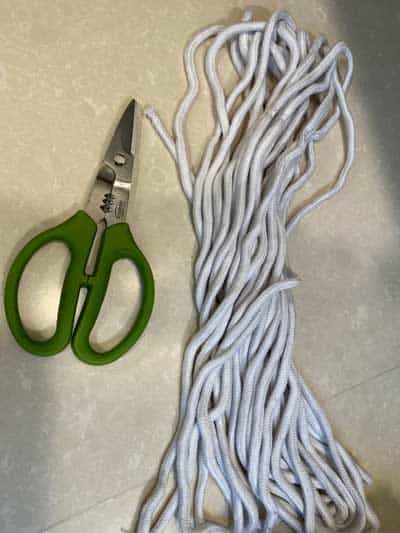
3.ENSURE YOUR POT WILL FIT IN THE SELF-WATERING POT AND PREPARE THE WICK CORD
You'll want to cut the wick cord long enough so that it can extend from about the top of the pot, through the drainage hole, and a few inches below the drainage hole.
Would you like to save this post?
Enter your email, and I will send this link straight to you!
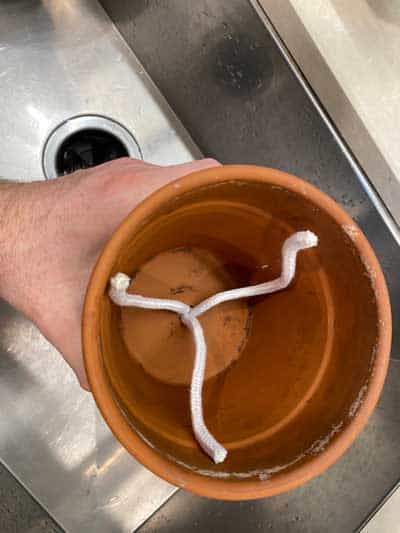
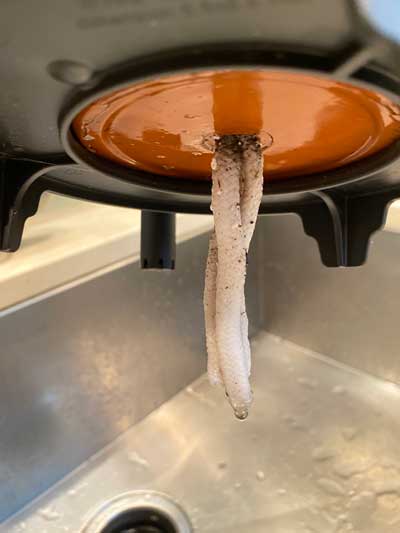
Let me show you what I mean. I used 3 pieces of wick cord and pulled them through the drainage hole (they were snug but not completely restricted by the drainage hole).
Underneath the pot, it looked like this.
When you cut your wick, you can figure cutting each piece about twice the height of the pot.
You'll also need to seal the cut ends of the cord.
I just took a lighter and passed it over each cut end to slightly burn/melt the end. This will prevent fraying at the ends and extend the life of the cord. This is for this specific cord only. Do not try with with a pure cotton cord or it may catch fire!
Be sure also to run the wicks under water to moisten them. This is important because self-watering pots work by what is called capillary action. The water will flow through the wick, in the opposite direction of gravity, and will work to moisten your soil.
When you choose your pot to fit inside the self-watering mechanism, the pot base should be wide enough so that it doesn't fit inside the hole.
This is because you don't want the base of your pot to sit in the water reservoir. You only want the dangling wick to be submerged in water.
Then the capillary action will wick the water up through the cord, to the soil, and to the roots of your maidenhair fern.
I used a terra cotta pot because I happened to have one on hand that fit the Lechuza self-watering planter. You can use any type of pot that will fit and plastic pots are perfectly fine too.
There are many pros and cons for terra cotta pots, but I'm not concerned about this pot drying out because it is in a self-watering mechanism. In fact, I'm wondering if it actually will help the capillary action!
I would advise against terra cotta for ferns if you are NOT using a self-watering planter. Simply because they will dry out quickly.
4.USE THE RIGHT POTTING MIX FOR SELF-WATERING CONTAINERS
You can't just use any old potting mix for self-watering containers! You need a light, fluffy potting mix otherwise the soil can potentially stay too wet and rot your plant out.
I know I said that it's hard to overwater a maidenhair, but the more oxygen to the roots the better). If you can keep a nice, airy potting mix evenly moist, your plant will thrive.
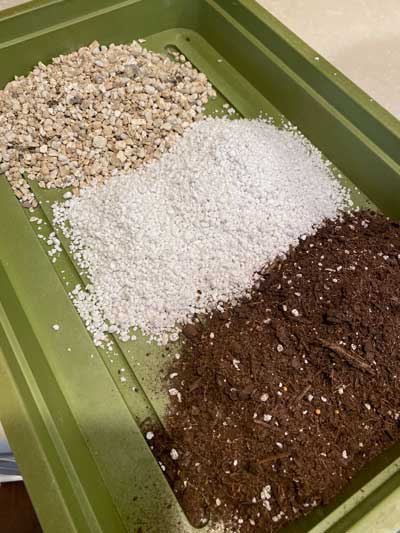
For my potting mix, I used a recommendation from the African Violet Society. In order for a self-watering container to work as best as it can, it needs to be pretty porous with a lot of air pockets.
The AVS recommends equal parts of peat moss, vermiculite and perlite.
Instead of peat moss, I just used an African Violet mix (which is mostly peat anyway and I had it on hand), and perlite and vermiculite. Equal parts of each.
Top to Bottom: Vermiculite, perlite, African Violet potting mix
Then I mixed it all up well.
Next, I premoistened the potting mix so it would be easier to work with and this is also important for the capillary action to work well. Both the wick and the potting mix must be moistened well.
5.PLANT YOUR FERN IN ITS NEW POT
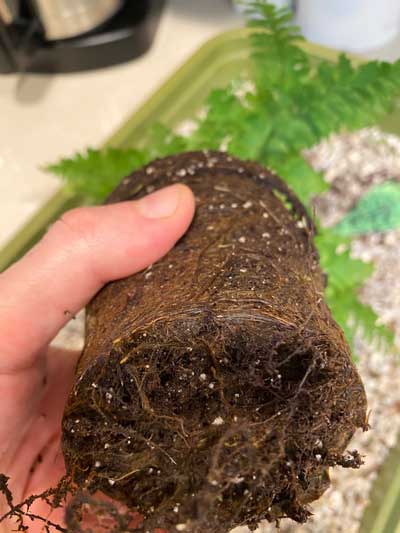
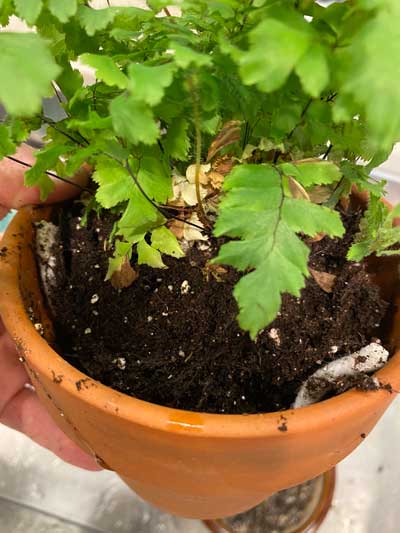
Next, I took my maidenhair fern out of it's pot. There were roots coming out of the bottom drainage holes so it was time to repot anyway.
As always, for any pot bound plant, you should loosen the root ball so that the roots can grow easily into the new soil in the new pot. Here is the result of that:
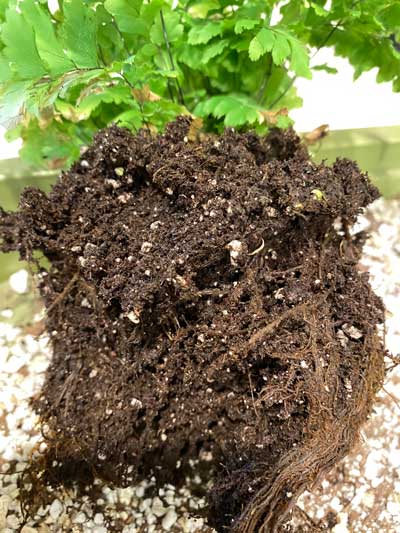
Next I placed some soil at the bottom of the pot and set the fern in the pot. You'll want to make sure that the soil line remains about the same in its new pot.
Adjust the wicks that you've added and make sure that they go almost up to the soil surface. Look at the photo below. I have a little more soil left to add, but I wanted to show how far up the wicks are going.
Once you're done adding all the soil to your repotting job, give your plant a nice thorough watering in the sink to let things settle a bit and ensure the potting mix and wicks are completely moistened.
6.ASSEMBLE THE SELF-WATERING PLANTER AND COMPLETE FINAL SETUP
The Lechuza self-watering pot doesn't come with any English instructions, BUT it has diagrams that shows exactly how to set it up very easily.
I'm a visual person anyway, so I found the visual instructions easy to follow.
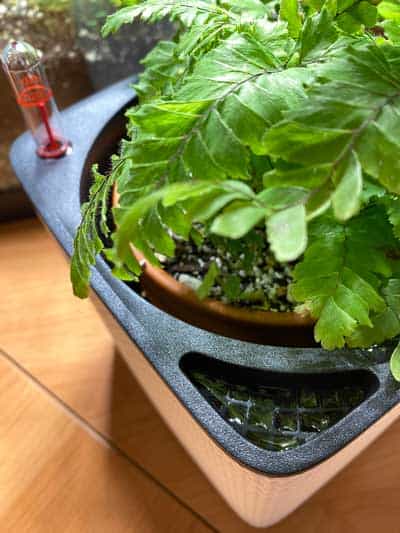
Drop your newly planted fern in the black insert. Make sure that the wicks are dangling underneath.
We are almost done! Next place the black insert into the outer part of the self-watering pot.
Next, add enough water to the container through the mesh port at the bottom of the photo above.
You'll want to add enough water until the top of the red stick in the gauge is between the "min" and "max" positions.
For best operation, you'll want it in this range at all times.
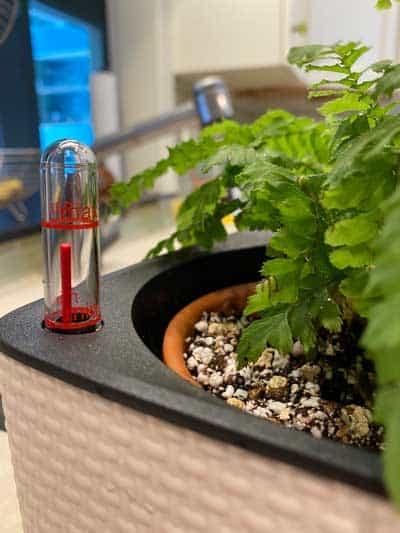
7.MAINTAIN YOUR PLANTER
Lastly, be sure to check on your self-watering planter to make sure that the water level is between the min and max at all times.
If you let it go completely dry by accident, take your pot out of the self-watering mechanism, take it to the sink and thoroughly moisten the potting mix and the dangling wick from the bottom of the pot again.
Add enough water to the mechanism until the red stick is between min and max again.
Please note that the surface of the soil may be dry, but this is only because it is exposed to air. If you use your finger to feel slightly below the surface, the soil should be damp if you did everything correctly.
This is part of how capillary action works. As the water on the surface evaporates, it will "tug" the water molecules from the water reservoir, through the wick, and up through the soil to the plant's roots. Pretty cool right?
And this is a blast from the past from my chemical engineering studies in college. Science is fascinating (and useful).
As far as fertilizing, I'm using ⅛ teaspoon of Dyna-Gro Grow per gallon of water. I normally use about ¼ teaspoon per gallon, but you want to reduce this for self-watering planters.
SUMMARY OF SUPPLIES FOR YOUR PROJECT
To summarize, here are all the supplies for this project. Everything is available conveniently on Amazon.
Once you do it one time, it can become addictive, especially as you see the results of your work! Consistency with fern care is absolutely critical for a thriving fern, so this will make it easy!
Lechuza Self-Watering Planter
¼ Inch Capillary Wick Cord
Equal parts African Violet mix (or even peat moss, or whatever potting mix you have on hand), perlite and vermiculite.
Dyna-Gro Grow (amazing fertilizer I use on all my tropicals!)
And of course a Maidenhair Fern!
You will also need a lighter to seal the ends of the pieces of wick that you cut, and a pair of scissors to cut the wick pieces.
This process will work for any plant, especially plants that like to be kept evenly moist like any fern and also African Violets.
If you want to check out a gigantic fern that I grew with the help of a self-watering pot (a different type), be sure not to miss my post on how to grow boston ferns (but the care tips apply to virtually any fern!)
And don't forget to check out my humidity post for my recommendations on best ways to increase humidity (and the one popular method that doesn't work).
Have you experimented with self-watering containers? Hopefully you've learned a thing or two that will help you master maidenhair fern care!
If you love ferns and are looking for a more unusual one, check out the Davana fern. It is spectacular!
Comment below on your experiences. I'd love to hear from you!
When using self-watering pots it is a good idea to flush them every six weeks or so to rid them of built-up salts, minerals, etc. I use Oyama self-watering planters and a mix I buy from the Violet Showcase. It has agricultural charcoal, dolomite lime and trace minerals added to the peat/perlite/vermiculite mix. I wanted to try a Maidenhair Fern in one of my planters and this article was extremely helpful. Thank you.


")


When using self-watering pots it is a good idea to flush them every six weeks or so to rid them of built-up salts, minerals, etc. I use Oyama self-watering planters and a mix I buy from the Violet Showcase. It has agricultural charcoal, dolomite lime and trace minerals added to the peat/perlite/vermiculite mix. I wanted to try a Maidenhair Fern in one of my planters and this article was extremely helpful. Thank you.
Glad you enjoyed the article Linda! And great tip about flushing the pots. I will add this to the post! I neglected to mention that.