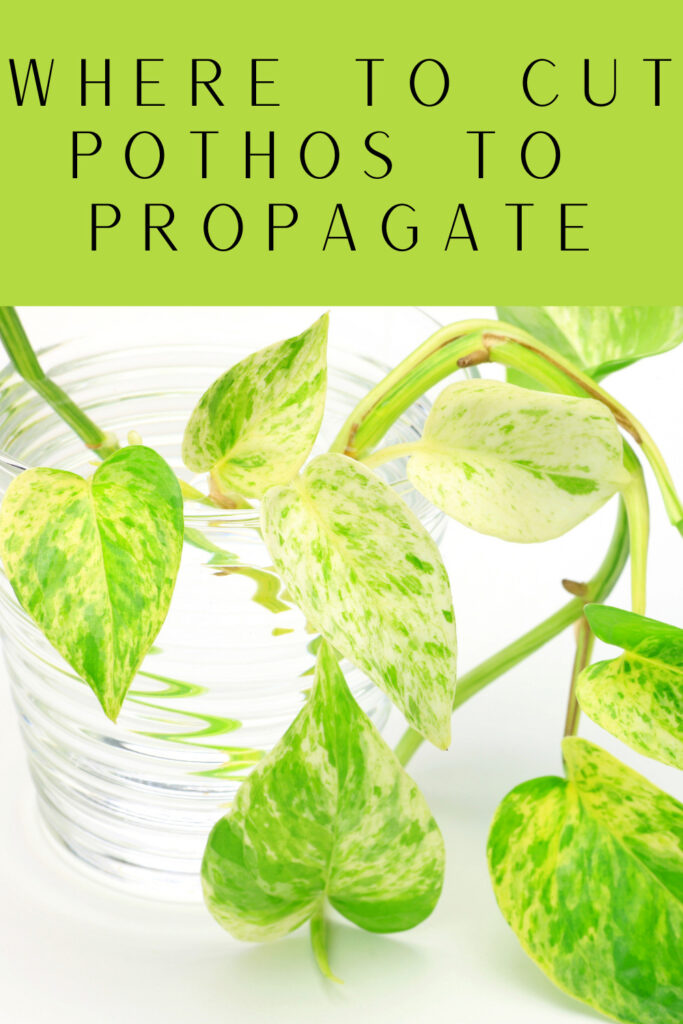
Have you been wondering where to cut Pothos to propagate, and also achieve a full plant at the same time? In this post, I will show you step by step with pictures exactly how you can do this. I demonstrate using my own plant, and the before and after is quite dramatic!
You can easily do the same with your Pothos, so let's get propagating and I'll show you how you can do the same.
You can use this simple process for any pothos plant. In this post, I'm demonstrating with golden pothos, sometimes known as devil's ivy, which is one of the best low maintenance and low light indoor plants that you can grow!
Pothos plants (Epipremnum aureum) are among the easiest plants to propagate.
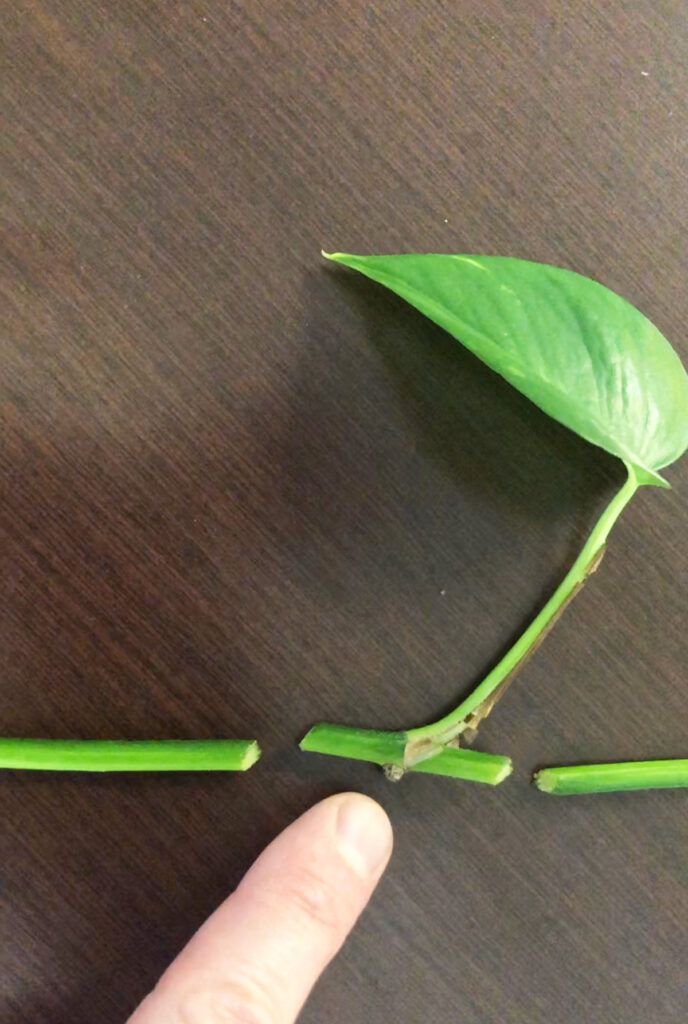
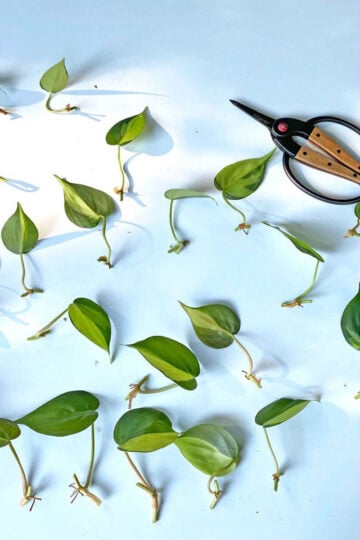
If you really want to maximize your pothos cuttings, you'll want to take single node cuttings.
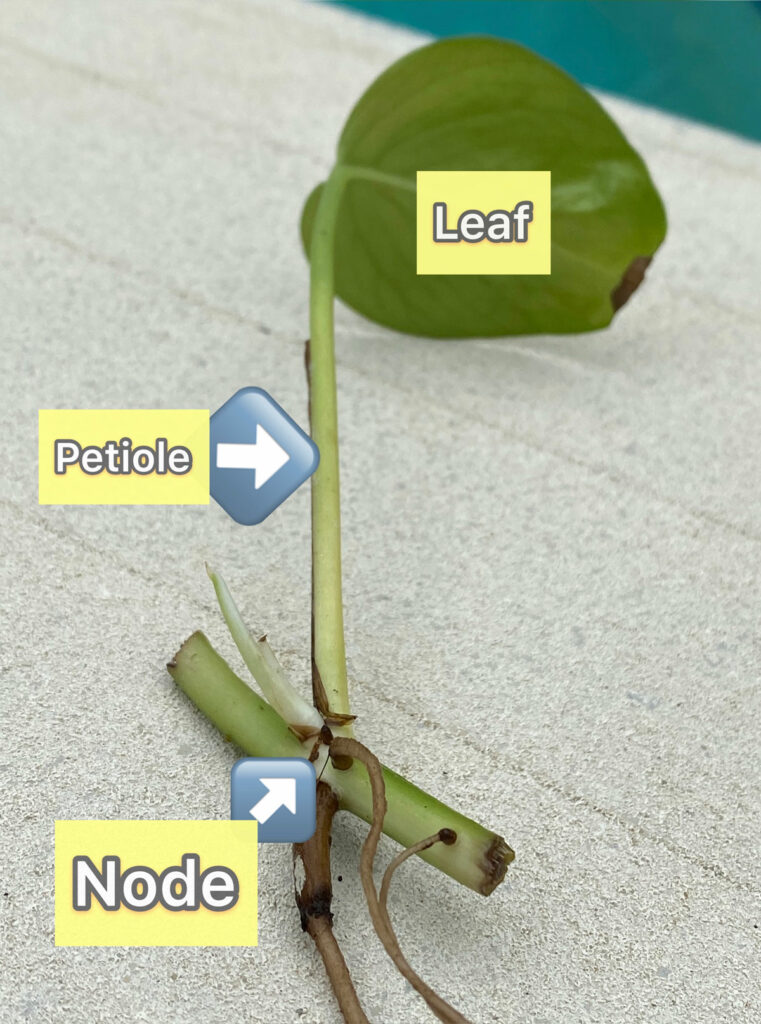
What does this mean? Take a look at the photo below.
Single node cutting of Pothos
Simply take a pair of sharp scissors and snip cuttings just like the one above. Find where the leaf and petiole attaches onto the main vine (this is the node) and snip on either end of the vine.
You may even already see little brown bumps (see where my finger is pointing in the photo). These are aerial roots and they will start to grow once you place them in water to root.
You can make longer cuttings with of vines with multiple leaves and nodes, and there is nothing wrong with this.
But by taking single node cuttings, you will maximize the number of resulting vines since each propagated node will produce a new vine.
2. WATER PROPAGATION
Next, I placed a bunch of these cuttings in water and allowed them to root.
I took all the pothos cuttings and placed them in containers with fresh tap water. Keep an eye on the water level and always make sure that the nodes are under water.
It's always a good idea to take multiple cuttings if you can, because not all the cuttings may make it (but you should have a very high success rate if you follow the tips in this post.)
As water evaporates, top off your jar of water with fresh water. If you notice anything that is rotting, go ahead and pull that material out and change the water.
I like to place my cuttings in a bright spot, with most bright indirect light.
Depending on your conditions, I've seen new roots occur in a matter of days, but sometimes it can take up to a couple of weeks or so.
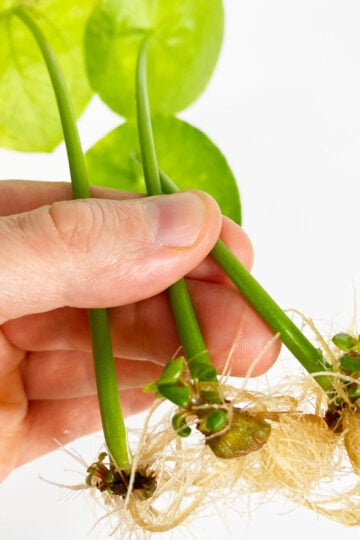
In the picture below you can clearly see everything in action. As you can see, new pothos vines and new roots will start to grow from the node.
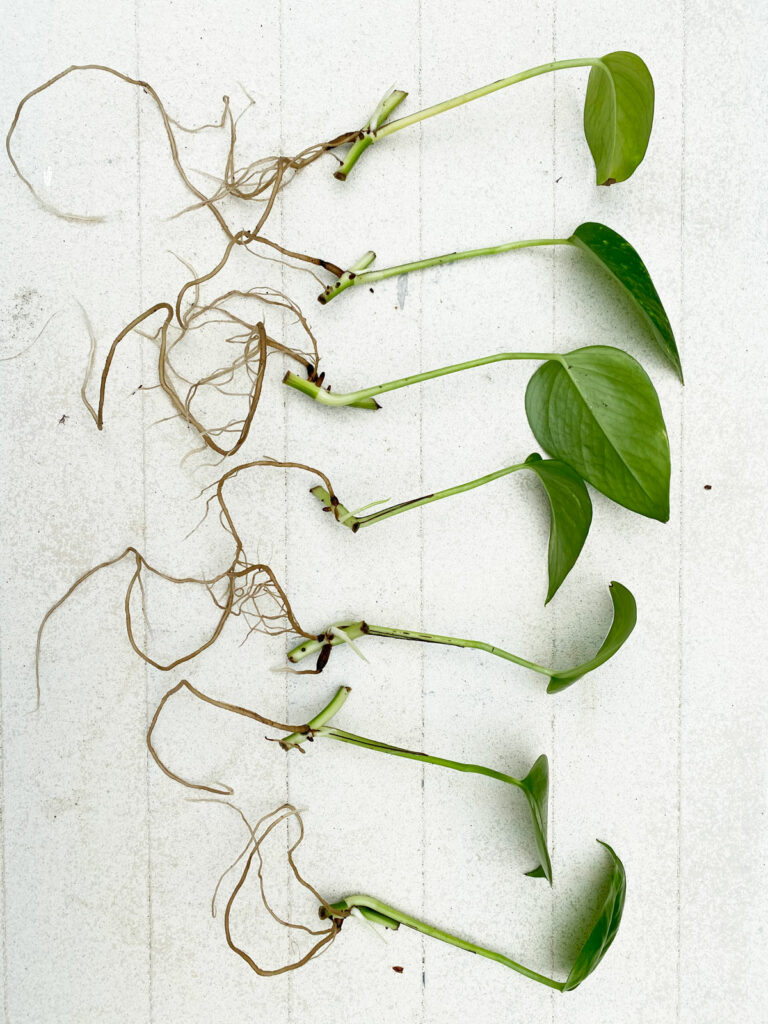
Here are several cuttings that have fully rooted. Each cutting also has a new vine growing already.
At this point, the next step is to plant the rooted cuttings in potting mix. Look at the photo above. I ideally would have not waited for the roots to get this long in order to plant in potting mix.
The cuttings will have an easier time transitioning with shorter roots once planted into potting mix, but everything still worked out beautifully in the end.
I would recommend planting in potting mix as soon as the new roots are about an inch long or so. At this point, you may not have any new vine growth visible yet, but they will come, so don't worry.
Would you like to save this post?
Enter your email, and I will send this link straight to you!
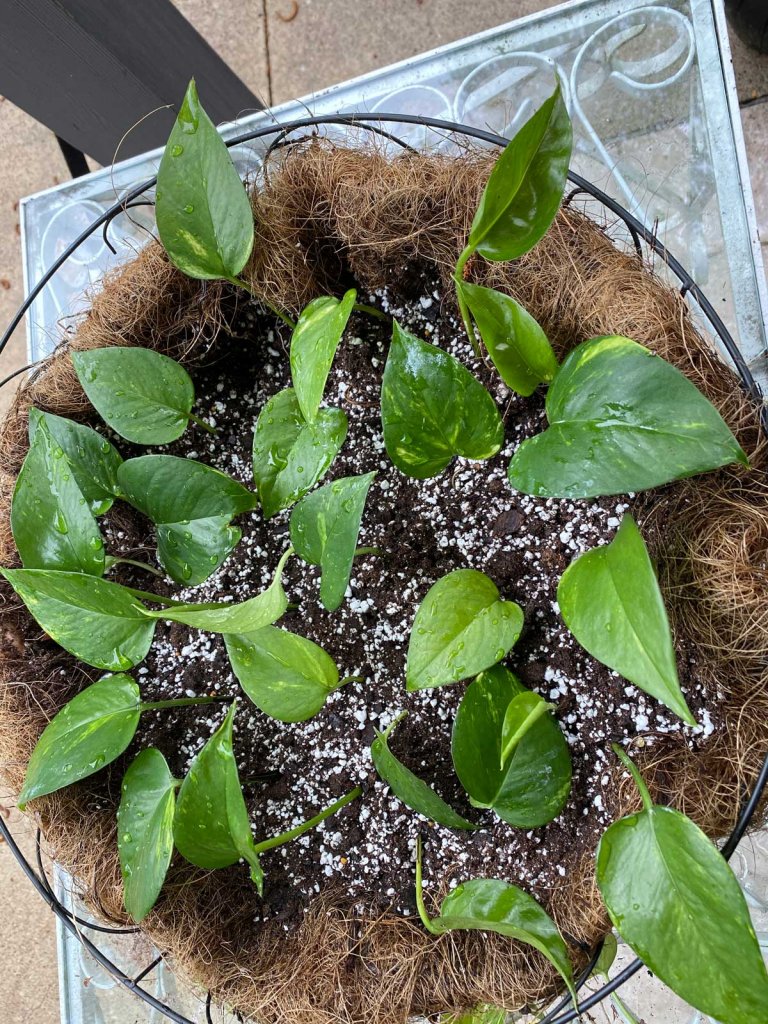
Next, go ahead and plant all the cuttings in fresh potting soil. Be sure to use a pot with drainage holes.
In my case below, planted in a coconut fiber lined hanging basket. Although there are no drainage holes per say in this case, the water goes straight through the liner when I water, so it's good to go!
Notice that I placed the cuttings pretty close together because I wanted to achieve a nice, fuller look. And remember that each of these cuttings will produce a new vine!
For my potting mix, I mixed in some perlite in with an all-purpose potting mix. I used about 2 or 3 parts of Miracle Gro potting mix with 1 part of perlite.
Or if you want to use an AMAZING potting mix straight out of the bag for Pothos, try out the Tropical Climber Soil Blend from Oh Happy Plants. And if you use my link, you will get 10% off automatically applied at checkout.
(Please note that you could have skipped placing the cuttings in water to root, and instead placed them straight into potting mix. Although this skips a step, I feel like it's easier and more gratifying for many people to root in water first and then plant into soil.)
As a general rule of thumb, maintain fairly moist soil, but allow the top inch of soil to dry out before watering again.
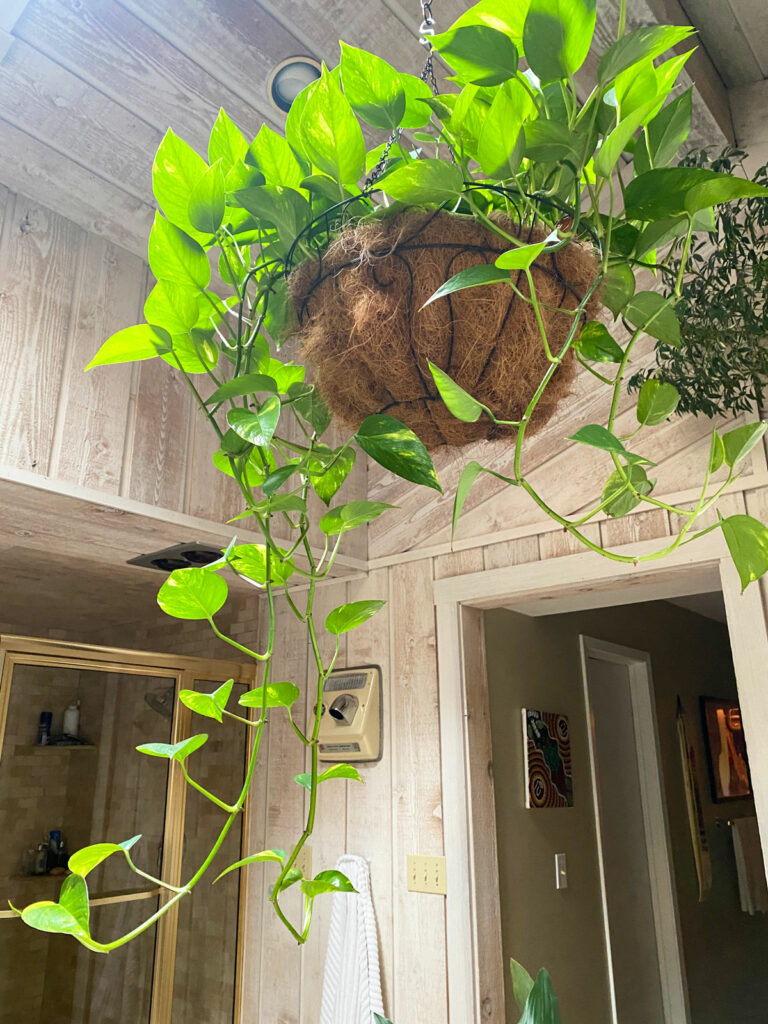
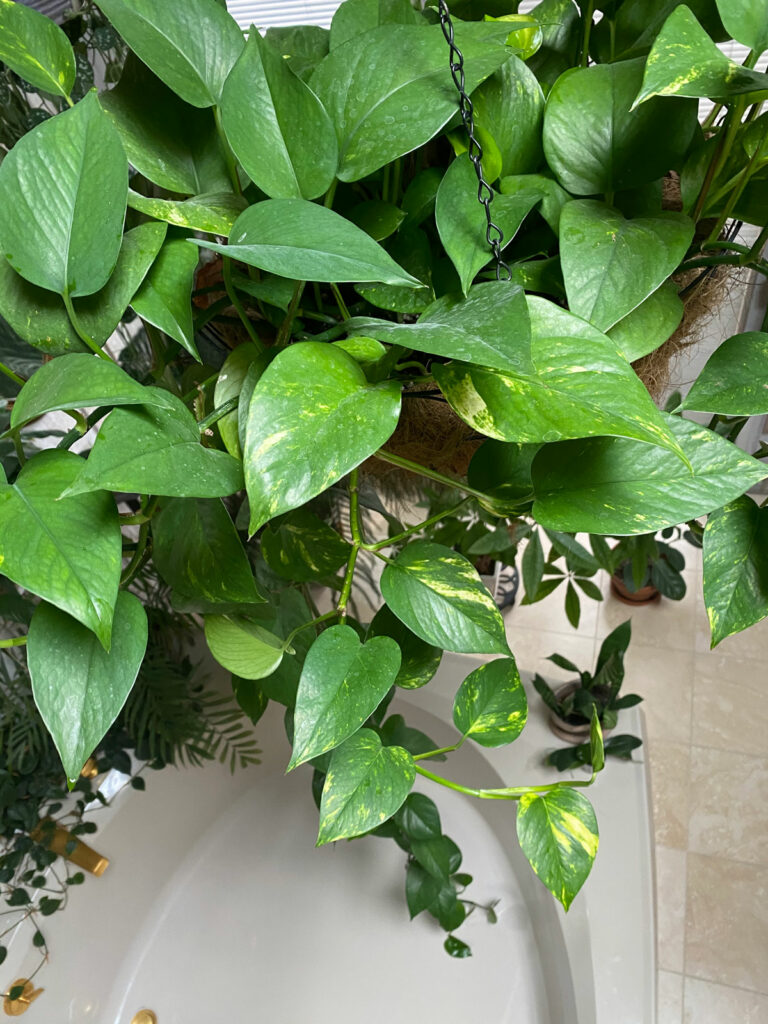
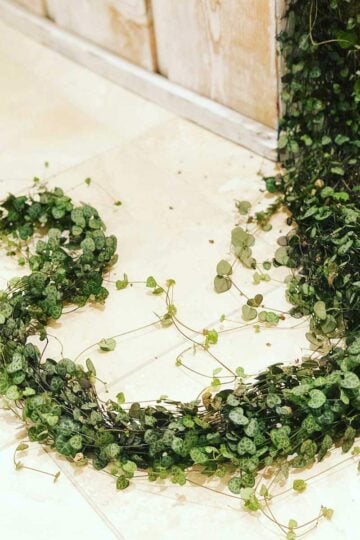
I made 2 baskets like this. Fast forward one year, and this is what the baskets look like. Look how full and beautiful they are! They are both hanging over a bathtub and right under a skylight.
Here is one of the baskets:
And here is the other basket. One long vine already reached the bathtub and will need to be trimmed or looped around the hanging basket so it's not in the way.
There is nothing wrong with planting only only a couple cuttings in a pot. But if you want a bushier look and not just one or two long vines, go ahead and plant several in the same pot if you have enough plant material.
For some more amazing options on potting mixes, check out my post on best soil for pothos.
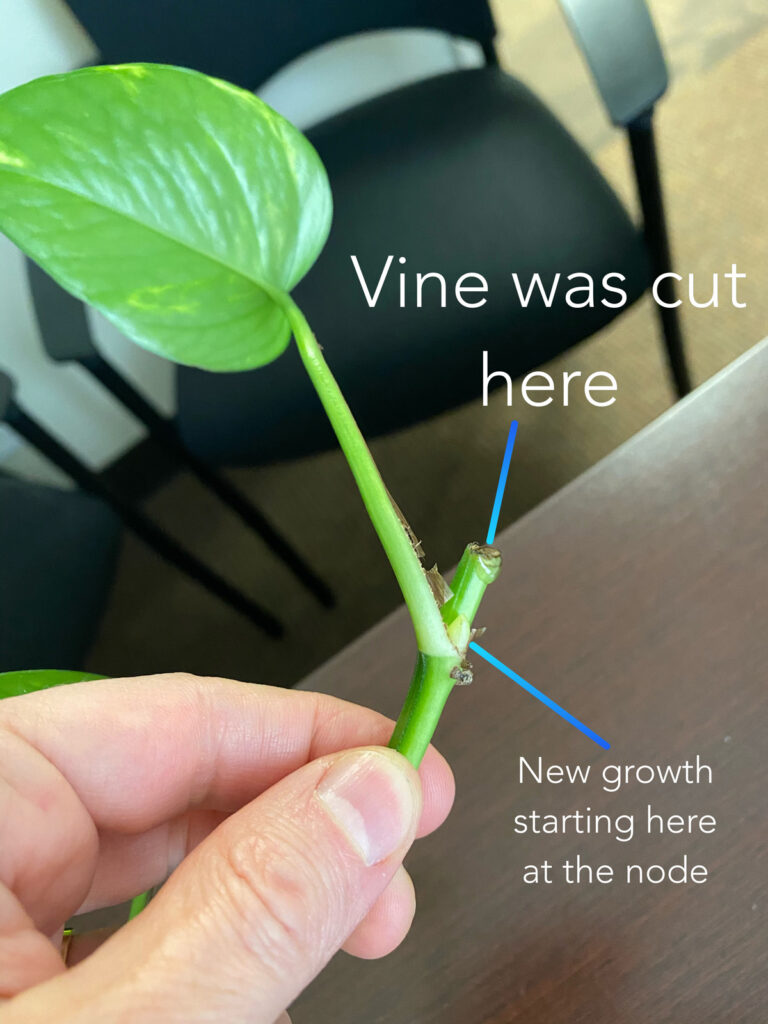
IF I CUT MY POTHOS, WILL IT GROW BACK?
Many people have asked me what will happen to the mother plant that the pothos cuttings are taken from. Will the mother plant grow back?
The answer is yes! Take a look at the photo below.
You can clearly see the cut end of the vine on the mother plant, and also the new growth where the new vine is starting to grow back. It is the gift that keeps on giving!
ADDITIONAL TIPS TO HELP PROPAGATE POTHOS
The best time to propagate any plant is during the active growing season. Spring or Summer will give you the quickest results, but I've successfully propagated in all seasons.
Don't place your pothos cuttings in a dark area! Situate them close to a window where you would normally grow your plants.
Keep your cuttings in a warm location. Plant propagation can take a long time under cool conditions.
Hello Raffaele I stared 3 years ago with growing different plants. Over the last 3 years I have received all my information online. It's giving people just like you that helps the ones who are not sure where to start. This is my first year for starting with seeds so far so good. Thank You
I have a plant that was my grandma’s and has long vines with leaves just at the end, but lots of nodes! I am hoping after following your advice I can start new vines and leaves and revitalize her plant. I appreciate the time you took to explain your process with pictures to match.
Thank you for the wonderful article. I absolutely love how forgiving pothos can be. It's the perfect starter houseplant and can thrive even for those of us with less than green thumbs!
I have kept 2 pothos alive for 26 yrs but am now inspired to propagate a new plant!
Thanks for your clearly written pothos article. Great photos! I will do this today for my pothos that is getting skimpy. My grandmother gave me cuttings from her pothos in 1972 and she bought her original plant in the 1930s in Brooklyn. Almost 100 years old! I think I will give my daughter some of the cuttings if all goes well.
Glad you enjoyed the post Susan! And wow!!! I love that story! What a nice way to remember your grandmother! Good luck with the propagation. I'm sure you will do great.
This was very informative and easy to understand. I have one question. My plant has many long vines but is not bushy. Once I root some vines can I just plant them with the original plant to make it more of a bushy type?


Hello Raffaele I stared 3 years ago with growing different plants. Over the last 3 years I have received all my information online. It's giving people just like you that helps the ones who are not sure where to start. This is my first year for starting with seeds so far so good. Thank You
You're very welcome Connie! I'm glad my my site is helping you succeed 🙂 Thanks for taking the time to comment, and have lots of fun with your seeds!
This was great info and well explained.
Glad you enjoyed it Ryan!
I have a plant that was my grandma’s and has long vines with leaves just at the end, but lots of nodes! I am hoping after following your advice I can start new vines and leaves and revitalize her plant. I appreciate the time you took to explain your process with pictures to match.
Glad you found my post helpful Kenny! Good luck with your plant 🙂
Thank you for the wonderful article. I absolutely love how forgiving pothos can be. It's the perfect starter houseplant and can thrive even for those of us with less than green thumbs!
I have kept 2 pothos alive for 26 yrs but am now inspired to propagate a new plant!
So happy that you enjoyed the post Shelly! 🙂
Thanks for your clearly written pothos article. Great photos! I will do this today for my pothos that is getting skimpy. My grandmother gave me cuttings from her pothos in 1972 and she bought her original plant in the 1930s in Brooklyn. Almost 100 years old! I think I will give my daughter some of the cuttings if all goes well.
Glad you enjoyed the post Susan! And wow!!! I love that story! What a nice way to remember your grandmother! Good luck with the propagation. I'm sure you will do great.
Thanks so much for all the information, now I think my plants should look much better.
You're very welcome!
This was very informative and easy to understand. I have one question. My plant has many long vines but is not bushy. Once I root some vines can I just plant them with the original plant to make it more of a bushy type?
Yes absolutely!
Molto esaustivo nella spiegazione,preziosi suggerimenti. Grazie infinite per avere aperto le menti degli inesperti come me.
Prego! 🙂