Do you want to know how to successfully propagate Monstera in water? Luckily, water propagation of Monstera deliciosa (sometimes known as swiss cheese plant) is super simple!
However, there are some very important concepts to know as you're going through the propagation process, so keep reading so that you can be successful.
In no time, you will have a new monstera plant (or two...or three...) but be careful because it can be addicting! This propagation method is by far the easiest method for the beginner, not to mention being very satisfying to observe.
Although Monstera propagation is super simple, you must first understand how to take a cutting otherwise it may not grow into a new plant.
First off, each cutting that you make must have a node otherwise you will not get a new plant.
What are nodes? In simple terms, they're an area on a plant where new growth will occur, and roots/stems/leaves will start growing from these nodes. If you don't include a node, you will not get a plant.
I'll show you a detailed diagram shortly.
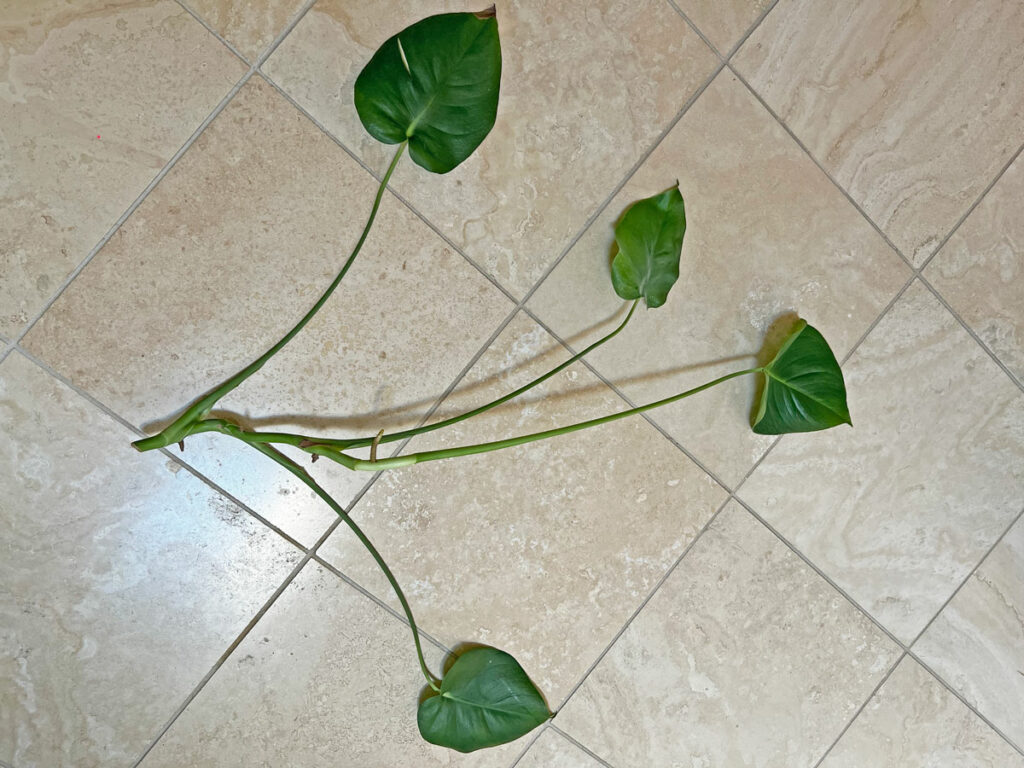
For instance, let's take this monstera vine that I cut off my mother plant. The parent plant was already huge, and this vine was languishing at the base of the plant, so I cut it off in order to demonstrate how to propagate.
Please note that this is not my final cutting, though I could put this in water and root it and it will grow. In order to make the most of your plant material though, I'll show you how to take single-node cuttings.
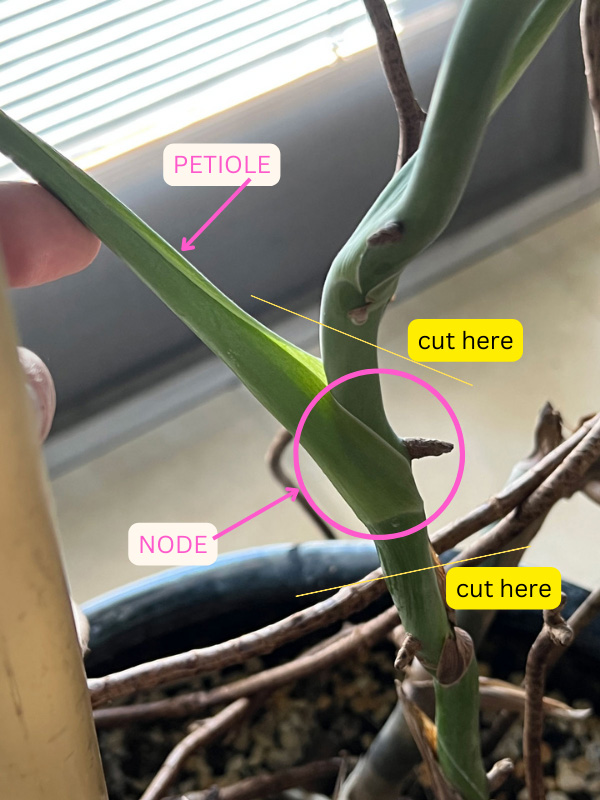
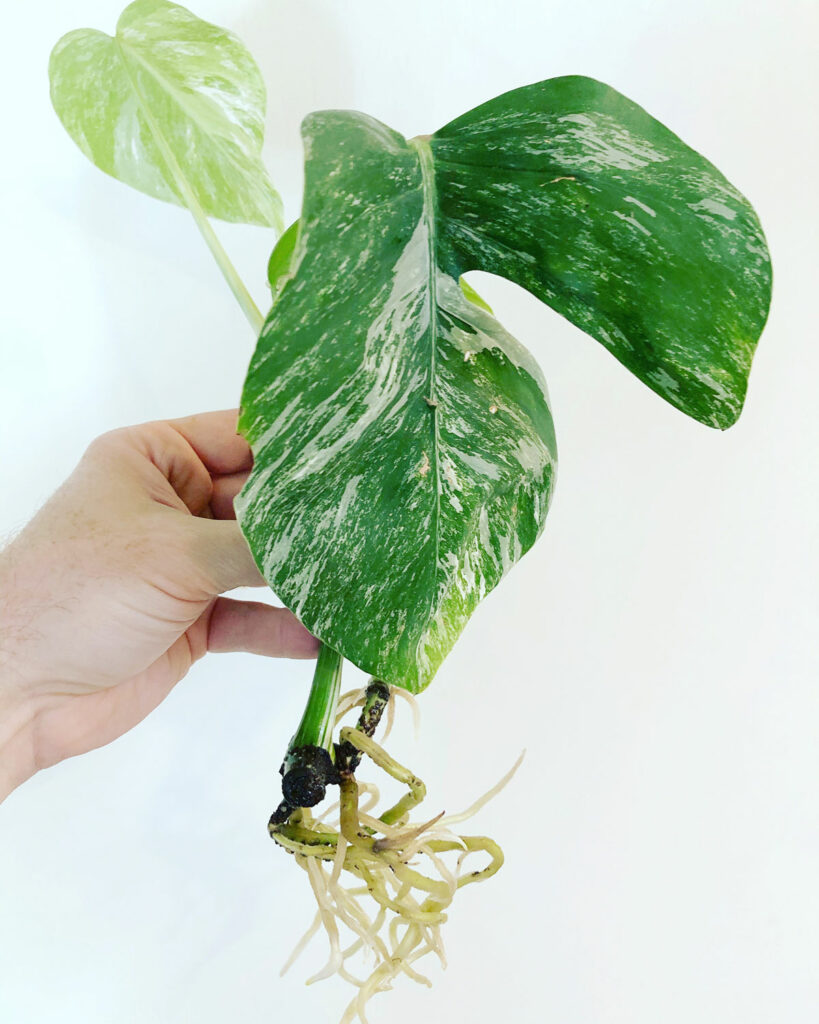
Let's take a closer look at the diagram below so you can see exactly where to take cuttings.
You can see my finger is touching the petiole (the stem-like structure that is attached to the leaf). You can see that the petiole is attached to the vine, and I've indicated in thin yellow lines where to make your cutting.
The node is located in the area within the pink circle. This is where the new plant will grow out from! Don't cut too close to the node. When in doubt, cut further away from the node as you make your cuts on either side of where the petiole meets the vine.
As you can see in the diagram above, oftentimes, you will see aerial roots growing out of the node area.
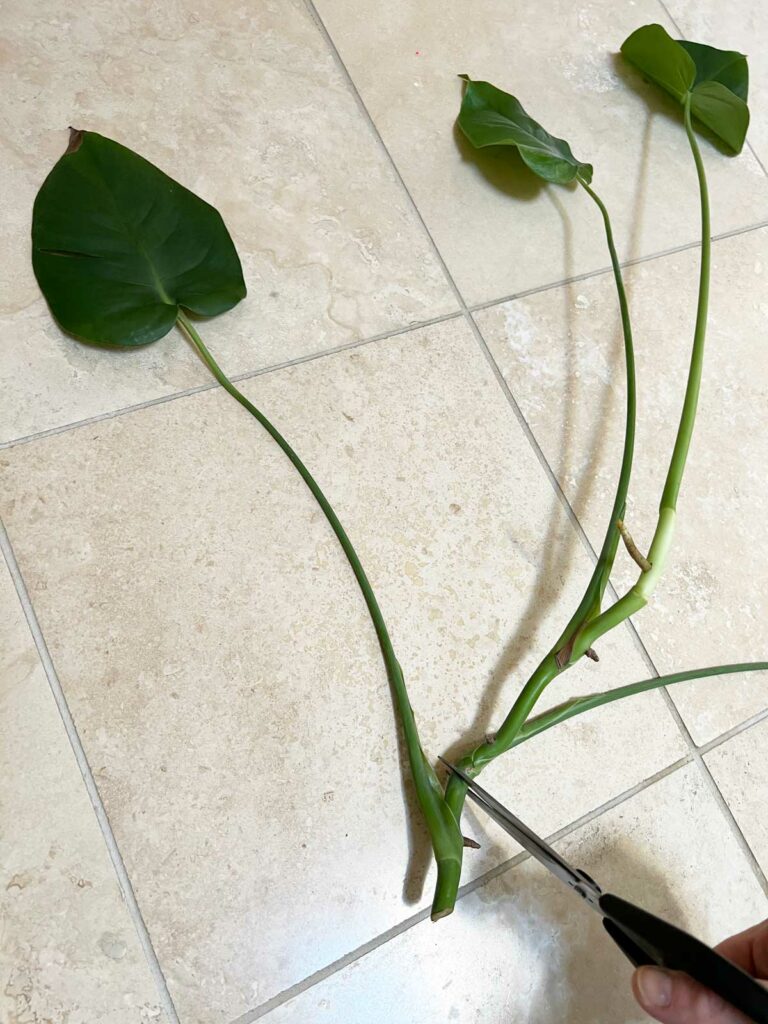
Let me show you a view further back, so you can see exactly where I'm cutting.
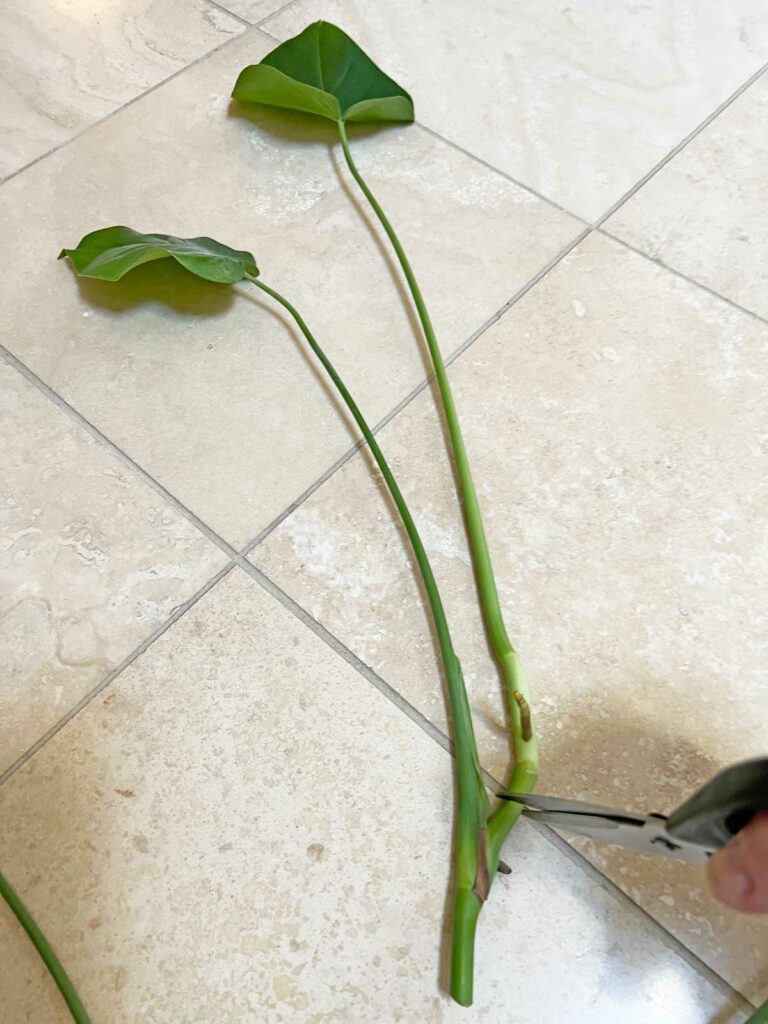
And yet another...
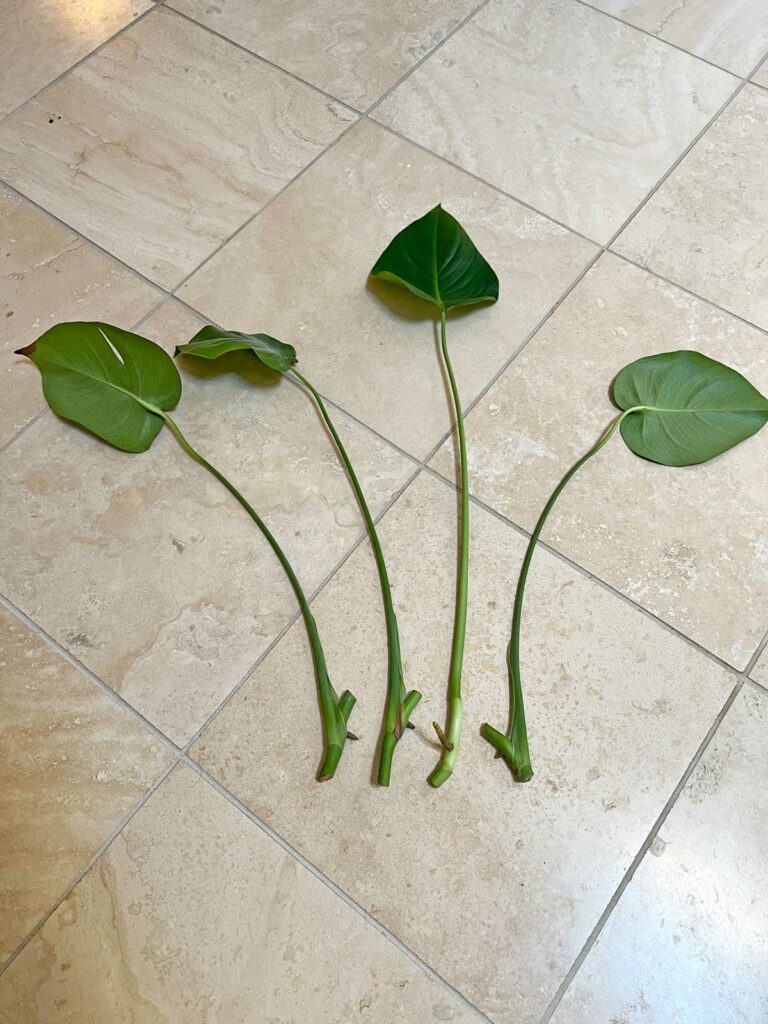
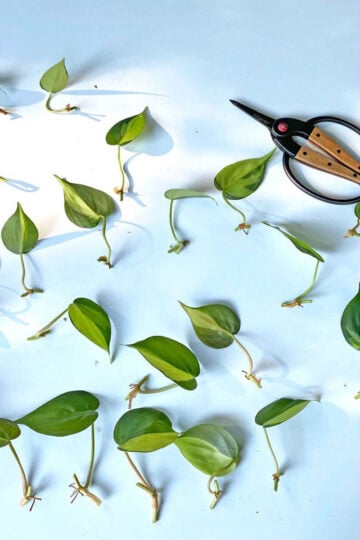
Out of the original cutting, I made 4 different single-node Monstera deliciosa cuttings. Each one of these cuttings will grow into its own Monstera deliciosa plant!
I'll talk more about this later, but after rooting occurs, you can pot these up individually, or all into the same pot if you want a bushier Monstera deliciosa plant.
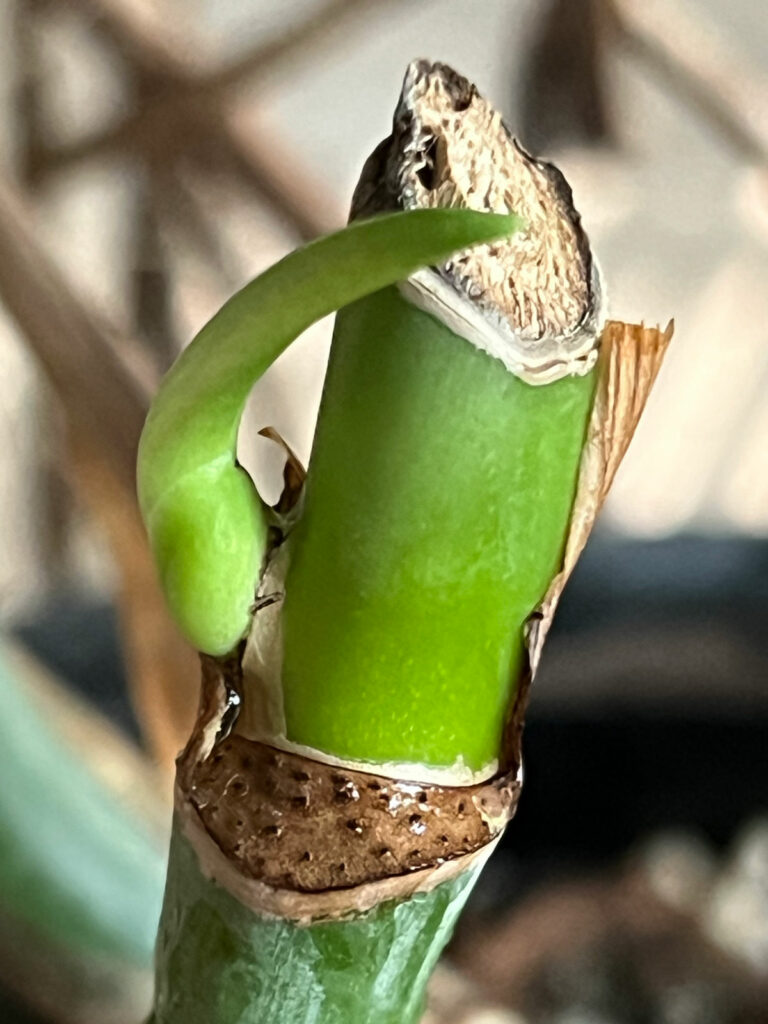
And in case you're wondering, the vine on the mother plant where you snipped the cutting off will grow back. Just two months after snipping the vine, here is what it looks like.
2. ROOT YOUR MONSTERA CUTTINGS IN WATER
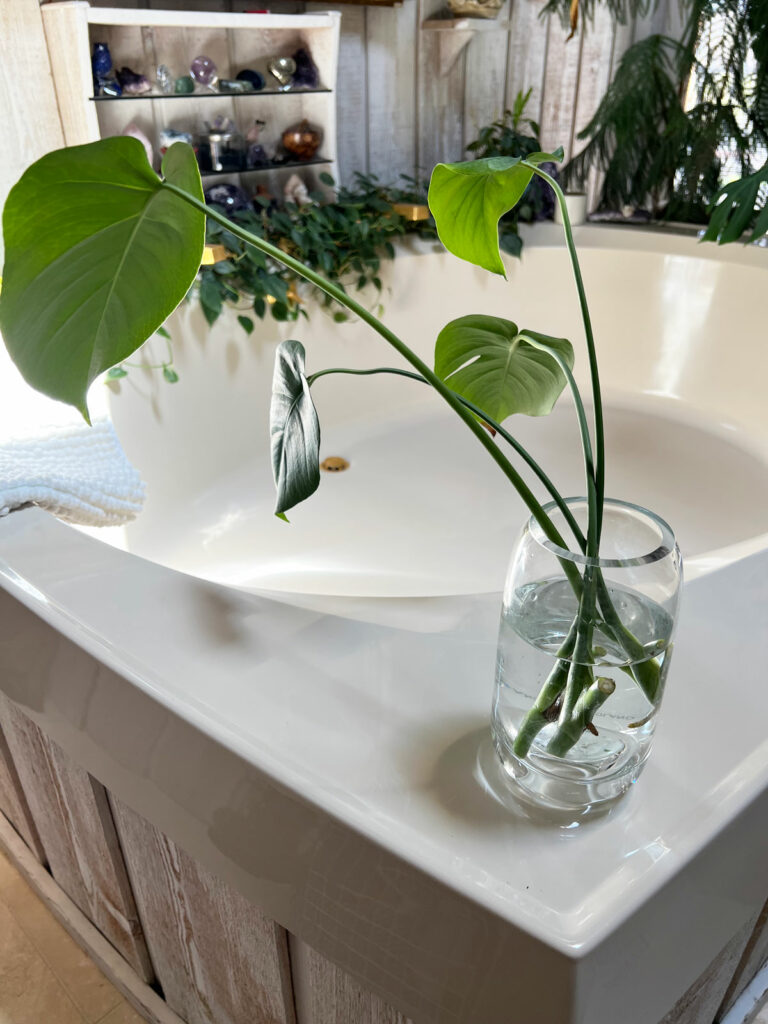
Next, simply place your cuttings into a clear container such as a vase or jar of water. Add enough tap water, or filtered water if you'd like, and make sure that the node is below the water level.
Tap water is perfectly fine to use, unless you use a water softening system that uses sodium, which is toxic to plants.
Next, place your cuttings wherever you would grow a potted plant. Don't place it in a dark corner somewhere. Please it in a bright spot in front of a window that gets no direct sun, or even a window that gets morning sun would work very well.
I would recommend changing the water about once a week, or more often if you see that the water is cloudy or dirty. Replacing old water with fresh water also replenishes oxygen and will help the root development.
Rooting should occur fairly quickly, especially if you are propagating during the growing seasons (versus trying to propagate in the doldrums of winter). You should start to see new root growth within a couple of weeks.
In general, the best time is late winter through Spring and early Summer, though it can really be done at any time. It just may take a little longer.
If you live in an area with short, dark days in winter, I would recommend making sure you do it before early Fall, so that your plant's root system can get established before winter comes.
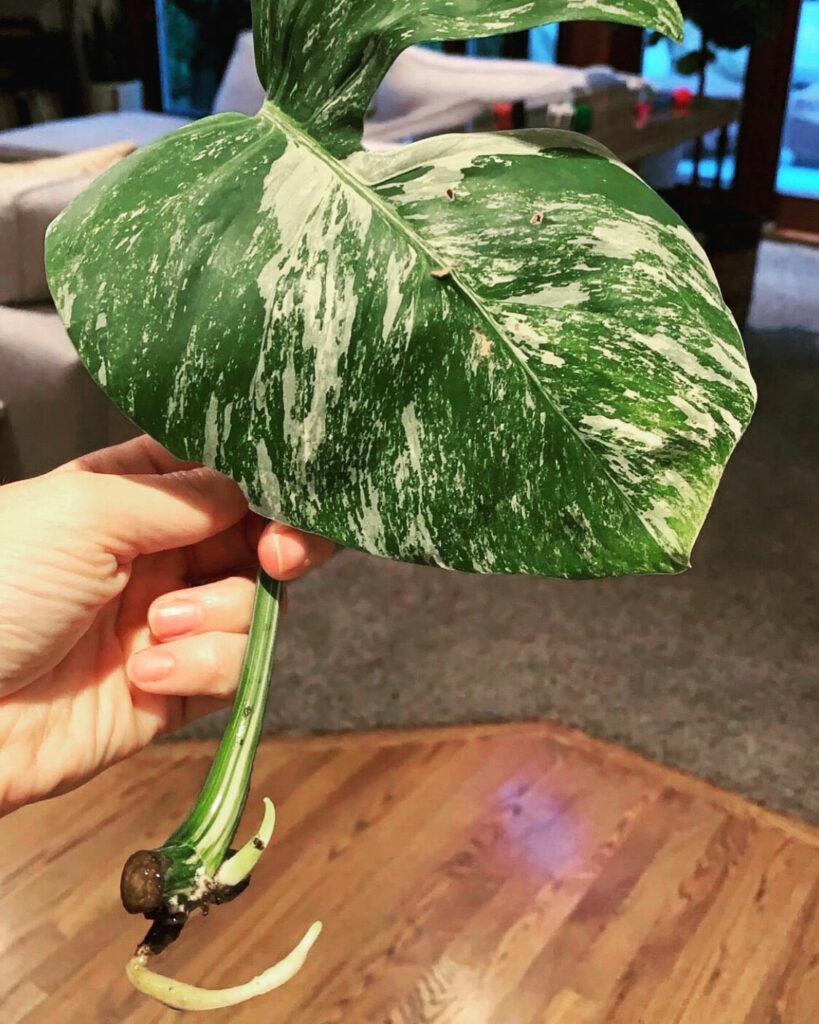
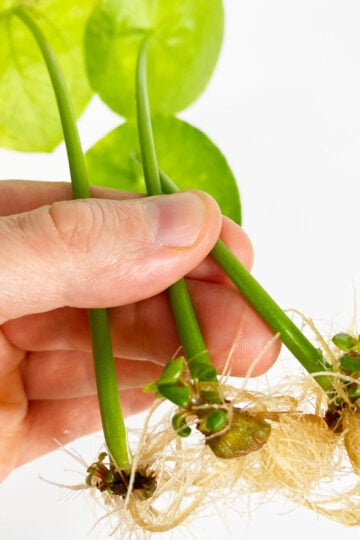
Here is a variegated Monstera cutting that a friend rooted for me. You can see a nice, healthy root growing at the very bottom of the photo, and just above that root, you can see a new shoot growing out of the node.
A couple of months later, this cutting developed nicely with quite a few healthy roots, and even a brand new leaf.
Lastly, it's time to pot up your rooted cuttings. Wait until your new roots are about 1-2 inches long or so. These are water roots, and they will have a harder time transitioning to soil if you wait for a long time.
Would you like to save this post?
Enter your email, and I will send this link straight to you!
If you do keep them far beyond this point, don't let that worry you, but just know that it will take a little longer to transition.
Now comes a decision point that you need to make. You have a few options on how to proceed from here. You'll have to give your plant a support since Monstera deliciosa plants are climbing vines.
Do you want a moss pole? Or maybe another support structure? Do you want a single vine specimen? Or do you want a fuller plant? It is a good idea to make these decisions before you pot up your plant.
If you have a single-vined Monstera, you can easily propagate a few cuttings and put them all in the same pot in order to achieve a bushier specimen.
Before I get into all these details, let me discuss soil blends that you can use. Keep in mind that you can use many different types of soil blends, and for each one, you may have to modify your watering routine.
The chunkier the mix, the more quickly it will dry out, and the more frequently you'll have to water.
INDOOR POTTING MIX OPTIONS
There are many different mixes that will work, but the bottom line is that you need one that has good drainage.
A mix that has worked really well for me is using 2 or 3 parts of a good indoor potting mix (like Miracle-Gro) and then 1 part of #3 sized perlite. #3 perlite is much bigger than regular perlite, and it improves porosity and drainage much better than smaller perlite.
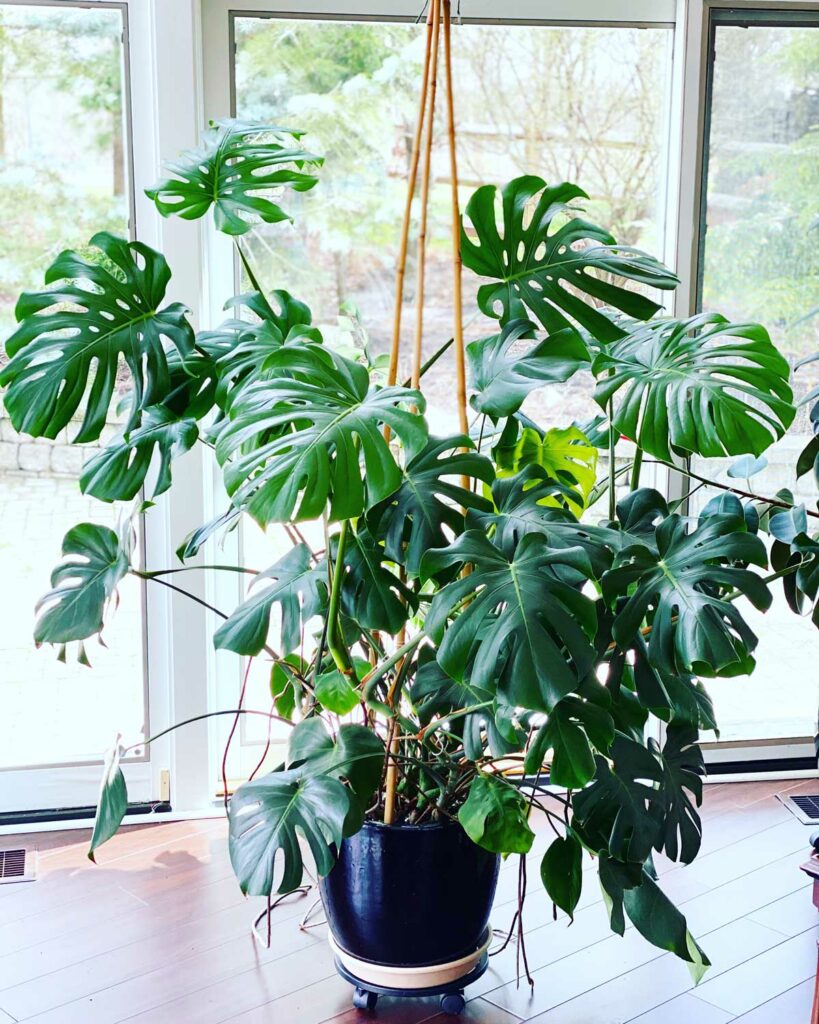
My own mature monstera plant has been growing in this mix for years.
Another option that people often use is equal parts of an indoor potting mix, perlite and orchid bark. This is a very chunk mix that has amazing drainage, but you will find yourself watering fairly frequently with this mix, depending on your indoor growing conditions.
If you want an amazing, turn-key potting mix that has been specially formulated to grow Monstera deliciosa and other climbing rainforest plants, I've recently been acquainted with the Tropical Climber soil blend from Oh Happy Plants. If you use my link, it will give you 10% off automatically at checkout!
I love all the Oh Happy Plants specialized potting mixes. A lot of care and attention to detail has been made in developing these mixes, and they use sustainable ingredients. All my plants that I've switched over to their mixes are doing beautifully!
It also takes the guess work out of mixing your own potting mixes. There are blends for a variety of plants, so be sure to check out all the offerings at Oh Happy Plants.
POT TYPE
Pot type is almost important because you'll want something heavy enough to sustain the climbing support for your plant, and the choice will also affect how quickly your potting mix dries out.
I'd encourage you to read my Monstera pots blog post to choose a pot that suits you. There are numerous options, but one thing they all need to have is drainage holes. This is not optional! Why risk root rot for no reason?
Now that I've discussing potting mixes and pots, let's talk a bit about supports for your plant because your plant will need it! And it's best to provide a support from the start when you are potting up your rooted cuttings.
My Monstera deliciosa
MOSS POLE
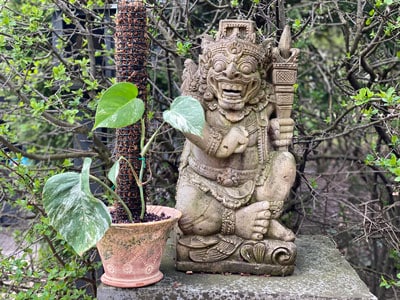
I'm sure you've heard all about moss poles, and the fact is that a moss pole is a great option, but it isn't the only option for support. I've personally not found any moss poles available commercially that are sufficient, so I like making my own!
They will be cheaper, per unit, than any that you can purchase, and also be far superior!
For this type of moss pole, you need to add it to the pot at the same that you pot your cutting. It's too difficult to do it after the fact.
You would simply need to keep the sphagnum moss fairly moist so the aerial roots grow into it, and you can add probably 1 to 3 different rooted cuttings, depending on how full you want your plant to be.
If you don't want to use a moss pole, there are other options including:
A rough wood plank
A single stake
A bamboo tripod
Your imagination is the limit. For more details, check out my blog post on tips to keep your Monstera upright. For my own mature Monstera plant that has several vines in one pot, I use the bamboo tripod method.
Lastly, after planting your cuttings, give your plant a good watering, allow excess water to drain away, and place your plant in front of a nice, bright window.
My recommendation is immediately in front of a window that gets no direct sun at a bare minimum. However, if you have a window that gets morning sun, this is an amazing location for your plant. Or any window that gets 2-3 hours of direct sun.
If you follow me closely, especially if you've read my book Houseplant Warrior, you will know that indoors, the light intensity is dramatically reduced versus the outdoors. It also continues to decrease dramatically as you move further and further from a window.
Can you propagate Monstera deliciosa with just a leaf?
If your cutting doesn't have a node, you will not be able to propagate.
How long does does it take for Monstera deliciosa to root in water?
It all depending on your growing conditions, but if you have plenty of light and warm temperatures, you should start to see root growth within a couple weeks or so.
Can Monstera grow in water forever?
Yes! It may not reach the proportions that it can in a pot with soil, but you can certainly keep it growing in water. There are a couple keys to this:
Replacing the water with fresh water every week or so in order to maintain oxygen levels and remove any rotting materials.
Using a high quality fertilizer to provide needed nutrients. I like to use Dyna-Gro Grow (link to Amazon). Simply add 1 teaspoon of Dyna-Gro Grow per gallon of water for hydroponic growing.
I hope you've enjoyed this post on how to propagate Monstera in water. Have you propagated your Monstera in water before? Comment below. I'd love to hear!
I THANK U SO MUCH.i just adopted monstera from real neglect ,I'm new to this plant I have many other types and none have died.
I live in fl.and wonder what I can grow outdoors and also indoors .I have subscribed. I enjoyed every detailed moment u are detail oriented which is so helpful I'm going to propagate now .oh.i did notice no stakes in water after propagation won't it tip over?
I have 5 nodes I cut from my Monstera decilciosa about 6 weeks ago. I live in Indiana and have a greenhouse they are in. I try to keep the temperature between 60-65 degrees. Each one had a leaf on the node which I did not remove. They were all the mature leaves with the splits. They all have rooted but the leaves are slowly turning yellow. Should I remove the leaves and plant all in soil or leave them as is for a little longer? Some look like they are starting to put out new green growth. I can send you a picture of them if you would like.
Thanks and I enjoy reading your emails and have shared some with friends.
Great post, thank you! Do you follow all the same methods to propagate Monstera adansonii? I've got one that I've only had for a month or so, and it's growing like crazy. I'd love to grow a few more to expand my collection and share with family. Thank you!


I THANK U SO MUCH.i just adopted monstera from real neglect ,I'm new to this plant I have many other types and none have died.
I live in fl.and wonder what I can grow outdoors and also indoors .I have subscribed. I enjoyed every detailed moment u are detail oriented which is so helpful I'm going to propagate now .oh.i did notice no stakes in water after propagation won't it tip over?
Again ,thank very very much
Patricia .
I myself am a transplant from long island to Fl.
You're very welcome Patricia! You can always add a stake at any time. Good luck with your plants!
This is the best Monstera propagation article I have ever seen - covers all the bases in a clear, succinct way.
Glad you enjoyed it Mary! 🙂
Hi Raffaele--
I have 5 nodes I cut from my Monstera decilciosa about 6 weeks ago. I live in Indiana and have a greenhouse they are in. I try to keep the temperature between 60-65 degrees. Each one had a leaf on the node which I did not remove. They were all the mature leaves with the splits. They all have rooted but the leaves are slowly turning yellow. Should I remove the leaves and plant all in soil or leave them as is for a little longer? Some look like they are starting to put out new green growth. I can send you a picture of them if you would like.
Thanks and I enjoy reading your emails and have shared some with friends.
Sheri
Super helpful
Thank you
Glad you enjoyed it Philip!
Thanks for the multiple pictures of the cuttings. Other blogs I looked out described it well but nothing like a close up picture.
You're very welcome Judy! I try to document as much as I can to be helpful to my readers 🙂
Great post, thank you! Do you follow all the same methods to propagate Monstera adansonii? I've got one that I've only had for a month or so, and it's growing like crazy. I'd love to grow a few more to expand my collection and share with family. Thank you!