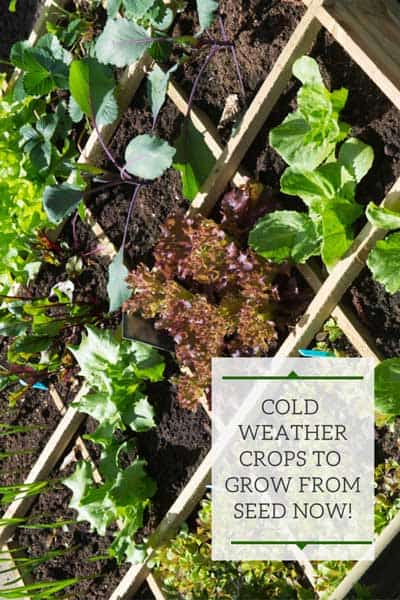
I've had huge demand to write about vegetable gardening lately, so I'm going to start sharing my experience and wisdom on this topic! Many of you may know me very well for my houseplant posts, but get ready to see another side of me now!
I'm going to take you through how to grow cold crops from seeds and show you exactly which ones I'm growing and HOW!
Vegetable gardening is amazingly fun. My own heritage is Italian, and as a first generation Italian-American, I learned all about gardening from a very early age.
In fact, I can't remember a time when I wasn't surrounded by gardening so it is in my blood!
Before we get started, this post will help you determine which cold weather crops you can grow directly from seed outside in cooler weather.
And for the vegetables I'm featuring in this post, you do NOT have to wait until the danger of frost is over to plant the seeds outdoors. I don't start these seeds indoors...but I do start warm weather crops indoors (peppers, tomatoes, etc.) but that is another topic.
Part of the beauty of vegetable gardening is that you can grow a huge variety of vegetables and herbs from early Spring through Fall (and actually year-round depending on where you live!)
For gardeners it is super useful to know what hardiness zone you live in so that you can learn approximately when you can plant certain things. Often times seed packets will contain recommendations, but it is good to check your USDA zone.
Table of Contents
USDA HARDINESS ZONE
How do you determine what hardiness zone you're living in? Well I will make it very easy for you (if you live in the U.S.)
Simply visit the USDA Agriculture Research Service's Plant Hardiness Zone Map and type in your zipcode and it will tell you!
If you then check out the map, it will tell you what the average annual extreme minimum temperature is where you live.
You can also click on your state or select your state from the dropdown, and it will show you a map of your state with a distribute of the various zones in your state.
For example, I live in Ohio and zone 6a is my hardiness zone. This is important to know when sowing seeds or planting anything outside (mainly for winter hardiness of plants, but it is useful to know in general).
Many seed packets will give you guidelines on when to sow things outside so you have an idea of when the appropriate time to plant for your specific zone!
Alright, now I'd like to tell you what cold weather crops I'll be planting in my garden this year and then I'll also talk a little bit about preparing your beds so that you'll have the most success!
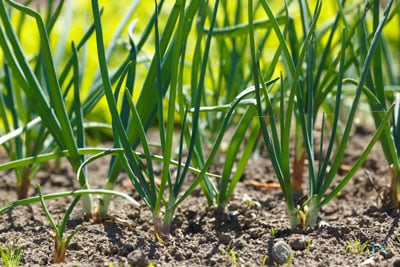
COLD WEATHER CROPS
There are tons of cold weather crops that you can grow, and I will be talking about 9 of them in a bit of detail and will also mention some others that I won't be planting, but it doesn't mean you can't!
We all have our favorite veggies, so choose some of your favorites and get planting!
Living in Ohio, I get so antsy to get out there and start gardening. I'm excited that I had built 4 raised beds last year but they didn't get done until June. So this year, I'm excited to have them ready in to plant my cold weather crops in early Spring in March.
Here is what I'm planting this year and I will update this post as my garden makes progress. Many of these crops can be planted in succession to extend the harvest, and also can be planted again in late-summer or early fall for a late crop!
If you plan it well, you can have a bountiful harvest for many months of the year, even in limited climates such as mine in Ohio, or many parts of the midwest.
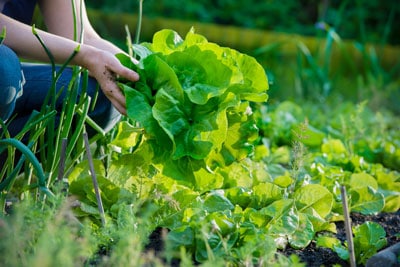
LETTUCE
There are SO many different lettuces that you can plant. The variety of staggering! This year I'm sowing romaine lettuce and a red leaf lettuce. Choose your favorites!
My Italian grandmother would always sow lettuce as soon as the soil was workable in very late winter or early Spring. She would broadcast the seed in a patch. After the seedlings had a couple true leaves and big enough to handle, she would transplant some into rows to give them more space to develop into larger heads.
She would also leave most of the rest of the patch the way it was and not transplant all the seedlings because she treated it as loose-leaf lettuce to harvest whenever! The lettuce won't get as big this way, but you can harvest smaller, tender leaves as needed.
Lettuce likes cooler weather and when it gets too hot, it will quickly bolt. Meaning, it will start to grow tall and go to seed. If you add moisture stress to that, letting it get too dry which lettuce doesn't like, it makes it worse. At that point, the leaves are no longer tender and really isn't fit for eating anymore.
There are some varieties though that are slower to bolt, so you may want to save these varieties to grow during the warmer months so you can extend your lettuce harvest. Check the seed packets because they will contain this type of information.
Lettuce seeds are very small, so when you plant them, be sure to just barely cover the seeds completely (about ⅛" of soil on top). This is important because lettuce seeds need light to germinate! So if you plant them too deeply, they won't germinate.
Also, there are TONS of different varieties and if you plan it well enough, you can extend your harvest because they will all have varying maturity dates. For example, Mesclun is a mix of different loose leaf lettuce and other greens. This will be ready in 1-2 months or so for harvest.
If you want to get individual heads of lettuce like you get at the grocery store, romaine lettuce will take at least 75 days and crisphead types can take even longer.
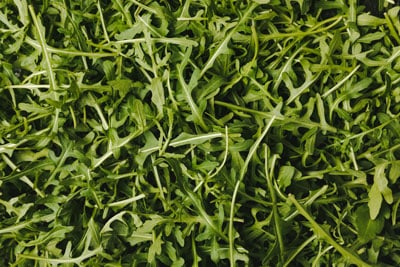
ARUGULA
Arugula is my absolute favorite green. And honestly, there is nothing like homegrown arugula. The peppery flavor is unsurpassed compared to what you buy at the grocery store. It just doesn't compare!
Arugula is a very satisfying crop to grow because you can start harvesting as soon as 4 weeks, and it is also very quick to germinate. Often within just a handful of days depending on the weather.
After you sow them, add enough soil on top to barely cover the seeds with about ⅛" to ¼" inch or soil.
To extend the season and so you don't get overwhelmed with having to eat too much arugula at once, you can sow smaller quantities every couple weeks while the weather is still cool.
Arugula needs cooler weather so avoid planting it during any hot summer months. You can resume in the Fall! It is a fast crop so you can get plenty in the Spring and also in the Fall. If the weather gets too hot, it will quickly go to seed and "bolt."
My favorite way to grow arugula is to just sow it in a patch. I lightly scatter seeds in a patch and don't transplant them. You CAN transplant individual plants to give them more space to develop into a a bigger plant, but I find it's not necessary and I leave the "real estate" for plants that need more space!
Another strategy you can use if you sow in a patch, and this goes for lettuce too, is that you can can thin out the patch by pulling out small plants completely and use your thinnings in a salad. This way you are still harvesting, but then you are leaving more room for the other plants in your patch to grow bigger.
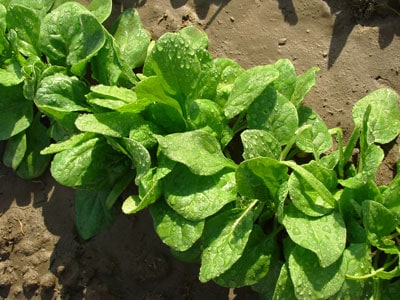
SPINACH
There are many varieties of spinach, but some basics to remember. Spinach must be planted early as soon as you can work the soil in the spring. It needs cool temperatures to germinate and do well, and also needs moist soil. Dry soil and hot weather is not good for spinach as it will just encourage it to bolt.
Spinach doesn't like to be transplanted, so follow your seed packet's recommendations for the specific variety on spacing.
In general though, sow spinach seeds about ½" deep and you'll want the resulting individual plants to be about 6 inches apart or so. I like to sow in a patch, and then thin out any crowded plants to use for salads or any other dish I'm making.
If you prefer a tidier look, you can sow in rows as well. Have fun and experiment!
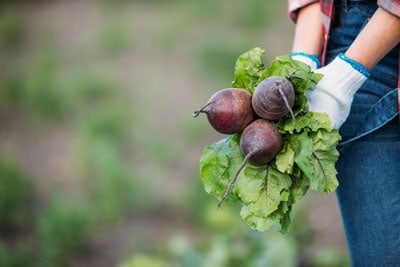
BEETS
For the best beets, plant these seeds directly outdoors as soon as you can work the soil. Sow the seeds about ½" or so deep since they are bigger seeds.
Often times though, the "seed" is actually a cluster of seeds and you may get multiple plants so you may thin them out and transplant if you'd like. Or if you don't want to transplant, you can just clip the extra plants and throw them on a salad! Beet greens are edible and nutritious.
Spacing is important for beets because you'll need room for the beet root to grow properly, so follow your individual seed packet's recommendations for spacing.
I'm planting a variety called Chioggia this year which has beautiful rings of white and red! Burpee recommends thinning them to stand about 3" inches apart after the seedlings get about 1-2" tall.
For root crops especially, you really need to pay attention to keeping the weeds down and making sure you have a consistently moist soil. This will encourage a more tender and bigger root. If you sow beets when the weather is already warm, they won't be as sweet.
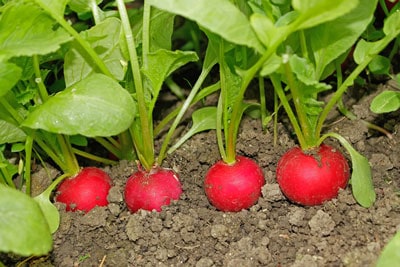
RADISHES
Would you like to save this post?
Enter your email, and I will send this link straight to you!
Radishes are almost instantly gratifying and in just a few weeks, you can harvest!
Sow seeds about ½ inch deep and you'll want individual radish plants to be about 2 inches away from each other in order to allow for enough room for the root to grow.
These are easy to use for succession planting since they will mature so quickly (anywhere from 22 days according to my Radish 'Cherry Belle' from Burpee, to about 6 weeks for other varieties.) So don't be afraid to sow some every week or two for a continued harvest!
Another point to mention here is that radish greens are edible! The tender leaves would be best since older radish leaves can be a little tougher and definitely not as tender. So if you harvest them on the younger side and the leaves are tender, throw them in your salad as well!
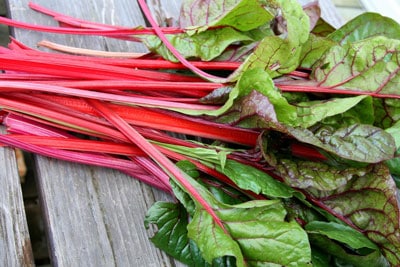
SWISS CHARD
There are many varieties of swiss chard including colorful varieties with yellow or red petioles like in the photo above. The stalks and leaves are edible and I love sauteing the greens with olive oil and garlic. Sometimes I add a little balsamic vinegar. Yum!
Sow the seeds about ½" deep, and these are similar to beets in that one "seed" may give you multiple plants. So once the seedlings are big enough to safely handle, you can thin and space them out about 6-8" inches apart to allow for enough room to mature.
Here is a tip that will help you manage your Swiss Chard. When you decide you want to start harvesting, you can easily just harvest the outer leaves and then allow the plant to keep growing and producing. Don't cut the inner leaves...just the outer ones.
Or just harvest the entire plant if you need the space for other vegetable plants.
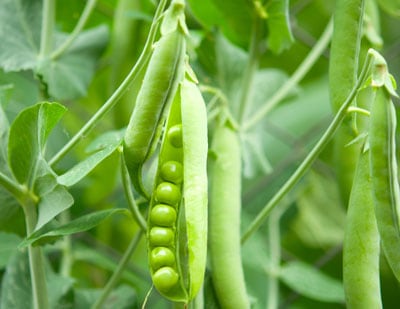
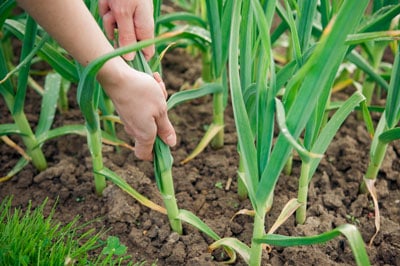
PEAS
Like any vegetable, nothing compares to freshly picked peas from the garden. Peas are very satisfying to grow, harvest and eat fresh!
There are many varieties of peas out there. Some will stay short, and others will grow really tall. Needless to say, most will need a support to climb on, so be sure read your seed packet variety and follow the instructions and pay attention to how big the plants get so you can plan accordingly!
Use any trellis you already have, or maybe even chicken wire fencing, will do! You can get creative and make your own support too. I'm used bamboo stakes to which I've tied clear fishing string both horizontally and vertically.
Whatever your support may be, make sure you add it at the time of sowing your seeds so that you're not disturbing the plants later on.
Sow seeds about 1" deep and about 4" apart from each other. Peas love soil to which plenty of organic matter has been added to it. I've amended all of my raised beds with bags of compost and manure. More on soil a bit later.
Be sure to pick the pea pods regularly! You can eat them at any stage, but pick them as soon as they appear to be filled out for the most tender peas, and also to encourage the plants to keep producing more!
ONIONS
For onions, I like to buy onion sets (little bulbs) instead of growing from seed. It's not worth it to me to take the time to grow them from seed and it is much easier and faster to just buy onion sets.
Place the onion sets about 1" into the soil and maybe 2 or 3 inches apart from each other. I tend not to let them grow too huge before harvesting and it's so nice to just walk into the garden and pick whenever I need one!
Another thing I like to do is plant the sets all about 2 inches form each other and then harvest every other plant when young and use them as scallions! Then you can leave the rest to mature into bigger onion bulbs.
You can harvest onions at any time. But to get the largest bulbs, when the plant is fully mature, you will see that the foliage will turn yellow and flop over. At this point, dig out your onions and you should have a nice bulb!
GARLIC
I normally like to plant garlic in the Fall and then harvest in the summer, but since I didn't get around to it last year, I'm going to experiment with planting it in the Spring. Fall plantings are definitely best.
The harvest will be later when planted in the Spring, but it will still work! Fall plantings will tend to yield more, but if you haven't done this, plant your garlic cloves as early as you can in early Spring. At least you will get some to harvest!
It is best to avoid supermarket garlic to plant because it may have been treated to suppress sprouting. Get your garlic (and onion sets) from an online nursery or from your local nurseries.
You'll want to break up the garlic bulb and separate into individual cloves and plant them so they are about 2 inches deep from the top of the clove, and about 3 or 4 inches away from each othere.
The pointy side of the garlic clove should be on the top. Make sure you keep the papery husk on the clove. Don't take this off prior to planting.
We always grew tons of garlic growing up, and it was always planted in the Fall in our area (October or November) and then we would harvest it around mid-summer in July or so the following year.
The leaves would start to turn yellow and start to fall over, and we would know it was time to harvest. We'd then dig up the garlic, lay it in the garage on cardboard or brown paper grocery bags, and allow them to cure for a few weeks. The leaves were left on and allowed to dry.
This allows the skins of the garlic to dry and get ready for storage in a cool, dry cellar (I unfortunately don't have a cellar now but I would die for one!). We'd also braid the dried leaves and make "necklaces" of garlic bulbs to hang for storage.
TIPS FOR BEING SUCCESSFUL!
Here are some important tips you can use as guidelines to be successful with growing your own vegetables!
The time that you sow the seeds I described above may vary depending on where you live. All of the plants I described in this post are tolerant to at least some frost. But you can also use hoops covered with all purpose garden fabric for any cold days and nights to minimize any risk. I purchased this garden fabric and these garden hoops to create tunnels that will protect from frost and even keep temperatures a little higher if it's really cold out.
Other than the ones I showed in this post, there are other cold weather veggies you can sow such as carrots and kale. There are plenty that you should NOT sow outdoors in cool weather. These include any peppers, tomatoes, eggplant, cucumber, zucchini, basil and tons more. These need warm weather. Know what you are planting and if they are cool season crops or warm weather crops.
Follow the instructions on your seed packet, as instructions can vary depending on the variety, to get a general idea of when you can plant various veggie seeds.
Be sure to keep your soil evenly moist for best results! This goes for germination but also for the growth of your plants. Allowing your veggies to go extremely dry will stunt growth and you will be disappointed. Aim to keep your soil consistently moist, but at the same time you want good drainage, so site your vegetable garden accordingly!
It is extremely useful to prepare your beds in the Fall so that they're ready to go in the Spring. I installed raised beds last year, so I'm ready to go in the Spring!
If you can, dig in plenty of compost or other organic matter into your soil prior to planting. You need to replenish the soil from the previous year's planting so that you can have a successful garden each year.
When you are sowing vegetable seeds outside, be sure to break up the soil really well. You don't want any clumps of soil. Add plenty of organic matter such as compost and aim to break up soil to a fine filth. This will encourage more even germination for your seeds.
It is especially important to have a fine filth in your soil (broken up and no clumps) for root crops like radishes, beets, etc. They will develop better in these conditions. Try and avoid rocky soils when you grow these.
Vegetables do best in full sun, so be sure to site your veggie garden in as sunny an areas as possible!
Be sure to keep your veggie plots well weeded. It is easier to weed when the soil is moist so after a good rain would be the best time! By keeping your plots weed free, your veggie plants will have less competition and grow bigger and better.
If you have raised beds, you can get to gardening sooner because the soil will have warmed and dried out more in raised beds versus just in a regular soil plot in the ground.
All of the crops I mentioned in this post (except for maybe onions which won't get too big unless you just want to use them as scallions) can be planted again for Fall harvest. As a general rule of thumb, for an additional Fall harvest, time the sowing of your veggies so that they mature by the time of your first average frost date for your zone. And remember, it is preferable to plant garlic in the Fall anyway. Get it in the ground a few weeks before frost so it can start to develop a root system before the ground freezes.
Do succession sowings of lettuce, arugula, spinach, radishes, and beets for an extended harvest! Sow some every week or two if you can.
To make nice even rows in your garden beds, you can tie string to two sticks and use that as a guide to have nice even rows to maximize space in your beds.
Label your veggies! Use plant markers or even popsicle sticks. Get creative. But it is easy to forget what you planted if you don't label anything!
If you don't have a garden bed, don't be afraid to grow in pots! If anything, you may even have better success because you can fill it with great soil.
I like to use only organic fertilizers for vegetables and herbs. My favorite to use is fish emulsion and I apply it throughout the season as directed by the label. It is easily available on Amazon. There are a number of dry organic fertilizers as well so experiment to find a favorite.
Finally have FUN and enjoy the process! There is nothing as rewarding as gardening to me, whether indoors or outdoors. It brings us back to our roots (pun intended) and strengthens our relationship with Mother Nature...which we can not survive without.
I hope you've found this post on cold weather crops helpful and please share your vegetable gardening adventures with me in the comments below!


I love this very helpful article! Thank you!
Glad you enjoyed it Anastasia!
Thank you for this well written article on 9 cold weather plants. Very informative, easy to read, and helpful.
You're very welcome Danika! I'm glad you enjoyed it!